Heatmap: Plans
This page comprises the Plans tab overview and options to customize plans. The tab displays a list of plans with the ability to manage them.
Overview
Select the Plans tab in the tabs menu:
Use and Functionality
The Plans tab shows:
- List of created plans with their ID
- Toolbox comprises:
- Edit
- Delete
Create Plan
To create a new plan click the Create Plan button:
The Create Plan navigation menu allows to:
- Click the Back to All Plans button to return to the main Plans tab
- Select the Save button to apply settings
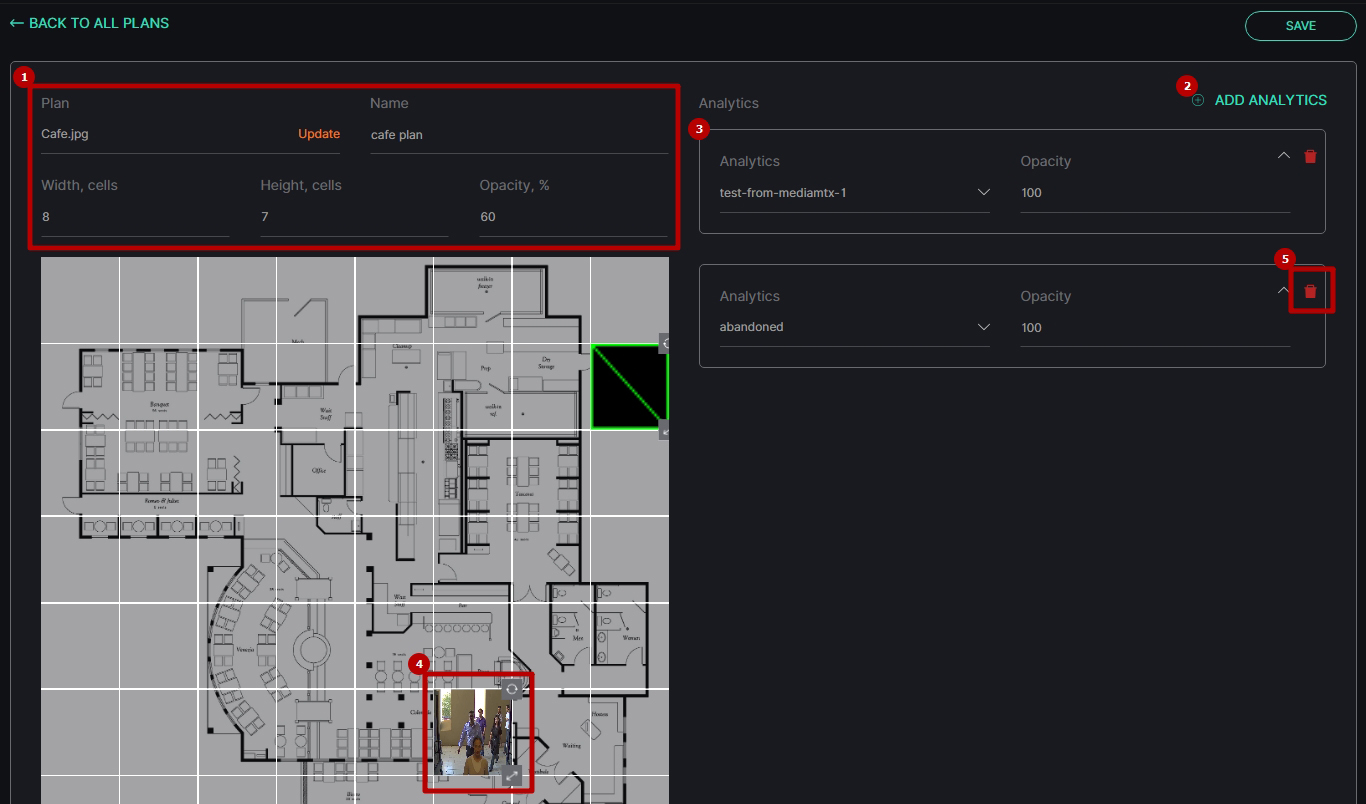
To set up the plan:
- Upload the plan image by clicking the Update button and set the required parameters:
- Enter the name of the plan
- Select the quantity of column and row lines in the grid
- Set the image opacity in percentage
- Click the Add Analytics button to add a camera frame above the grid
- Set the analytics frame parameters:
- Click the Analytics parameter to select the desired video analytics from the drop-down list
- Set the analytics frame opacity above the plan image
- Position the analytics frame over the plan to cover the entire area monitored by the selected analytics:
- Hold and drag the frame with the LMB to move it to different grid cells
- Hold and drag the Resize icon with the LMB in the desired direction to adjust the frame's size and dimensions
- Click the Rotate icon to rotate the frame 90° clockwise
- Click the red Delete icon to remove the analytics frame from the plan
Once the plan is created it appears in the list of plans on the main Plans tab.
To edit settings in the selected plan, click the Edit icon on the toolbox:
Delete Plan
To delete the plan:
- Select the Delete icon on the toolbox
- Confirm the intention


