Linux: MySQL Installation Guide
Introduction
MySQL is a widely recognized and highly popular Database Management System (DBMS) that is frequently utilized for storing data on websites of various complexities. It is valued for its ease of installation and initial setup, as well as its robust functionality and user-friendly nature. Due to its widespread usage, MySQL is readily available in the standard repositories of many Linux distributions and also in the FreeBSD ports system.
To enhance access rights before the installation in Linux, run the command in the command line:
sudo -i
MySQL Installation
To install MySQL, update the package index on the server by running the following command:
apt update
Install mysql-server package by running the following command:
apt install mysql-server
Ensure that the server is running by the following command:
systemctl start mysql.service
MySQL Configuration
To configure MySQL, open the MySQL prompt by running the command:
mysql
Execute the following command to select an authentication method for the root user that requires a password:
ALTER USER 'root'@'localhost' IDENTIFIED WITH mysql_native_password BY 'password';
Upon completing this modification, exit the MySQL prompt using the following command:
exit
Time Zone Configuration
To install time zone support in MySQL, execute the following command:
mysql_tzinfo_to_sql /usr/share/zoneinfo | mysql -u root -p mysql
Encoding Configuration
To configure the encoding, open the file at the command line:
nano /etc/mysql/mysql.conf.d/mysqld.cnf
Add the following lines at the very end of the file within the [mysqld] section:
character-set-server=utf8mb4
collation-server=utf8mb4_unicode_ci
Save the changes.
Restart MySQL by running the following command:
systemctl restart mysql.service
Middleware Core Reconfiguration
Open the middleware root folder on the server with the installed Middleware Core by using the following command:
cd /opt/incoresoft/middleware-core/
Remove the config.json file in the opened folder by using the following command:
rm config.json
Restart the middleware service by executing the following command:
systemctl restart incoresoft-middleware-core.service
After restarting the middleware service, reboot the webpage by accessing the following URL:
- If the Middleware Core was installed on the current PC, use http://localhost:2001/
- If the Middleware Core was installed on a remote server, use http://ip:2001/ where IP is the IP address of the server where the Middleware Core was remotely installed
Within the Database block, perform the following steps:
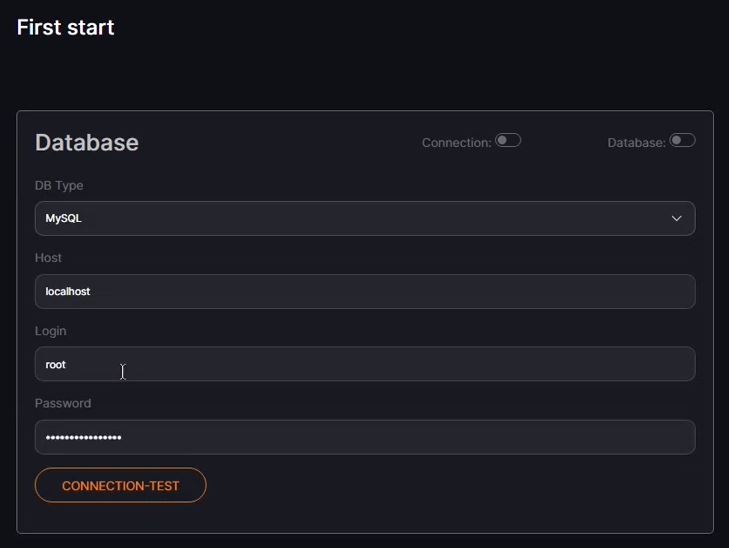
- Select the MySQL DB type from the drop-down list
- Fill in the necessary fields for the MySQL connection:
- In the Host field, specify the IP address of the server with the preinstalled and configured MySQL
- Enter the login credentials for the MySQL database (usually "root")
- Provide the password associated with the MySQL login
- Click the Connection Test button to verify the DB connection. A successful connection is indicated by a green Connection toggle
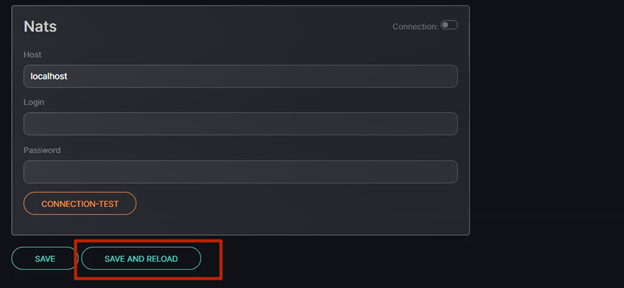
Proceed to the next step without configuring the NATS block. Click the Save and Reload button to save the current settings and restart the service:
Reboot the webpage and log in to the system. The Middleware Core reconfiguration process is now complete, and the MySQL database has been successfully connected.