Video Streams
Overview
To open the Video Streams item, in the left menu:
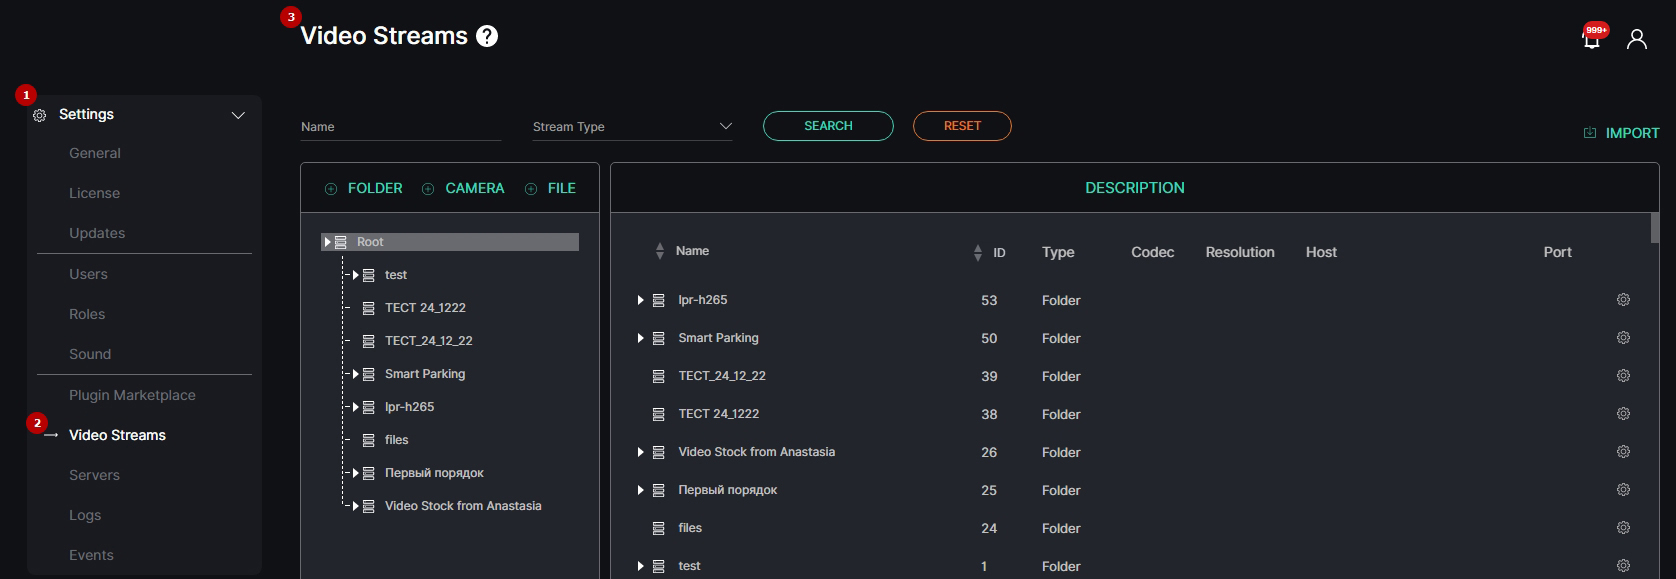
- Select the Settings section
- Choose the Video Streams item
- See video streams
Use and Functionality
The Video Streams item shows:
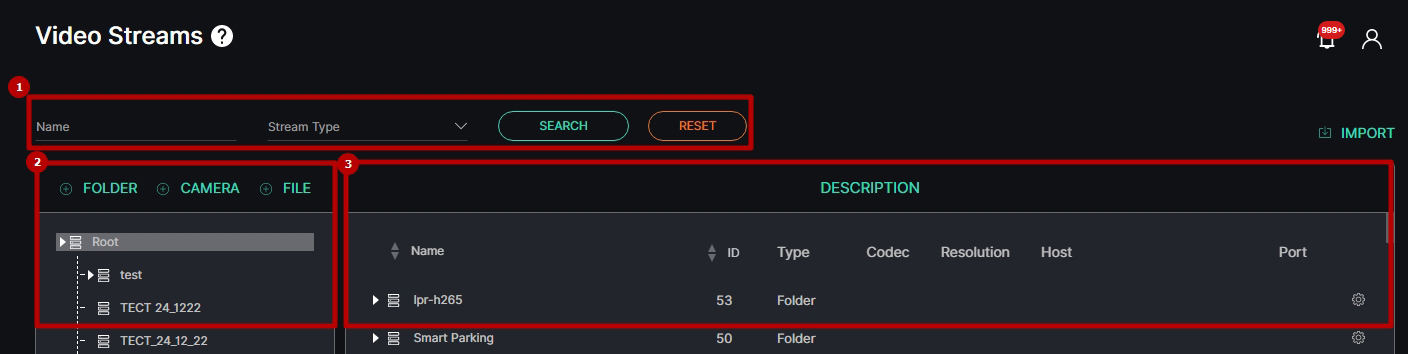
- Functional menu to:
- Enter the video stream name or characters in the name to filter video streams
- Select the video stream type from the drop-down list:
- RTSP
- FTP
- HTTP
- File
- Click the Search button to start filtering
- Click the Reset button to clear the filters
- Folders block to add folders, cameras, and files
- Description block to:
- View the list of created folders, cameras, and files with additional data
- Use extra functionality for cameras and files management
- The Add Folder, Add Camera, and Add File buttons are also available in the drop-down menu upon clicking on the RMB anywhere inside the Folders or Description blocks.
- Toggles next to the Name and ID titles in the Description block allow users to sort the content by the corresponding parameters.
Manage Folders
To add a new folder:
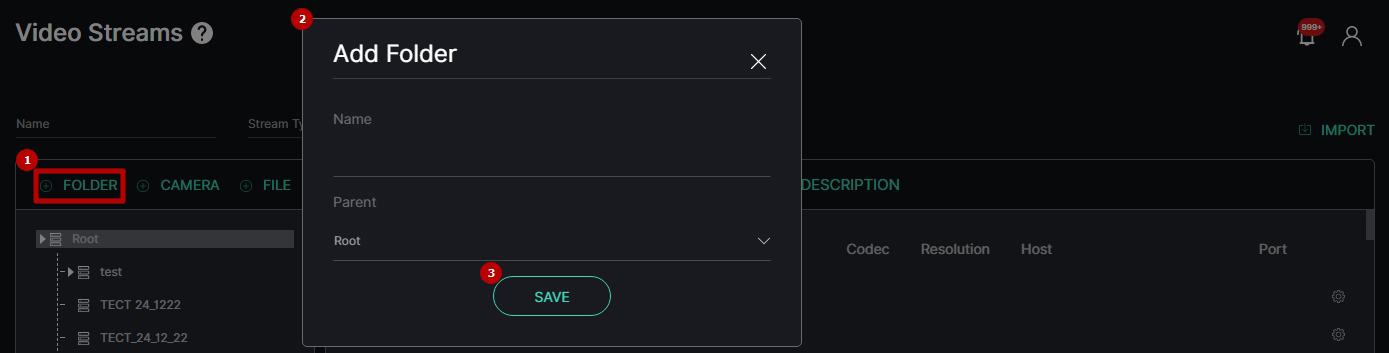
- Select the Folder button at the top of the Folders block
- Fill in the fields in the Add Folder pop-up window:
- Enter the name of the new folder
- Select the required parent folder from the drop-down list
- Click the Save button to confirm the intention
To edit a folder:
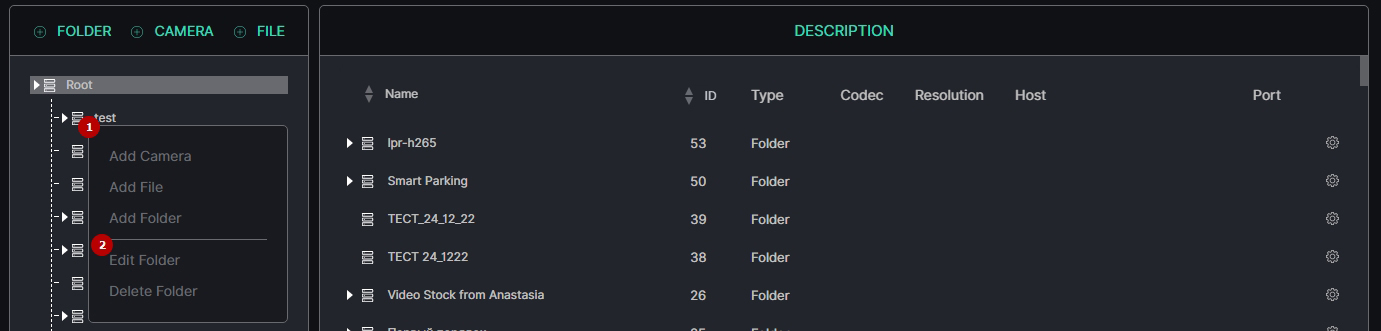
- Click the required folder with RMB to open the drop-down menu
- Select the Edit Folder button. In the pop-up window:
- Edit the name of the folder
- Select another parent folder from the drop-down list
- Click the Save button to apply changes
To delete a folder:
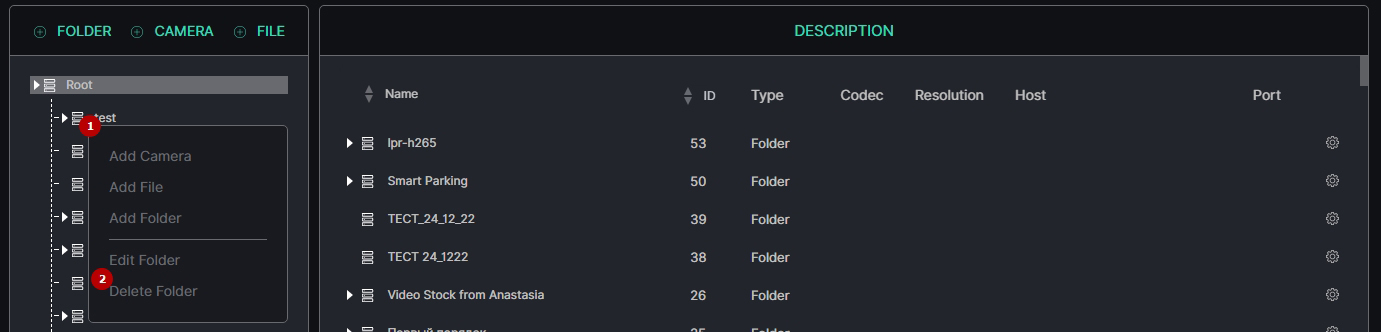
- Select the required folder with RMB to open the drop-down menu
- Select the Delete Folder button and confirm the intention in the pop-up window
Manage Cameras
To add a new camera, select the Camera button at the top of the Folders block. The Add Stream navigation menu allows to:

- Click the Back button to return to the Description block
- See the setting tabs and move among them by clicking their titles:
- General
- Geolocation
- Permissions
- Select the Save button to confirm the intention
In the General tab fill in the fields:
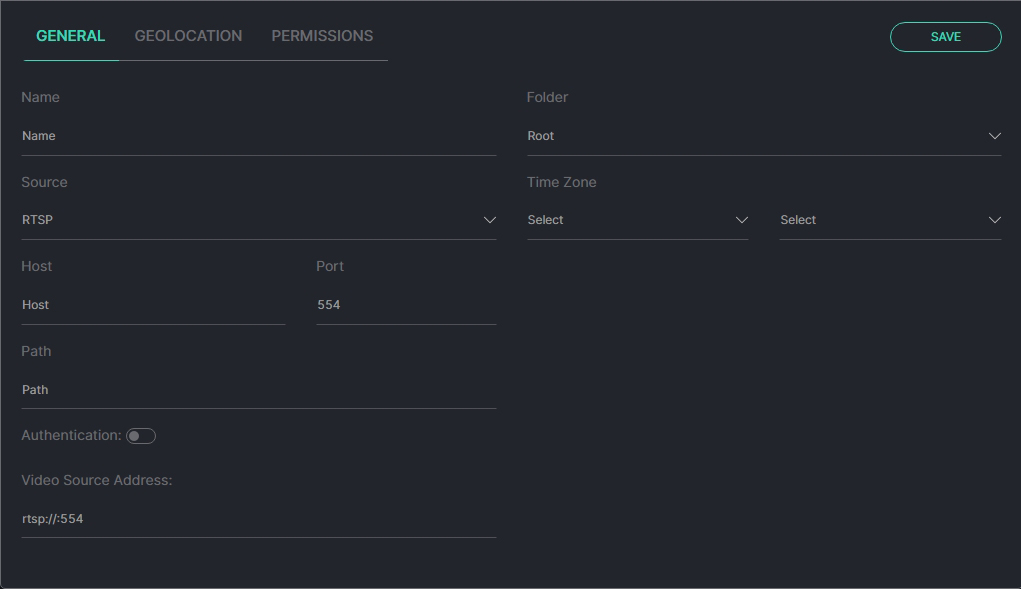
- Enter the video stream name
- Select the video source type from the drop-down list and fill in the additional fields:
- RTSP (additional fields: Host Name, Host Port, Host Path, Authentication - Login and Password (optionally), Video Source Address)
- FTP (additional fields: Host Name, Host Port, Host Path, Events and Extra Options (optionally), Video Source Address)
- HTTP (additional fields: Host Name, Host Port, Host Path, Authentication - Login and Password (optionally), Video Source Address)
- Select a folder from a drop-down list to place the video stream
- Select the camera's relative location and time zone
The Geolocation tab provides the ability to:
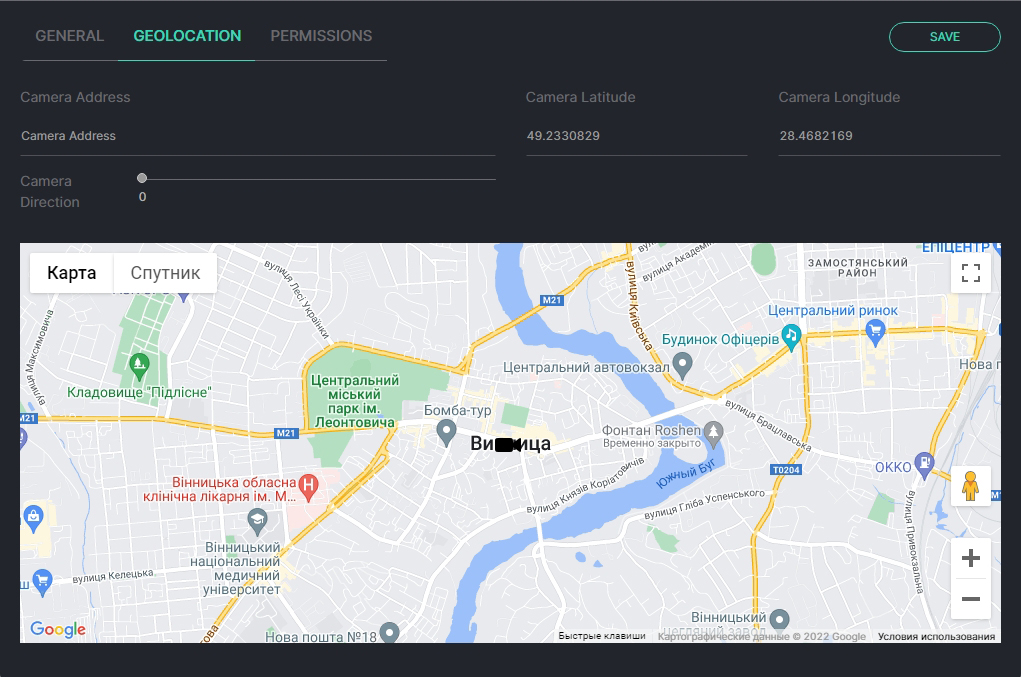
- Set the camera address, latitude, and longitude by:
- Clicking and dragging the Camera icon on the Google Map
- Filling in the Camera Address, Camera Latitude, and Camera Longitude fields
- Set the camera direction by moving the slider
The Permissions tab provides the ability to:
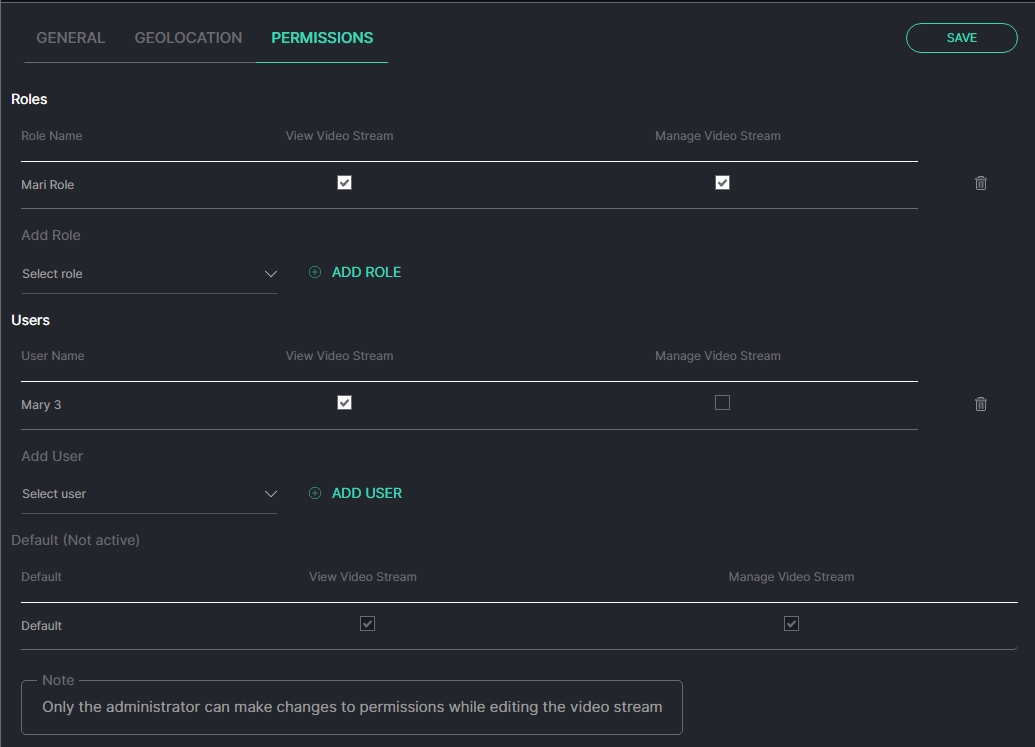
- Assign video stream permissions for Roles:
- Select the required role from the drop-down list
- Click the Add Role button
- Select the checkboxes for the required permissions
- Click the Delete icon to remove the unnecessary role
- Assign video stream permissions for Users:
- Select the required user from the drop-down list
- Click the Add User button
- Select the checkboxes for the required permissions
- Click the Delete icon to remove the unnecessary user
- Select the checkboxes for the required video stream permissions by default
- The View Video Streams permission allows viewing the video stream in the Video Streams item, as well as using the video stream in analytics and viewing search results, event notifications, and statistics related to the video stream.
- The Manage Video Streams permission allows editing and deleting the video stream in the Video Streams item.
- Default parameters are active only if no Roles or Users are added.
- The quantity of added Roles and Users is not limited.
To edit a camera:
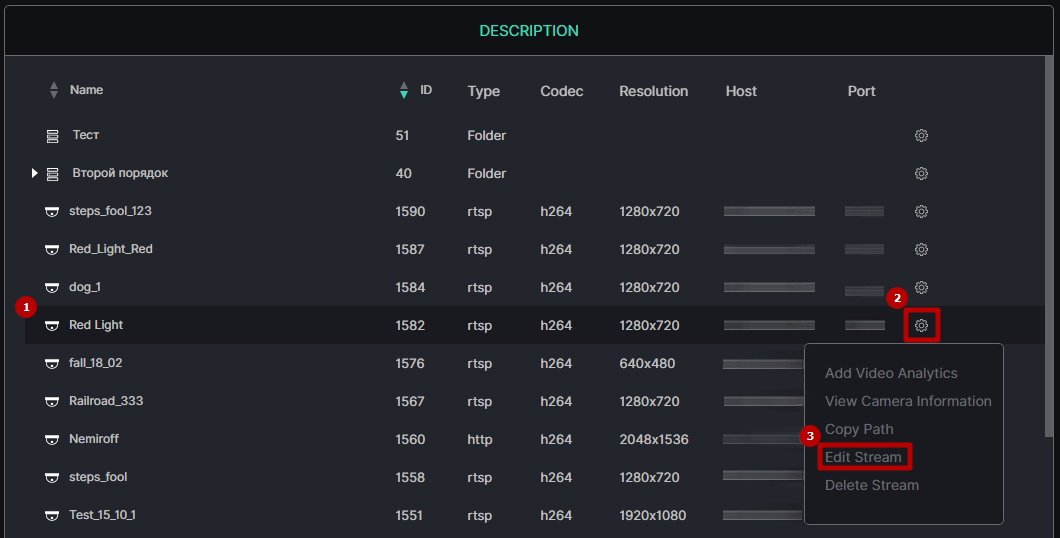
- Find the desired video stream in the Description block
- Hover the mouse over the Settings icon to open the drop-down menu
- Select the Edit Stream button
- All parameters configured while adding a video stream are editable.
- Only the administrator can make changes to permissions while editing the video stream. For other system users, the Permissions tab is disabled.
To delete a camera:
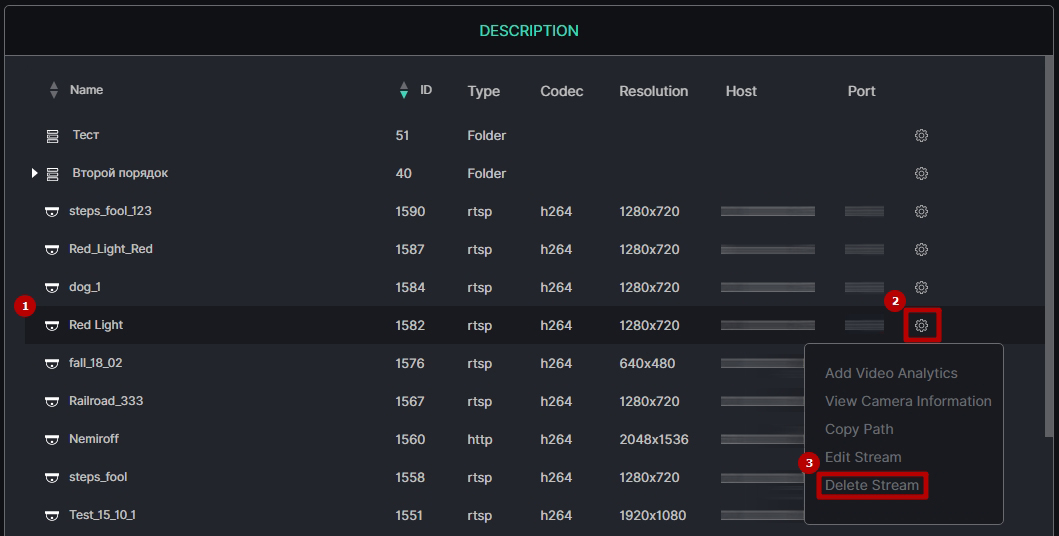
- Find the desired video stream in the Description block
- Hover the mouse over the Settings icon to open the drop-down menu
- Select the Delete Stream button and confirm the intention in the pop-up window
Manage Files
To add a new video file, select the File button at the top of the Folders block. In the Add Stream block:
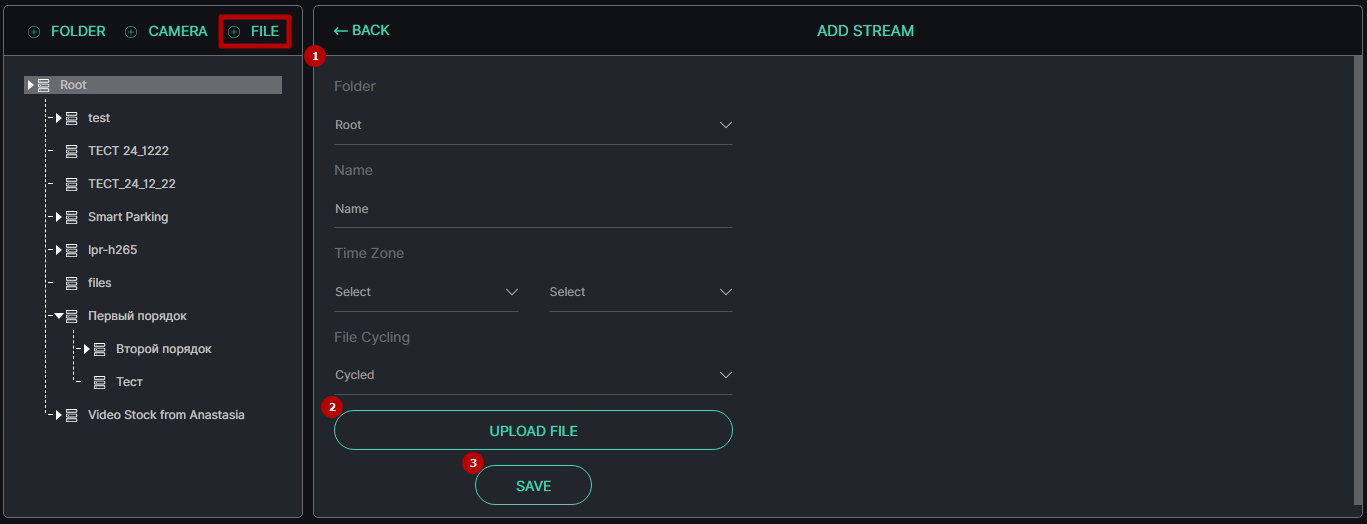
- Fill in the required fields:
- Select a folder from a drop-down list to place the video file
- Enter the video file name
- Select the camera's relative location and time zone
- Select the type of video file playback in the analytics process from the drop-down list:
- Once
- Cycled
- Click the Upload File button to select a video file from the device
- Select the Save button to confirm the intention
To edit a video file:
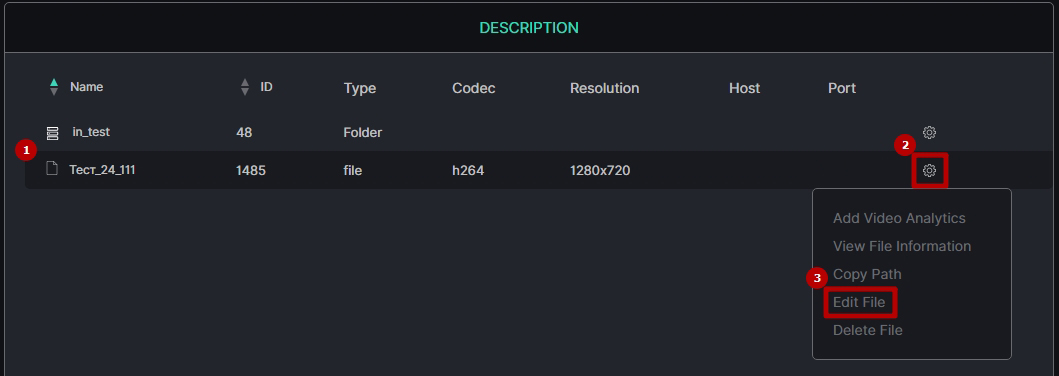
- Find the desired video file in the Description block
- Hover the mouse over the Settings icon to open the drop-down menu
- Select the Edit File button
To delete a video file:
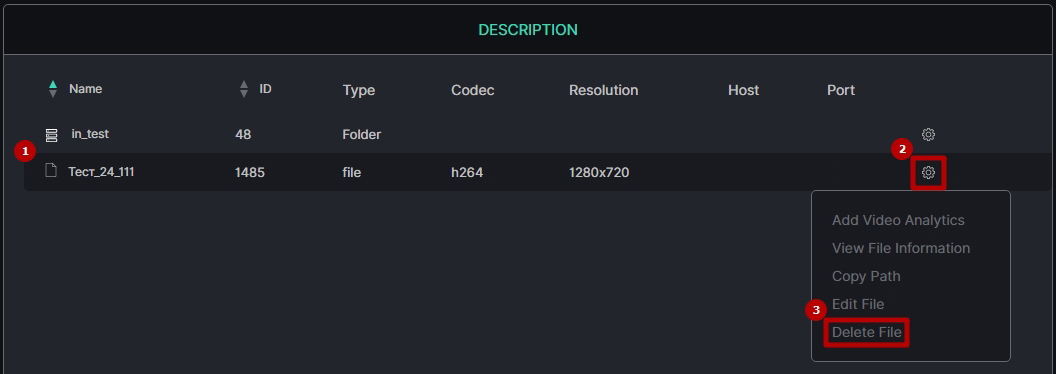
- Find the desired video file in the Description block
- Hover the mouse over the Settings icon to open the drop-down menu
- Select the Delete File button and confirm the intention in the pop-up window
View Camera/File Information
To view the video stream or video file information and video preview:
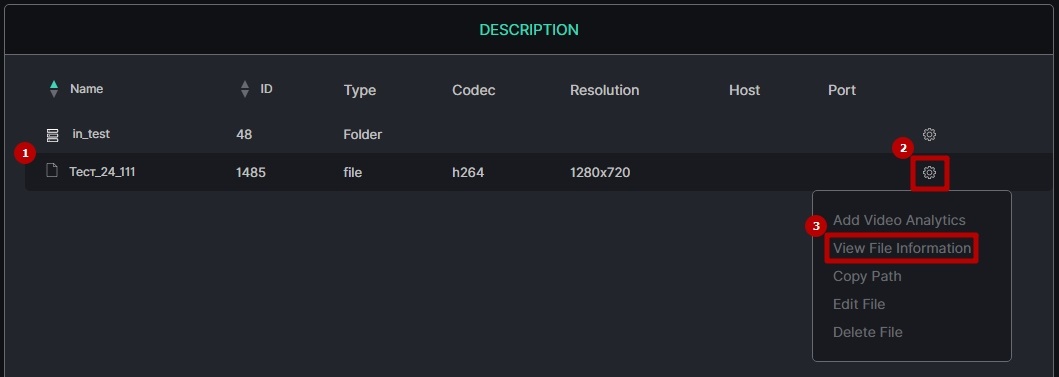
- Find the desired video stream or video file in the Description block
- Hover the mouse over the Settings icon to open the drop-down menu
- Select the View Camera Information (for video streams) or View File Information (for video files) button to open the information pop-up window
Add Video Analytics
To add video analytics from a video stream or video file:
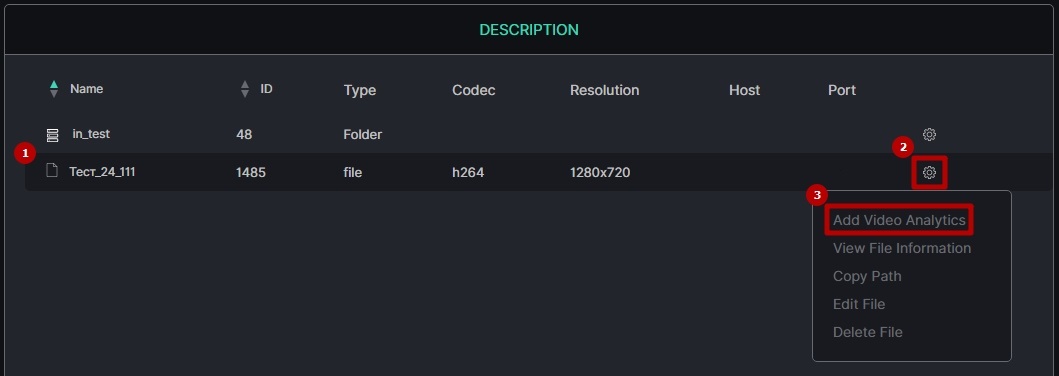
- Find the desired video stream or video file in the Description block
- Hover the mouse over the Settings icon to open the drop-down menu
- Select the Add Video Analytics button to open the pop-up window
In the Add Video Analytics pop-up window:
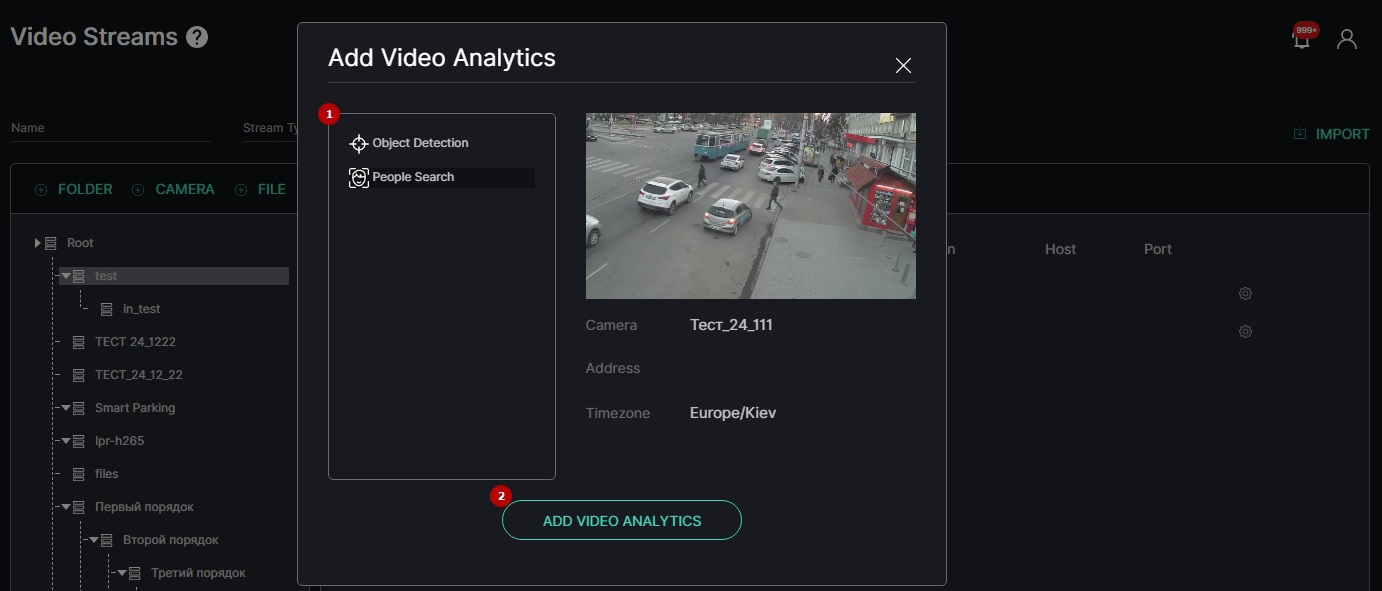
- Select the required plugin from the list
- Click the Add Video Analytics button to open the Add Analytics page of the selected plugin
Copy Path
To copy the path to a video stream or video file:
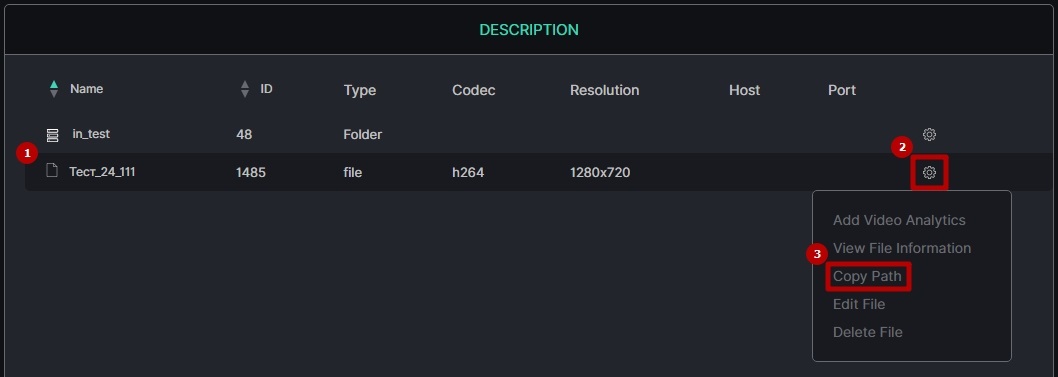
- Find the desired video stream or video file in the Description block
- Hover the mouse over the Settings icon to open the drop-down menu
- Select the Copy Path button to copy the path to the clipboard for further use
Import Cameras from ONVIF
To add several video streams from ONVIF:
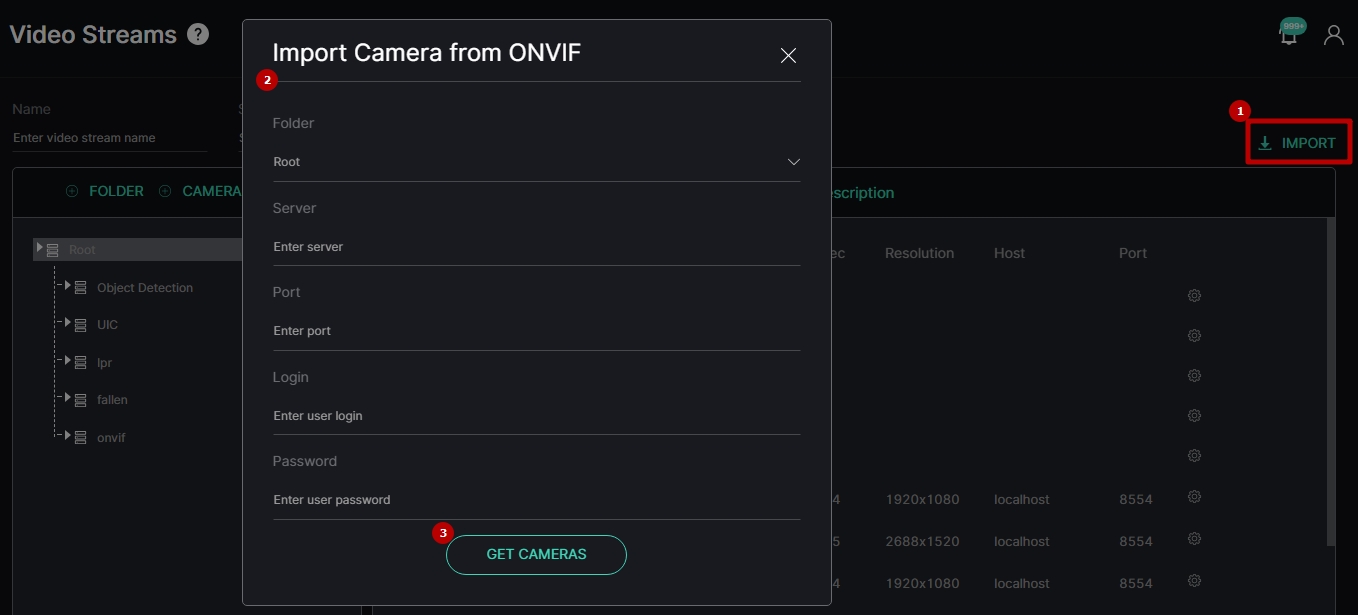
- Click the Import button
- View the Import Camera from ONVIF pop-up window and fill in the required fields:
- Select a folder from a drop-down list to place all imported video streams
- Enter the address of the server with the installed Milestone Open Network Bridge to which the cameras are connected
- Enter the Milestone Open Network Bridge port (580 by default)
- Enter the login and password of the Milestone Basic User associated with Milestone Open Network Bridge
- Click the Get Cameras button to confirm the intention