Wildfire Detection: Map
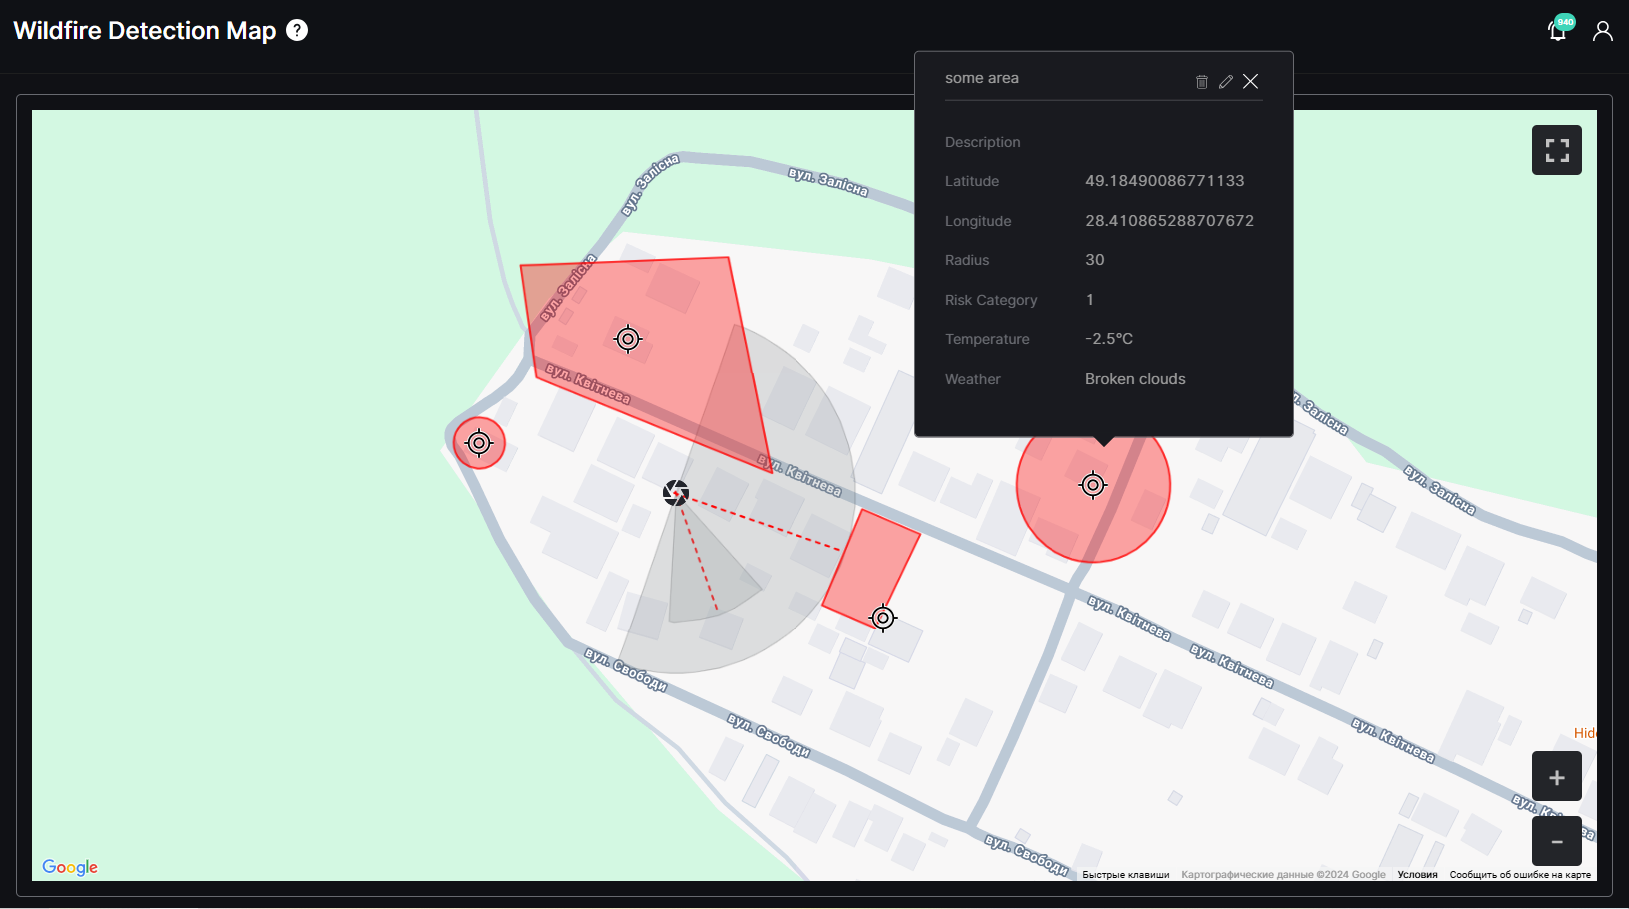
This page comprises the Map item overview and functionality description. The interactive map displays cameras and allows users to configure custom objects for effective monitoring and quick responses.
Overview
To open the Map item, in the left menu:
- Select the Wildfire Detection section
- Choose the Map item
- See interactive map
Use and Functionality
The interactive map allows users to:
- View key elements on the map:
- Monitor the PTZ camera’s detection radius and field of view used for video analytics
- Define custom observation zones near critical areas to enable swift response to wildfires detected in their vicinity
- Navigate the map:
- Hold and drag the map using the left mouse button to move around
- Scroll the mouse wheel to zoom in or out, centered on the cursor's position
- Access detailed information about cameras and custom objects by right-clicking them. Additionally, manage objects by selecting the required icon:
- Delete: Allows the deletion of custom objects from the map
- Edit: Allows editing camera calibration settings or custom object parameters
- Polygon: Allows editing polygon shape for the selected custom object with Polygon territory type
To learn more about camera calibration settings, refer to the PTZ Parameters documentation.
Create Custom Object
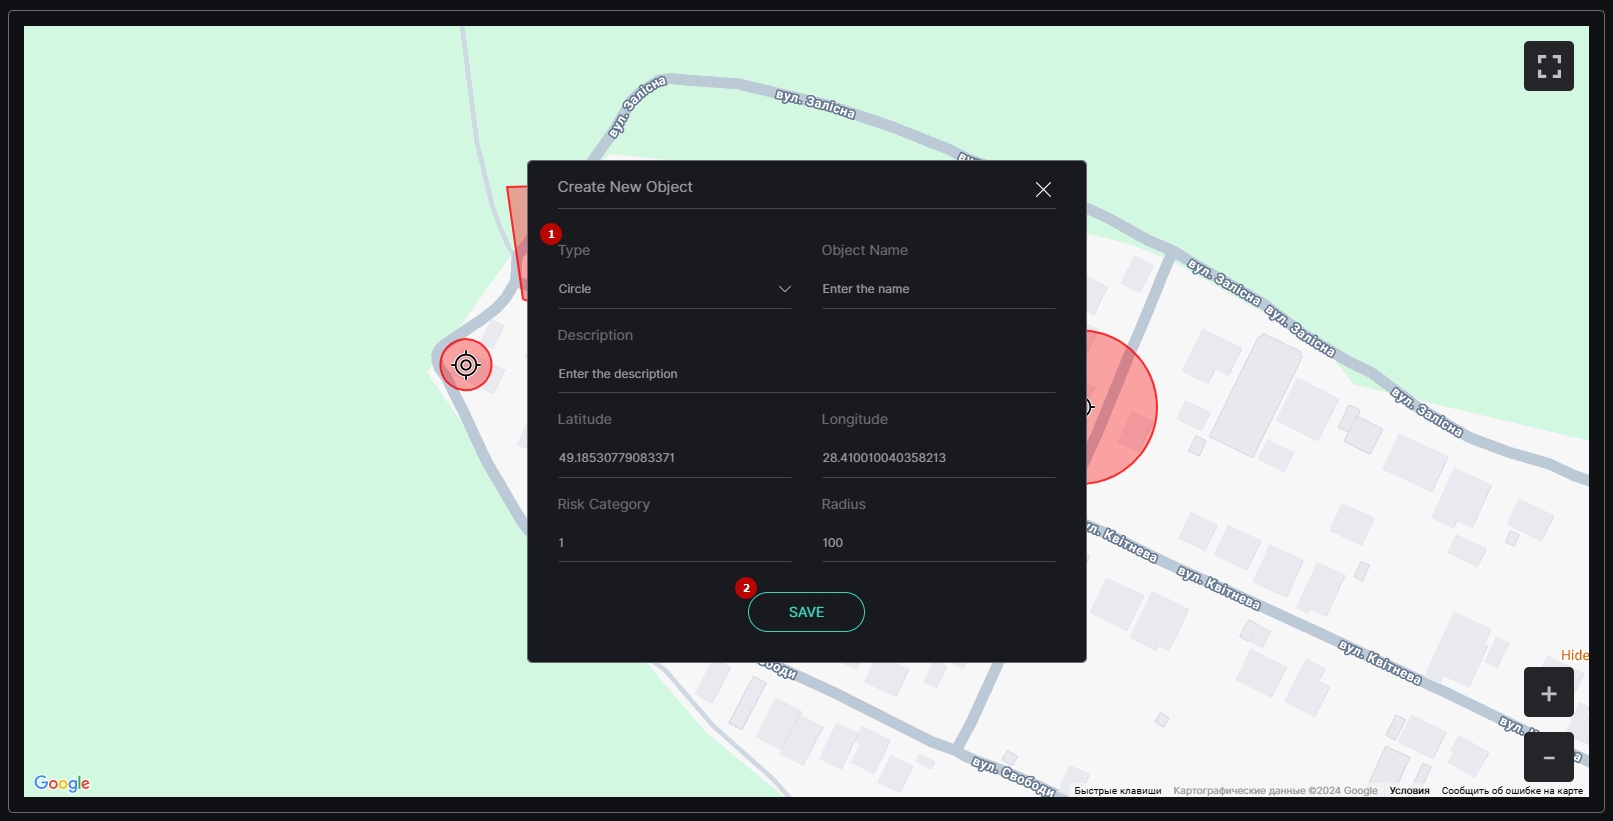
To create a new custom object, right-click any spot on the map and select Create New Object:
In the Create New Object pop-up window proceed with the following steps:
- Configure the object parameters as required:
- Select the object territory type:
- Circle
- Polygon
- Enter the desired object name and description
- Verify the object territory coordinates (latitude and longitude)
- Enter the required risk category for the object
- Set the object territory radius in meters (available for Circle type only)
- Select the object territory type:
- Click the Save button to confirm the intention
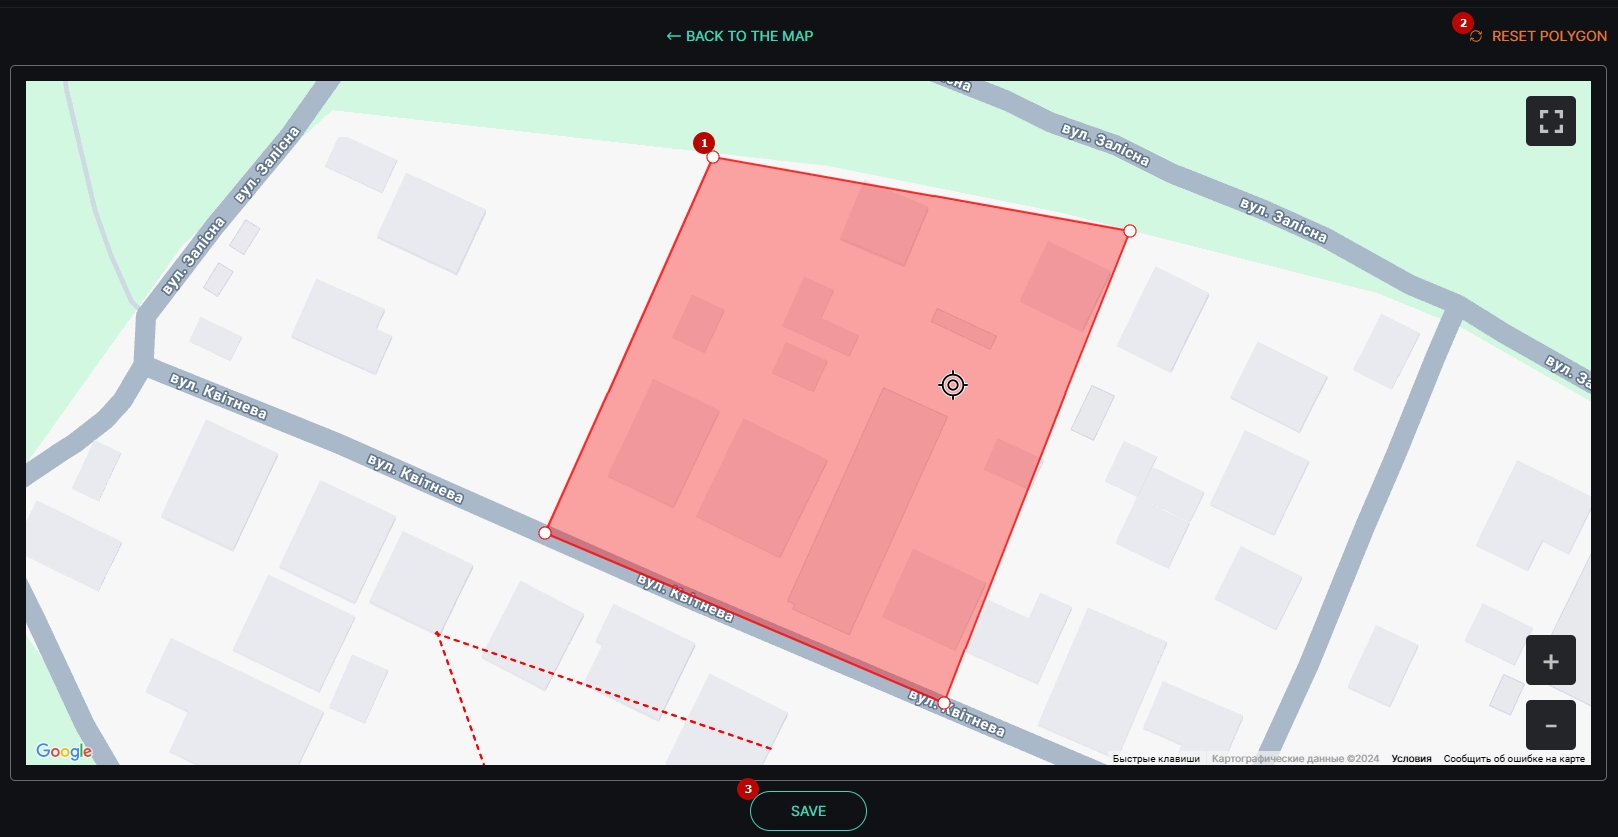
If the Polygon type was selected for object territory, additionally configure the polygon shape:
- Hold and drag the handles to adjust the polygon shape
- Click the Reset Polygon button to return all handles to their original positions
- Select the Save button to apply changes
Once the polygon is saved, its shape can always be modified by clicking the Polygon icon in the object's information popover.


