Search: Person
Overview
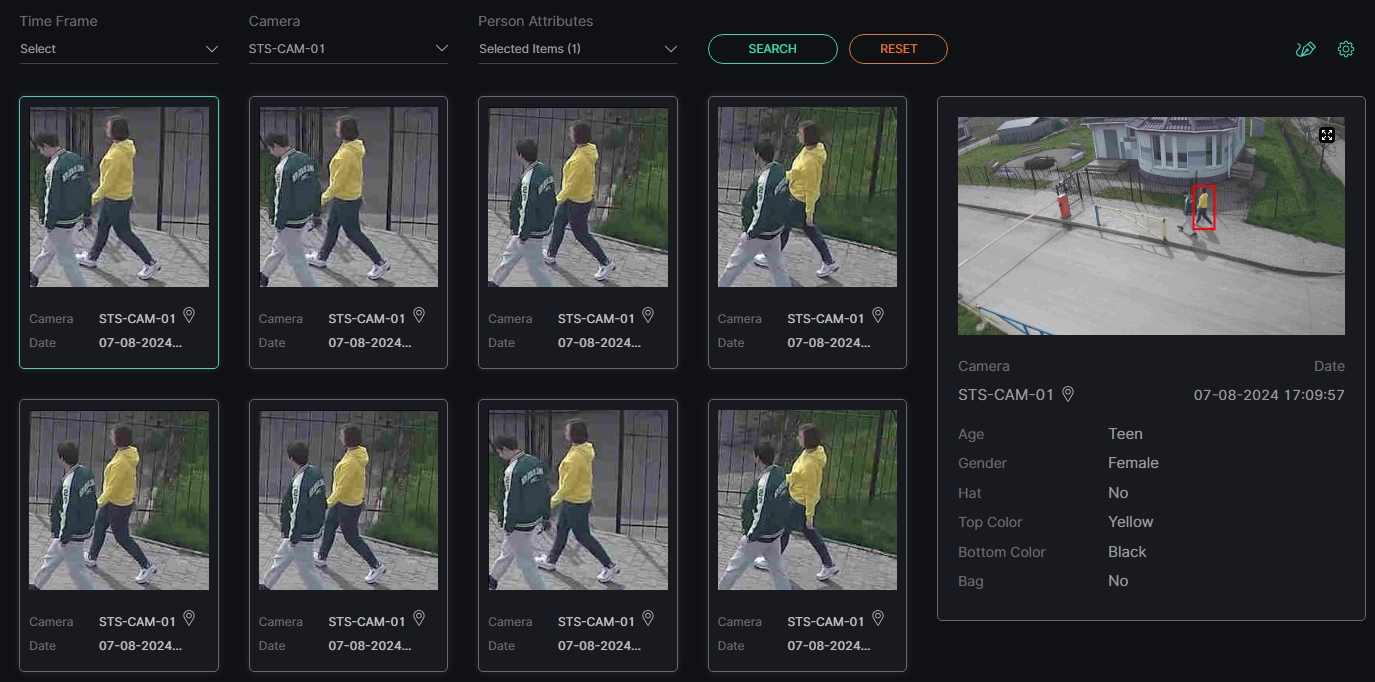
Select the Person tab in the navigational menu:
Use and Functionality
The Person tab functional menu allows to:
- Select the required time frame
- Click the Camera parameter to choose the desired video analytics. In the pop-up window:
- Check the boxes next to the required video analytics and folders
- Click the Select Video Analytics button
- Click the Person Attributes parameter to choose multiple appearance attributes from the drop-down menu:
- Gender
- Top Color
- Bottom Color
- Hat
- Bag
- Age
- Click the Reset button at the bottom of the menu to clear the parameters
- Click the Search button to start filtering
- Click the Reset button to clear all filters
Once selected and filtered, in the search results:
- View the exact date and time the required person was detected
- View the camera location on the map by clicking the corresponding icon next to the camera's name
- Click the desired tile to see the frame with the detected person preview and recognized appearance attributes
- Select the enlargement icon in the upper-right corner of the frame preview to view the additional information. In the pop-up window:
- See the extended person's appearance attributes data
- Use frame view tools:
- Zoom Out icon (-) to zoom out from a specific area of the frame
- Zoom In icon (+) to zoom in on a specific area of the frame
- Reset View icon (~) to reset the frame to its original size and position
- Enlargement icon to open the frame in full-screen (in the full-screen press the Esc button to return to default view)
- Check the required boxes to enable or disable the display elements on the frame:
- Bounding Box, which highlights the detected person
- Trajectory, which displays the detected person's trajectory of movement
Graphic Filter
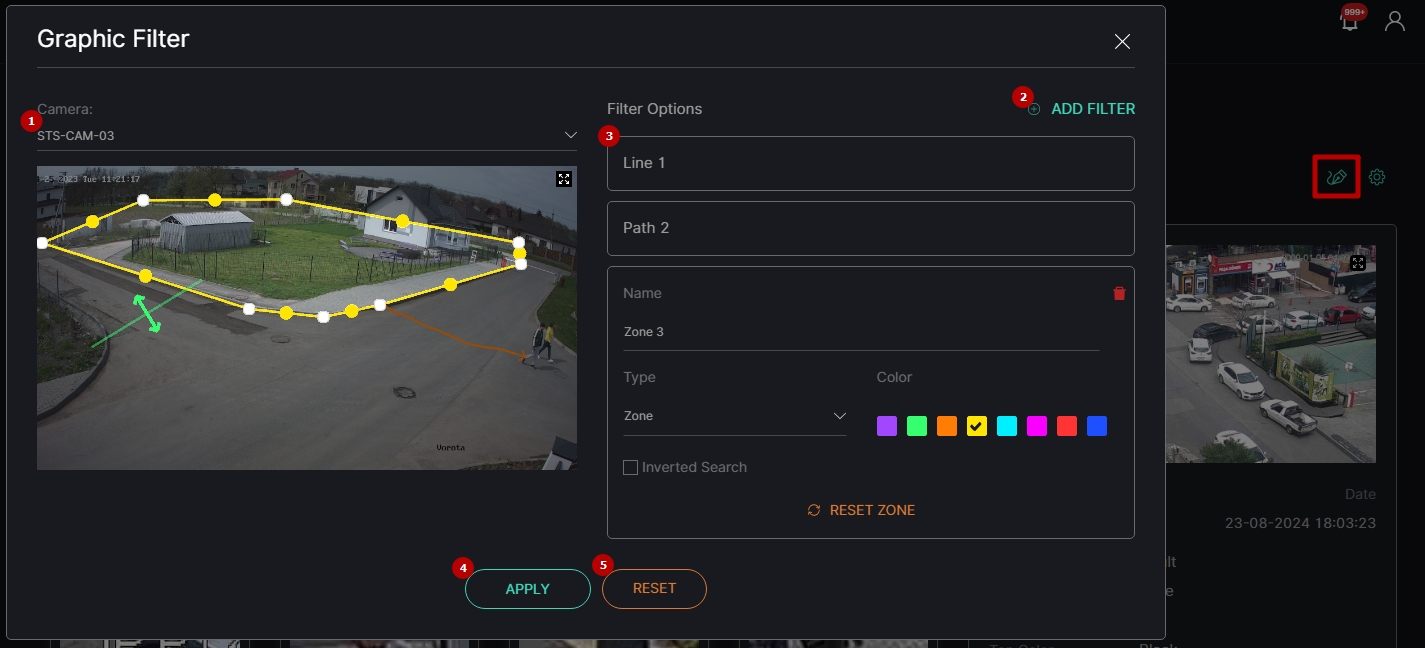
To add the graphic filter, click the Graphic Filter icon. In the Graphic Filter pop-up:
- Select a single camera to apply the graphic filter
- Click the Add Filter button to create a new graphic filter
- Set the filter options as required:
- To add the Zone filter, select the Zone filter type:
- Modify the recognition zone on the frame:
- Click and drag the handles with LMB to set the zone borders
- Click and drag the area inside the zone with LMB to move the whole zone
- Click the handle with RMB to delete it
- Set the parameters in the Zone block:
- Enter the zone name
- Select the zone border line color
- Click the Reset Zone button to return the zone borders to their original position
- Select the Inverted Search checkbox to filter by all objects outside the set zone
- Select the red Delete icon in the upper-right corner of the Zone block to delete the Zone filter
- Modify the recognition zone on the frame:
- To add the Path filter, select the Path filter type:
- Draw the path on the frame by clicking and holding down the LMB
- Set the required parameters in the Path block:
- Enter the path name
- Select the path line color
- Set the trajectory accuracy in percentage
- Click the Reset Path button to reset the drawn path
- Select the Inverted Search checkbox to filter by all objects moving outside the set path trajectory
- Select the red Delete icon in the upper-right corner of the Path block to delete the Path filter
- To add the Line filter, select the Line filter type:
- Modify the line on the frame:
- Click and drag the handles with LMB to set the line size and location
- Click and drag the line with LMB to move the whole line
- Set the parameters in the Line block:
- Enter the line name
- Select the line color
- Redirect the movement by clicking the Change Direction button
- Click the Reset Line button to return the line to its original position
- Select the Inverted Search checkbox to filter by all objects that did not cross the set line
- Select the red Delete icon in the upper-right corner of the Line block to delete the Line filter
- Modify the line on the frame:
- To add the Zone filter, select the Zone filter type:
- Click the Apply button to apply the graphic filter
- Click the Reset button to cancel the graphic filter
- Multiple graphic filters of single or different types can be applied simultaneously. In this case, only objects that meet all the specified criteria will be displayed in the filter results. For example, if both a zone and a line with a specified direction are selected, the filter results will show only those objects that were present in the specified zone and crossed the line in the specified direction.
- The Trajectory Accuracy parameter determines the level of precision required for a person to be recognized by the graphical filter, with higher percentage values demanding a closer match to the specified path.
Filter Preset
To save selected filters (including graphic filter) as a new preset, click the Options icon and select the Save Preset button in the drop-down menu. In the Save Filter Preset pop-up window:
- Enter the preset name
- Click the Save button
To manage the created filter presets, click the Options icon and select the Preset List button in the drop-down menu. In the Preset List pop-up window:
- See the list of created filter presets
- Click the View icon next to the required preset to apply its filters
- Click the Delete icon next to the required preset and confirm the intention in the confirmation pop-up window to delete the filter preset
To change the set of filters in the applied filter preset:
- Select the desired parameters to filter people
- Click the Options icon and select the Update Selected Preset button in the drop-down menu
Particular Search Results
Hover the mouse over the tile with the required person and click the Magnifying Glass icon in the upper-right corner to view other search results with the selected person:
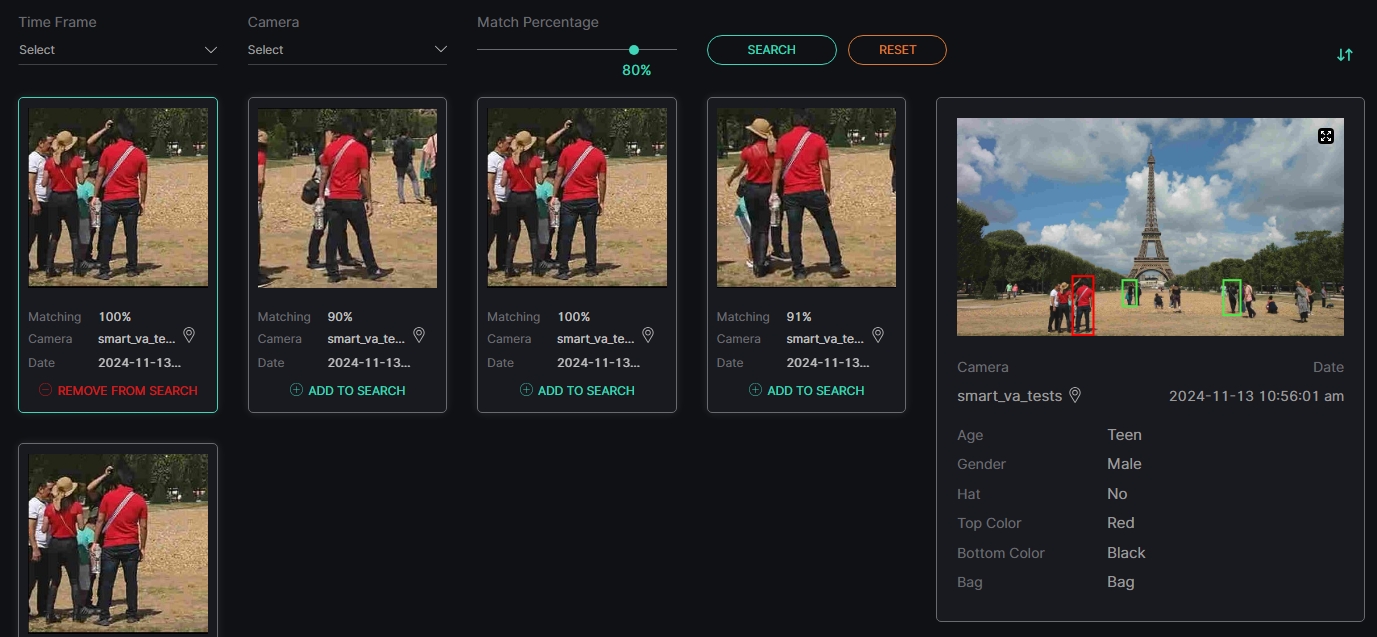
Search results similar to the selected person are displayed in the Search tabs:
- Select the required Search tab to view similar search results
- Click the Close icon next to the required Search tab to close it
- Select the Parson tab to return to the general search results
To filter search results with the selected person:
- Select the required time frame
- Click the Camera parameter to choose the desired video analytics. In the pop-up window:
- Check the boxes next to the required video analytics and folders
- Click the Select Video Analytics button
- Move the Match Percentage slider to set the desired matching level
- Click the Search button to start filtering
- Hover the mouse over the sorting arrows to select the desired sorting order from the context menu:
- Sort by time, to arrange the results by date and time from newest to oldest
- Sort by matching, to arrange the results by match percentage from higher to lower
- Click the Add to Search button to add the selected detection to the general search results
- Click the Remove from Search button to remove the selected detection from the general search results
Adding a Person to a List
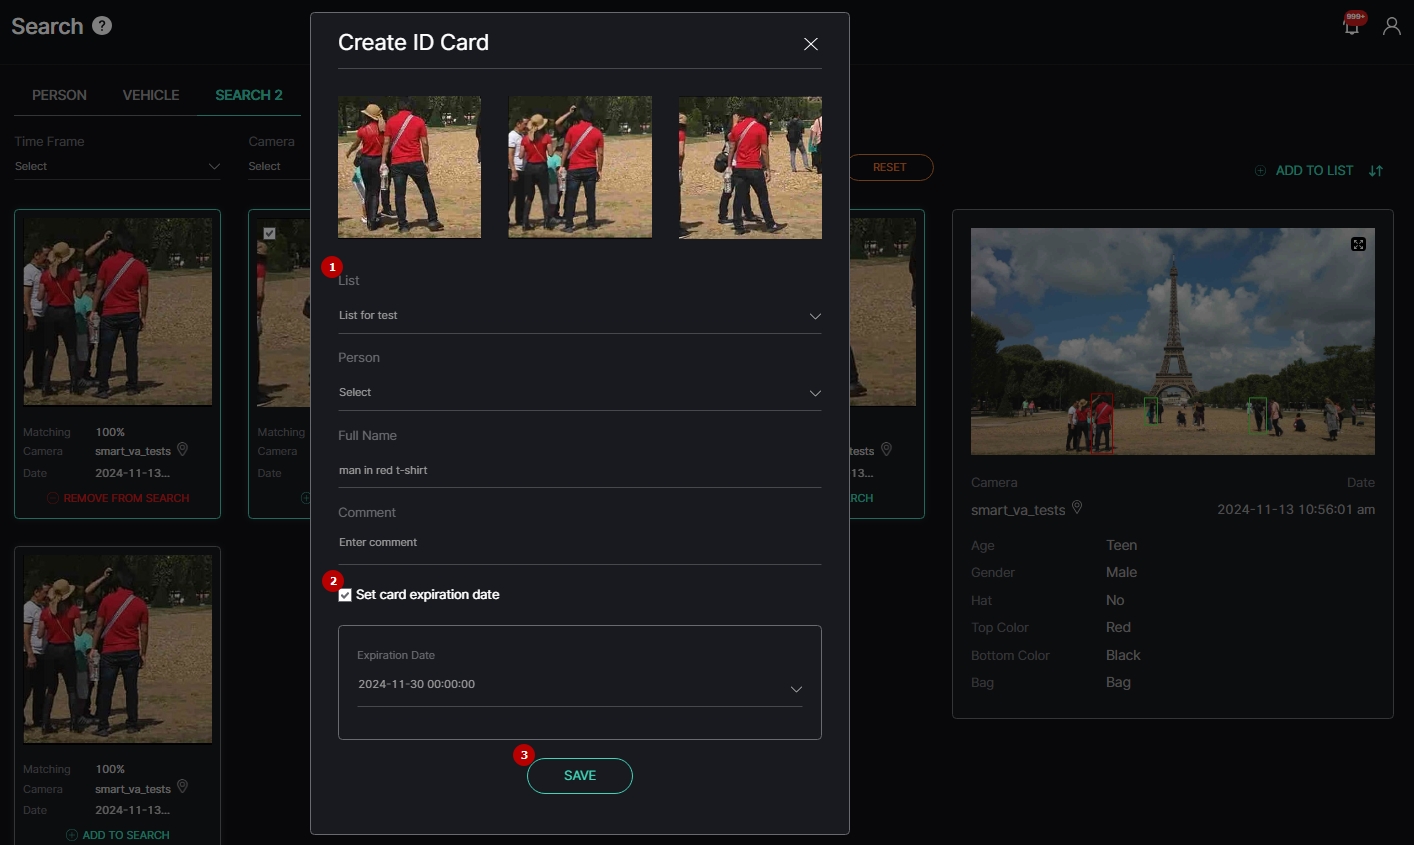
To add the selected person to a list:
- Hover the mouse over the required single or multiple tiles and check the boxes
- Click the Add to List button
In the Create ID Card pop-up window:
- Fill in the required fields:
- Select a desired list
- Select the existing card of a person in the list to add a new photo in it or enter a person's full name to create a new card
- Enter the comment about a person
- Check the Set Card Expiration Date box to manually set the card expiration date and time if required
- Click the Save button


