NX Web Integration Guide
Introduction
This guide comprises comprehensive information about VEZHA Analytics System web integration with NX VMS. The latest versions of VEZHA plugins already contain a built-in web integration functionality for NX VMS and are ready for use through the Web Pages.
Overview
Before you start, ensure you have correctly installed the latest versions of:
- IncoreSoft VEZHA Analytics System (Middleware Core ver. 23.2.11 or higher)
- Required IncoreSoft VEZHA plugins
- The latest version of the IncoreSoft VEZHA Analytics System installation file can be found in the Installation Files section of the Partners Portal.
- Middleware Core version can be checked in the Updates item of the VEZHA system, and updated if necessary.
- IncoreSoft VEZHA plugins can be updated in the Plugin Marketplace item of the VEZHA system.
NX Camera Adding
To add the NX camera to the VEZHA Analytics System, configure the required parameters while adding a video stream:
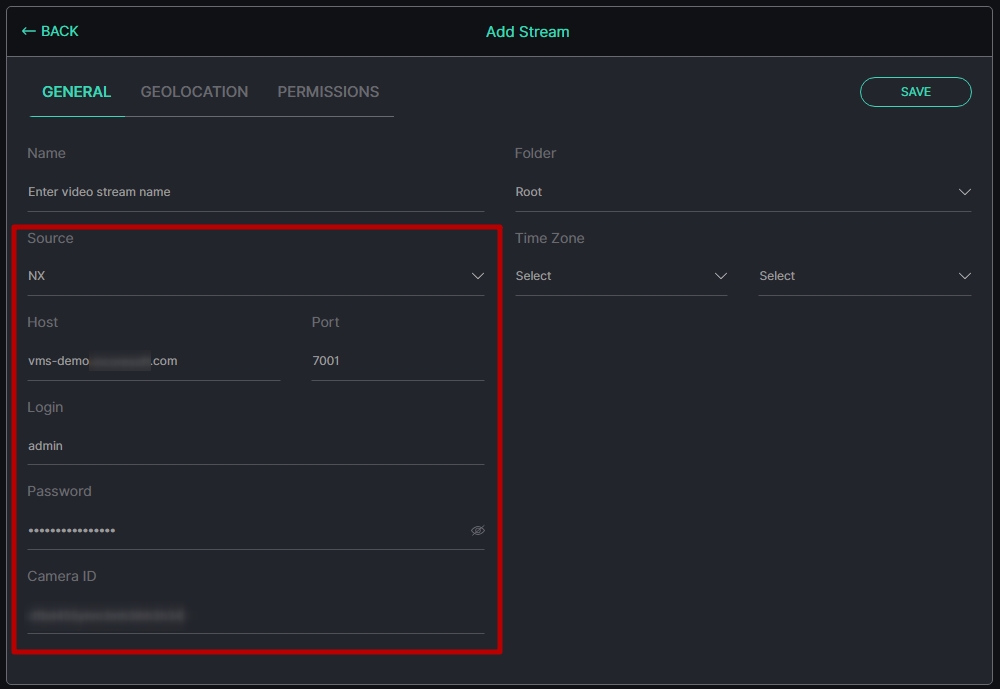
- Select NX from the Source drop-down list
- Enter the NX VMS server address in the Host field
- Enter NX VMS port in the Port field, 7001 by default
- Enter the NX user login and password
- Enter the required NX camera ID
- To learn more about the configuration of other parameters while adding a video stream, refer to our Manage Cameras documentation.
- The data for the Host, Port, Login, and Password fields can be found on the NX VMS authorization screen.
- Please avoid using the user's password with special symbols such as: "!@#$%^&*()", as it may lead to errors.
- The NX user whose credentials are used for adding the video stream must be allowed to use digest authentication in NX VMS, as digest authentication enables this user to securely retrieve the video stream from NX VMS.
To find the required NX camera ID, in the NX VMS navigate to Servers on the sidebar and proceed with the following steps:
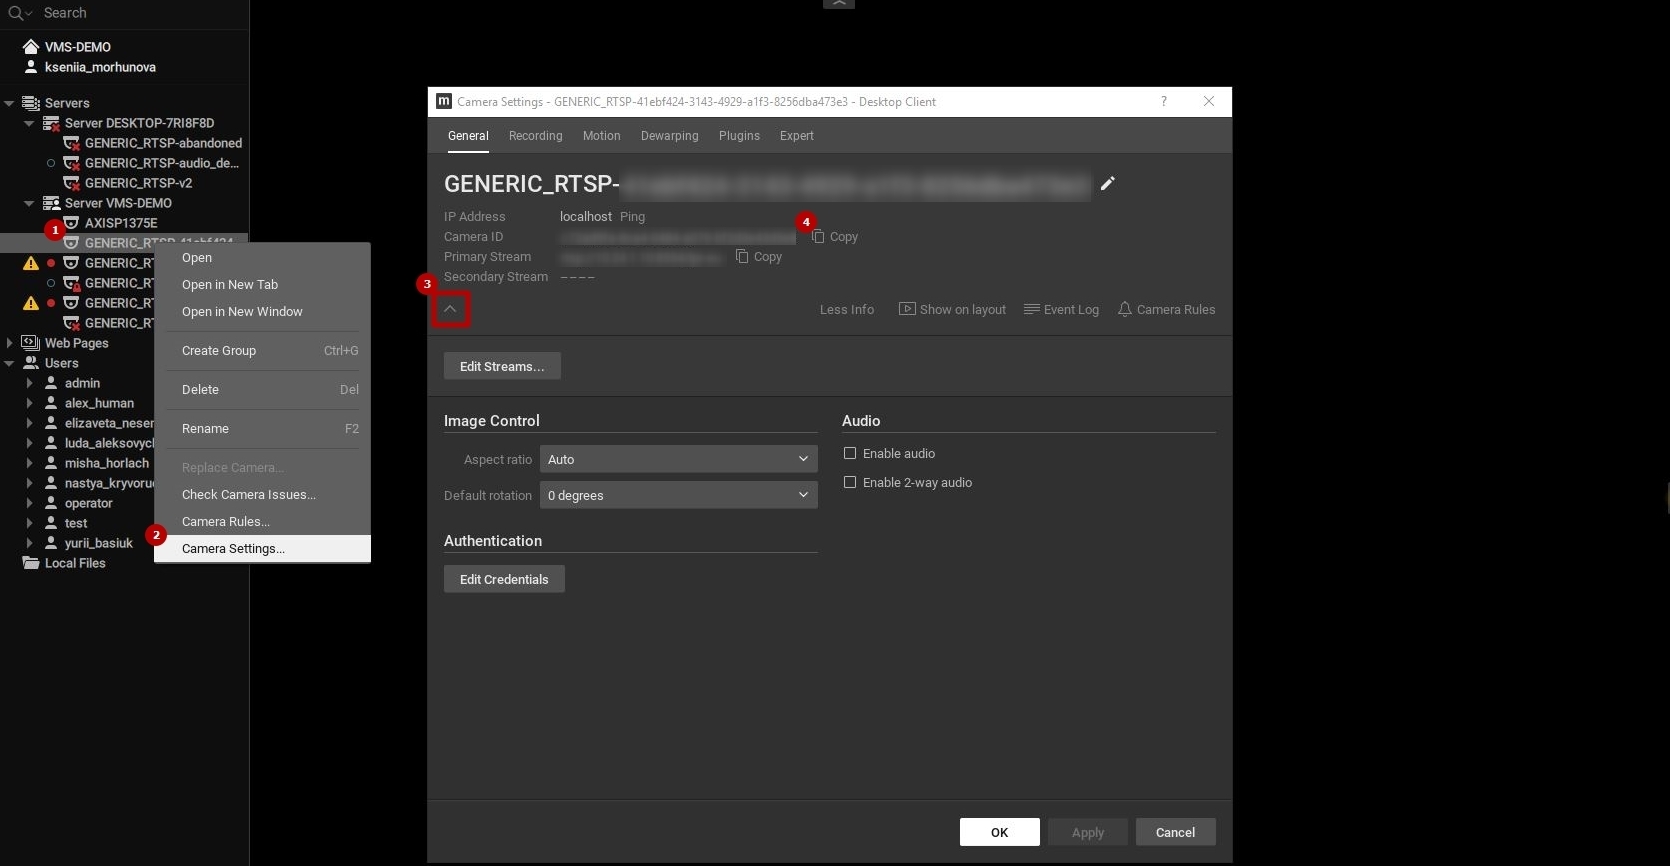
- Right-click the desired camera
- Select the Camera Settings option from the context menu
- Click the Arrow icon or More Info button to reveal the required information block in the General tab of the Camera Settings pop-up window
- Copy the selected NX camera ID
User Digest Authentication
To allow the digest authentication for the desired user, in the NX VMS open the System Administration settings ( press Ctrl+Alt+A) and proceed with the following steps:
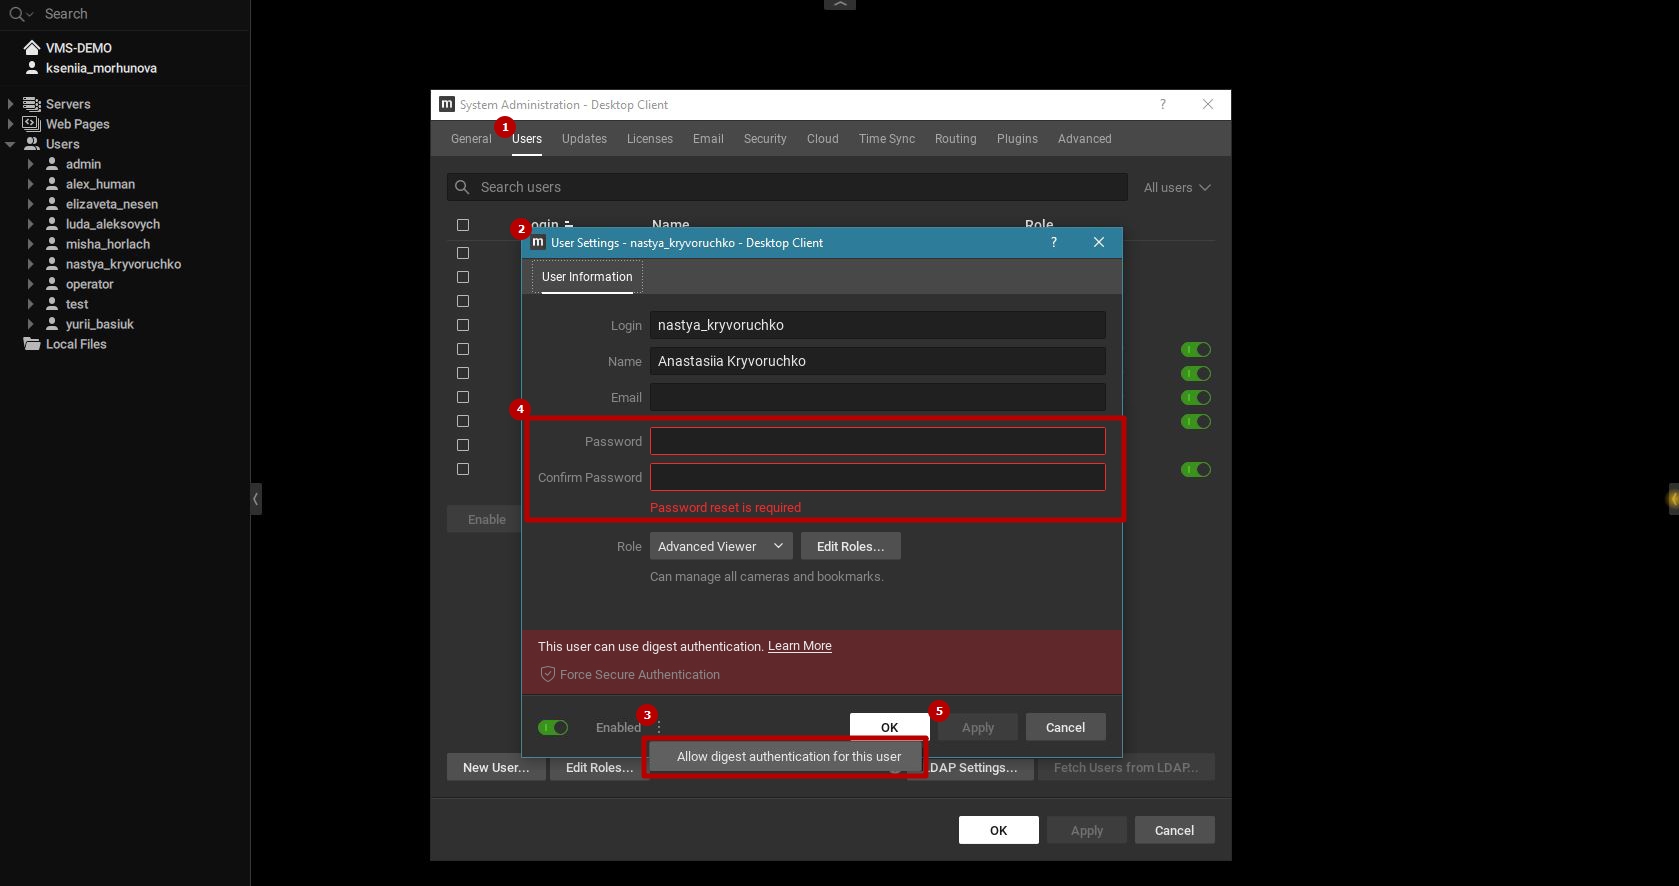
- Select the Users tab in the System Administration pop-up window
- Click the required user in the table to open the User Settings pop-up window
- Click the "⋮" icon and select Allow Digest Authentication for This User from the context menu
- Renew the user password
- Click the Apply button to save changes
- The caption "The User Can Use Digest Authentication" in the User Settings pop-up window indicates that digest authentication has already been allowed to the selected user.
- Please avoid using the user's password with special symbols such as: "!@#$%^&*()", as it may lead to errors.
Web Plugin Connection
To connect VEZHA plugins as web integration, log in to your NX VMS, navigate to Web Pages on the sidebar, and proceed with the following steps:

- Right-click the Web Pages section
- Select the Add Web Page option in the context menu
In the Add Web Page pop-up window, proceed with the following steps:
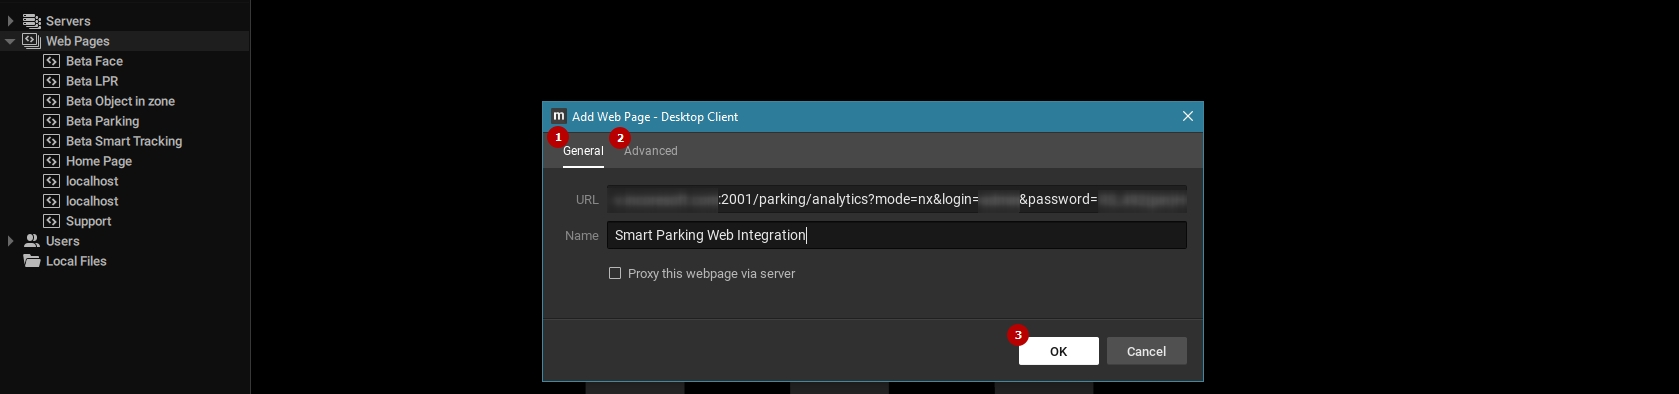
- In the General tab, fill in the fields:
- Enter the URL in the following format: "http://your_server_ip_address:port/plugin_name/default_page_name?mode=nx&login=your_vezha_login&password=your_vezha_password"
- Enter the desired plugin name
- In the Advanced tab check the Allow Using Client API checkbox
- Click the Ok button
- The URL-address example: http://111.22.33.44:2001/alpr/search?mode=nx&login=login&password=password
- The list of available plugin's plugin_name/default_page_name parameters comprises:
- Age & Gender Detection: "gender_age/report"
- Face Recognition: "face/search"
- Gun Detection: "gun_detection/events"
- Hard Hat Detection: "hardhat/events"
- LPR: "alpr/search"
- Military Detection: "military/events"
- Motion Detection: "motion/events"
- Object Detection: "object_in_zone/events"
- Pose Estimation: "fallen_people/events"
- Smart Parking: "parking/analytics"
- Smart Tracking System: "person_reid/search"
- Smoke & Fire Detection: "smoke_fire/events"
- Traffic Analytics: "traffic/events"
- UIC & Container: "railroad/search"
- Checking the Allow Using Client API checkbox is mandatory, as it allows interaction with HTTP API and sending commands for opening the archive.
To edit the plugin connection settings, right-click the required plugin in the Web Pages menu and select the Web Page Settings option from the context menu.
Web Plugin Utilization
Once the required plugin is connected, it becomes available within the Web Pages section. To open the required plugin, hold and drag it to the Layout and patiently wait for the VEZHA authorization process to complete:

Once VEZHA authorization is complete, the desired plugin opens in the Layout and is ready for use.
The web plugin interface resembles the VEZHA Analytics System. All available plugin sections are positioned at the top of the page, as illustrated in the example:
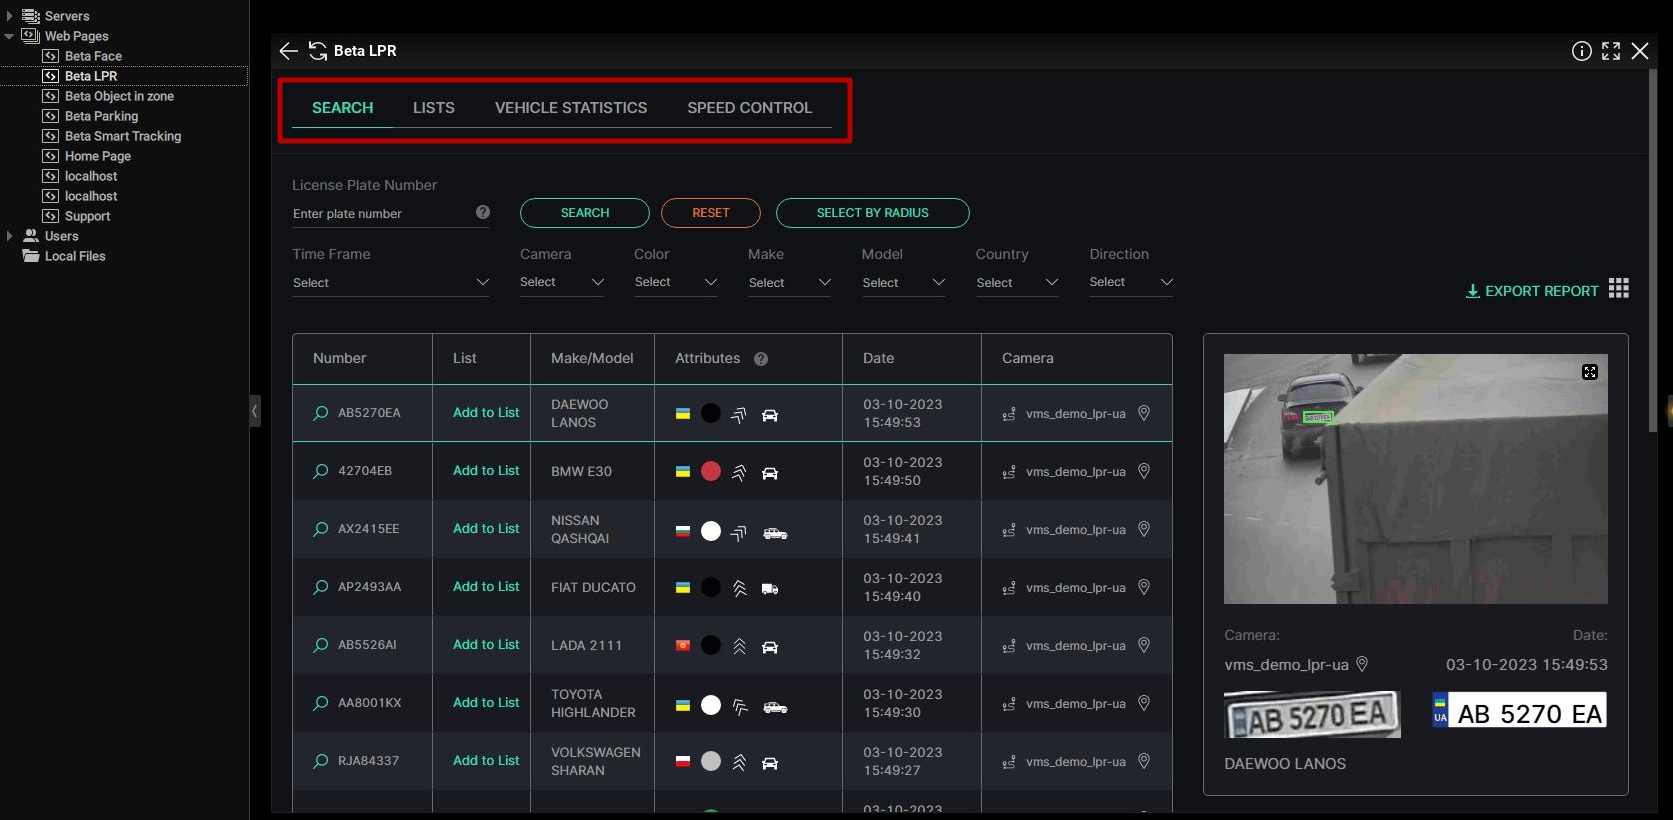
To view the required event playback from the Search section, follow these steps:

- Select the desired record
- Click its frame preview on the right side of the page
- See the event playback in the new tab
To view the required event playback from the Events section, follow these steps:

- Click the View icon next to the required event
- See the event playback in the new tab
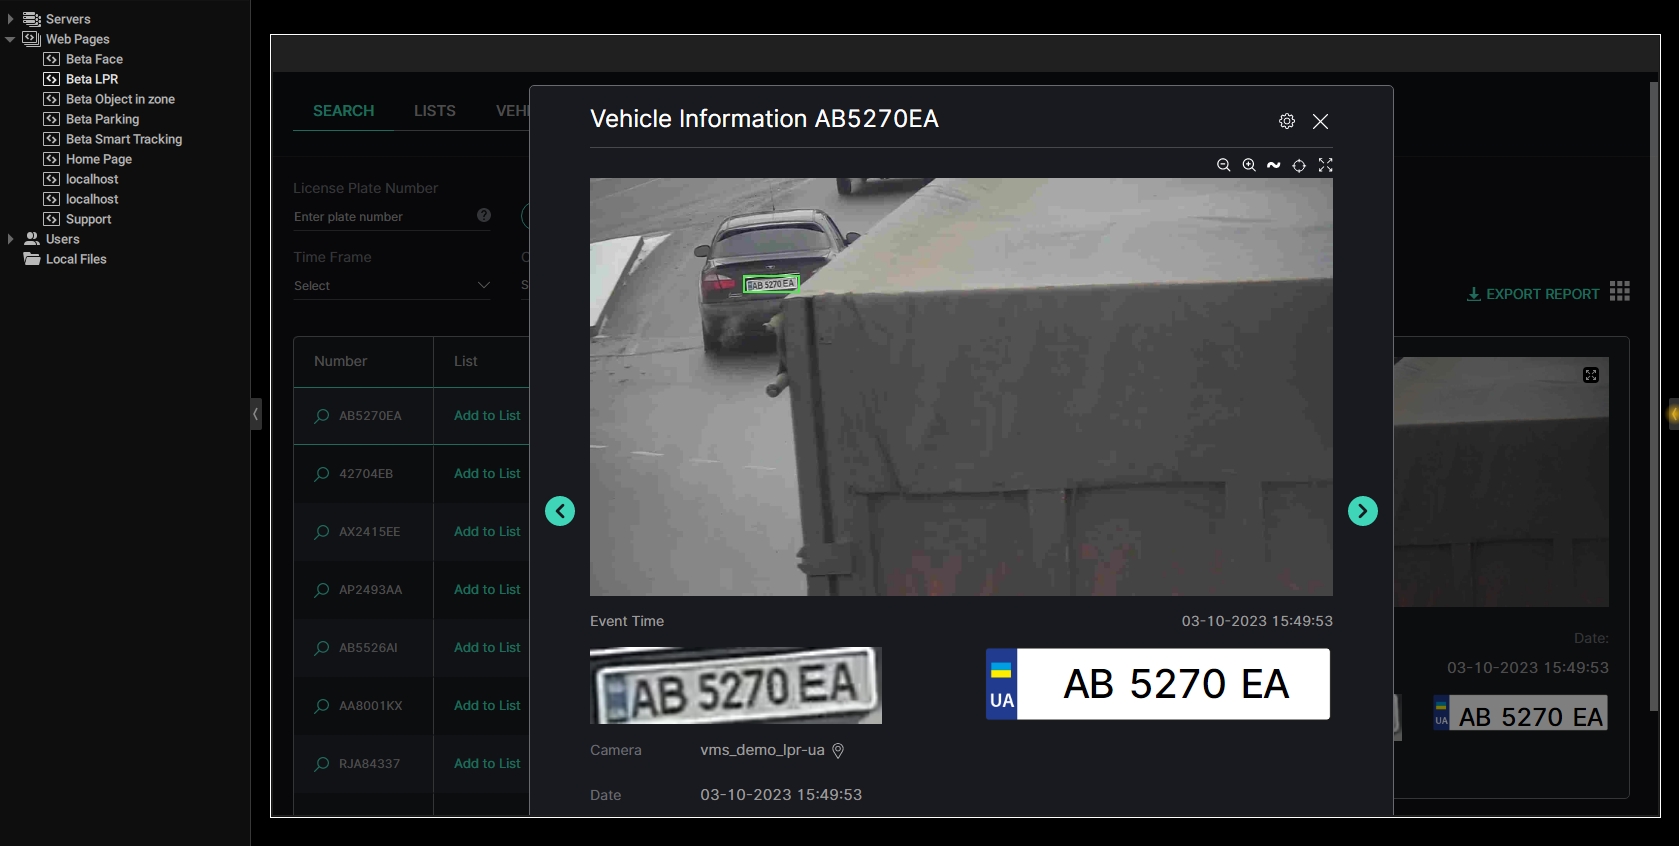
If the required video stream is not associated with the NX camera, the Event Information pop-up window will be opened, as it usually does in the VEZHA Analytics System, as NX VMS cannot get the video archive from non-associated video streams. An example of the Vehicle Information pop-up window is shown in the picture below: