Milestone: Object Detection Plugin Configuration
This page provides instructions for configuring the main settings of the Object Detection Plugin in the XProtect Management Client.
Introduction
Open the XProtect Management Client application and sign in by performing the following steps in the login dialog:
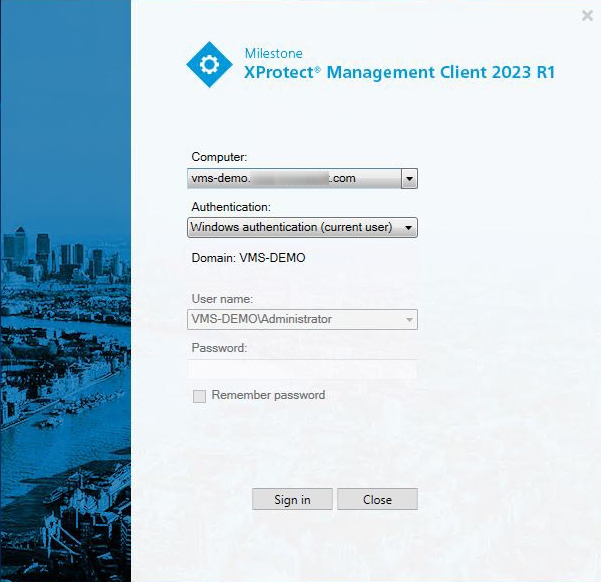
- Specify the hostname or the IP address of the Management Server in the Computer field
- Select the desired authentication method
- Enter the username and password
- Click the Sign In button
Plugin Configuration
To configure the Object Detection plugin, follow these steps:
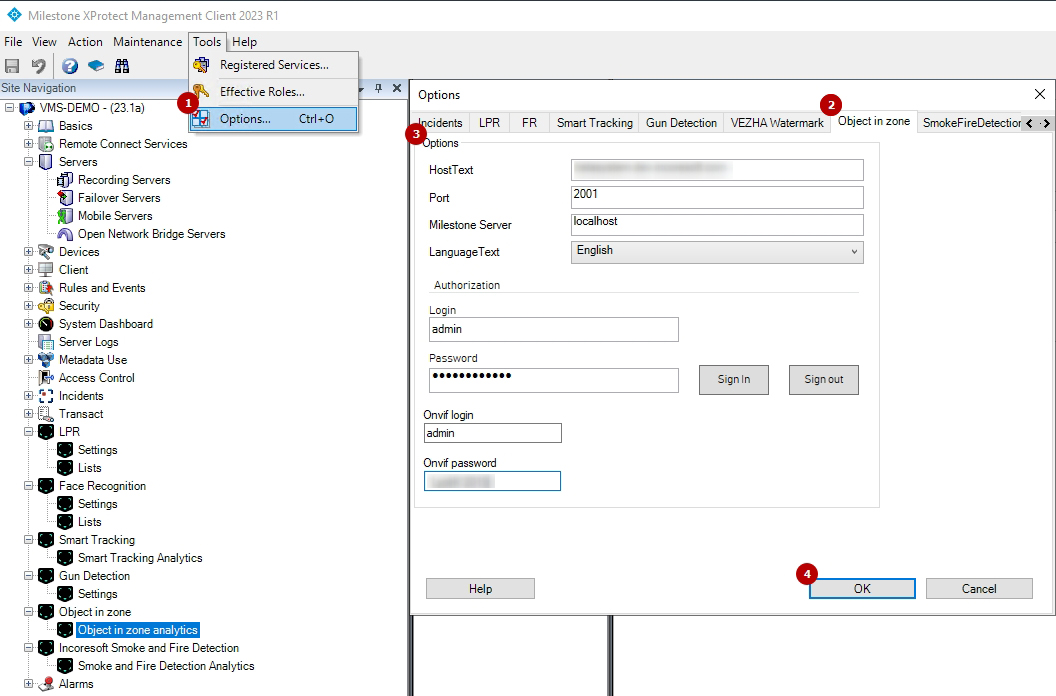
- Open the Tools tab in the menu bar and select Options from the drop-down menu (or press Ctrl + O)
- Navigate to the Object in Zone tab
- Set parameters as required:
- In the Options block:
- Enter the IncoreSoft VEZHA Middleware Core server address in the HostText field. If installed on the current PC, use "localhost".
- Specify the port (2001 by default).
- Enter the Milestone Management Server address in the Milestone Server field. If installed on the current PC, use "localhost".
- Select the desired interface language.
- In the Authorization block:
- Specify the VEZHA login and password.
- Click the Sign In button to connect to the VEZHA system.
- Specify the ONVIF login and password.
- In the Options block:
- Click the Ok button in the Options pop-up window to save the settings
The ONVIF login and password refer to the Milestone basic user previously added to the Open Network Bridge Manager.
Analytics Configuration
To proceed with the Object Detection analytics configuration:
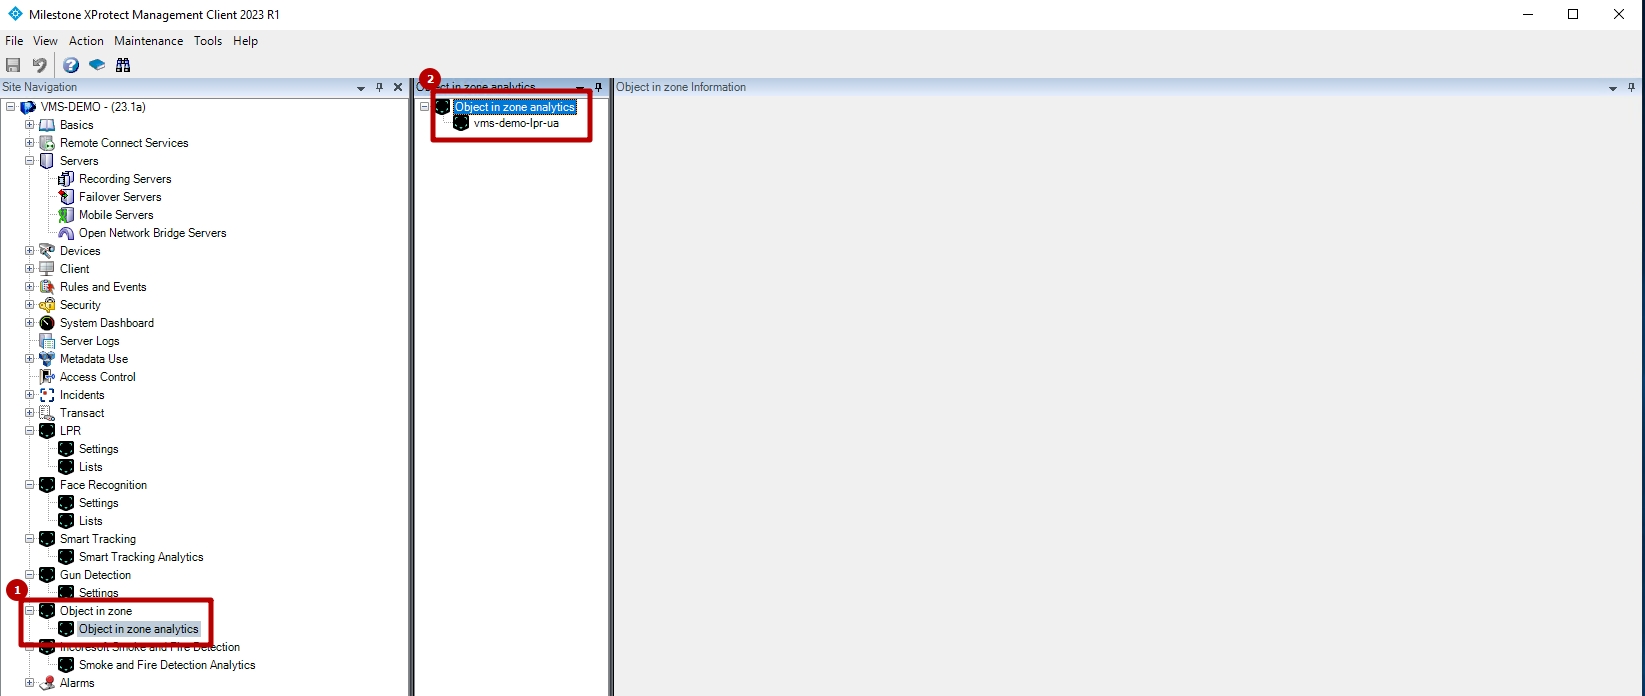
- Open the Object in Zone section and select the Object in Zone Analytics item
- View the list of analytics
Add Analytics
To add new analytics, right-click Object in Zone Analytics and select Add New from the drop-down menu (or press Ctrl + N):

The Add Object in Zone pop-up window opens.
The first settings block provides the ability to add a Milestone video source:

- Choose the desired video source from Milestone:
- Click the Choose Camera button
- Select the desired video source in the opened window
- Click the Ok button
- Select the desired connection method:
- For the Add Video Stream with Open Bridge (ONVIF) method:
- Enter the Open Bridge login
- Enter the Open Bridge password
- For the Add Video Stream with Device method:
- Specify the path to the associated video stream
- If required, select the Authorization checkbox and enter the required login and password to access the video stream
- For the Add Video Stream with Open Bridge (ONVIF) method:
- Click the Next button to proceed with the analytics configuration
The second settings block provides the ability to:
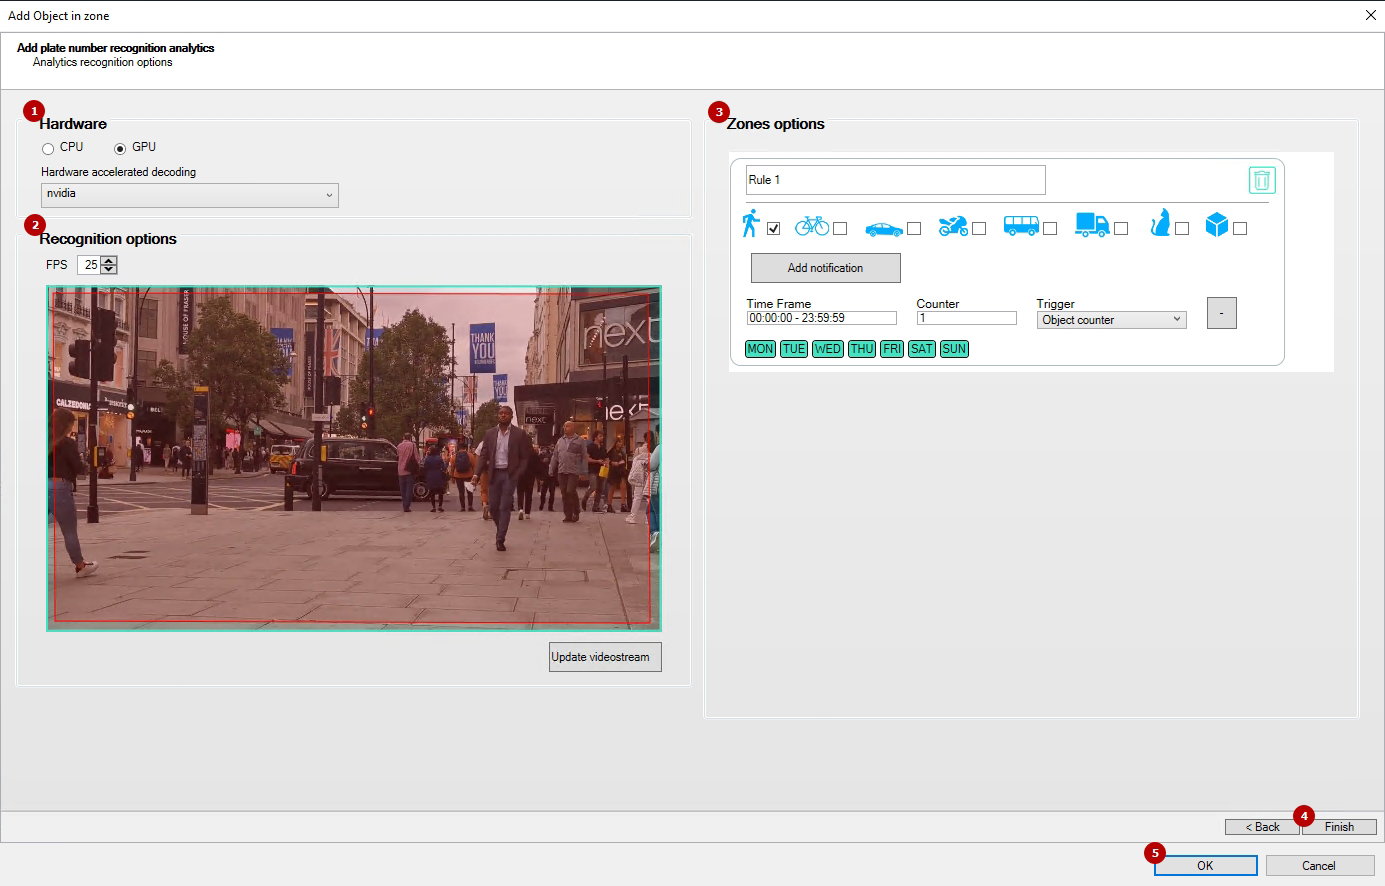
- Set hardware parameters:
- Choose the CPU or GPU hardware acceleration
- Select the hardware decoder from the drop-down list:
- CPU
- Intel
- NVIDIA
- Configure recognition options: Specify the desired number of frames per second for analytics
- Customize the zone options:
- Set the detection zone:
- Left-click the frame in the desired place to set the first zone point
- Move the mouse across the frame and left-click again to set another zone point
- Repeat until all zone borders are set
- Right-click the frame to complete the detection zone and create a related new rule
- Set the notification parameters:
- Enter the rule name
- Select the required checkboxes to set object types:
- Person
- Bicycle
- Car
- Motorcycle
- Bus
- Truck
- Animal
- Bags
- Select the required time frame
- Set the detection time in seconds for the Time parameter
- Set the amount of the required objects for the Counter parameter
- Select the notification trigger type:
- In Zone
- Out of Zone
- Object Counter
- Presence Control
- Intrusion
- Select days of the week to receive the specified notifications
- Click the Add Notification button to create multiple notifications
- Click the "-" icon to delete the notification
- Click the Delete icon to delete the rule with the related detection zone
- Set the detection zone:
- Click the Finish button to save the new analytics
- Wait once the analytics setup process is complete and click the Ok button to close the Add Add Object in Zone pop-up window
- All days of the week are selected by default. Buttons become grey when deselected.
- The Counter parameter becomes available only for the Object Counter trigger type.
- The detection zone is based on at least 3 points.
- If necessary, different detection zones may overlap with each other.
Edit Analytics
Once the new analytics is created, it appears in the main list of analytics. Click the desired analytics name to view its information:
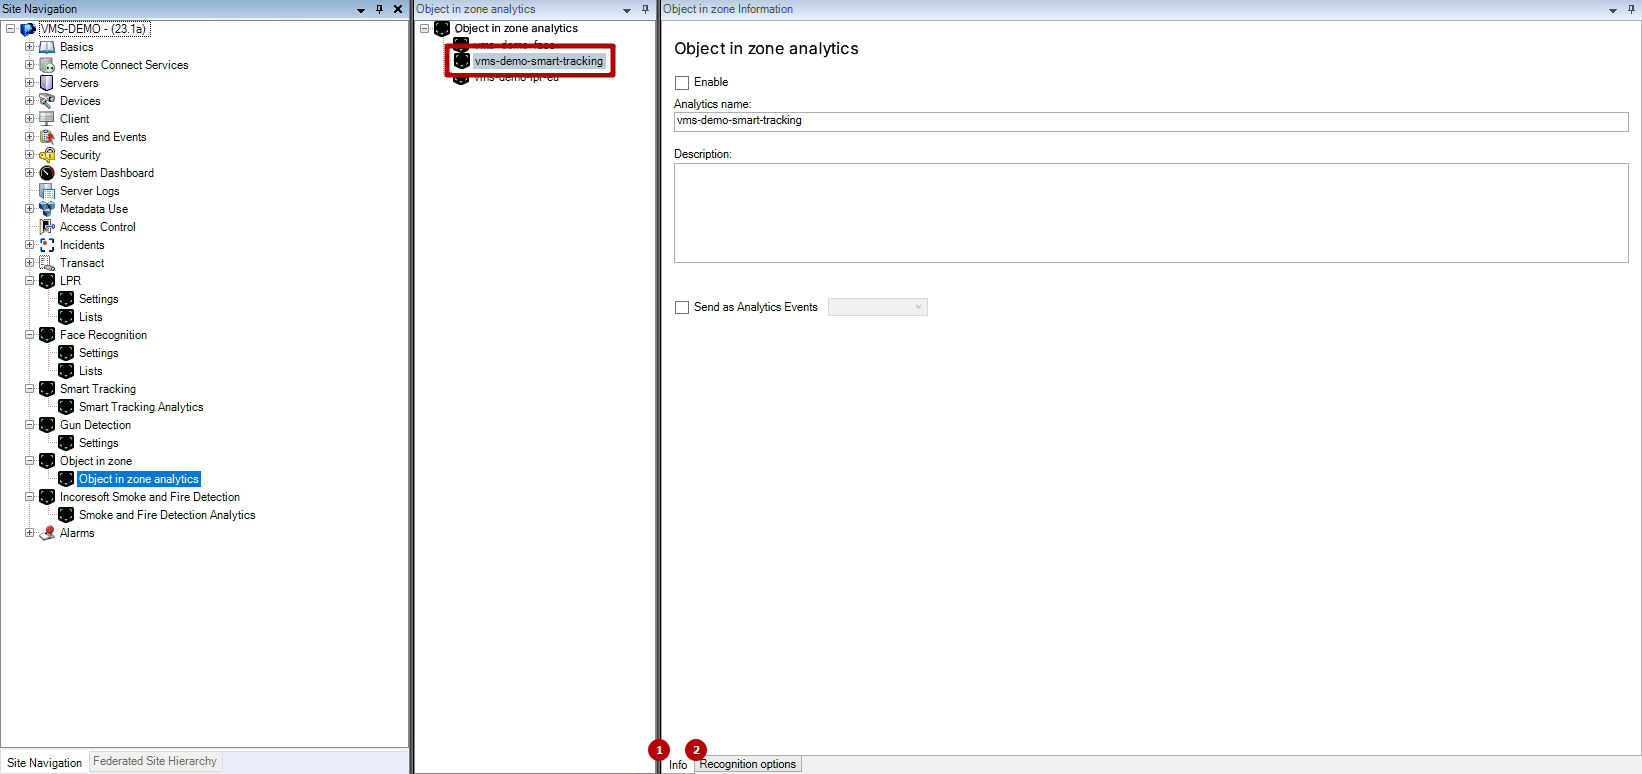
- In the Info tab:
- Select the Enabled checkbox to start the analytics
- Deselect the Enabled checkbox to stop the analytics
- Edit the analytics name
- Provide a brief description of the analytics
- Select the Send as Analytics Event checkbox and choose the desired event from the drop-down list to send all event notifications to the Milestone Event Server
- In the Recognition Options tab edit the analytics parameters as required:
- Set hardware parameters
- Configure recognition options
- Customize the zone options
- Press Ctrl + S to apply changes
- When the Send Events to the Milestone Event Server checkbox is selected, event notifications are directly sent to the Event Server without requiring additional notification configuration in the VEZHA system through the Event Manager.
- The parameter configuration process in the Recognition Options tab is similar to the one described in the Add Analytics section of this document, except for the video source connection.
Delete Analytics
To delete the analytics:

- Right-click the analytics name
- Select Delete from the drop-down menu (or press Del)
- Confirm the intention