Video Camera Settings
Before commencing the camera installation process, it is crucial to thoroughly review the accompanying documentation provided by the selected manufacturer for the specific model. Pay close attention to the following technical details:
Any IP camera necessitates the following components: a power cable, a network cable, a standard port connection to a router or switch, connectors, a bracket, and a power supply. It is essential to select the appropriate accessories that are compatible with your chosen model.
If the camera is equipped with pan/tilt mechanisms, additional mechanical adjustments must be performed after installation and initial setup. Failure to do so may result in the remote pan/tilt functionalities not functioning properly.
Camera settings play a vital role in achieving optimal performance. Cameras specifically designed for capturing license plates are typically preconfigured with appropriate settings, requiring minimal adjustments. However, for other camera models, it may be necessary to modify the following settings.
Maximum Shutter Time
The maximum shutter time depends on both the camera settings and the speed of the vehicle. If the camera's shutter time is too long, it can result in motion blur when capturing moving vehicles. For example, a car moving at high speed can appear blurred in an image taken with an exposure time of 1/30 second, as demonstrated in the picture below:
A car approaching the camera will not traverse the image horizontally but rather appear larger as it gets closer. This effect is typically insignificant. However, when there is an angle between the camera and the direction of travel, the car will move laterally in the image at a speed determined by the angle. This lateral movement can cause motion blur when using a standard shutter time of approximately 1/30 second, thus necessitating a limitation on the maximum shutter time.
Recommended maximum shutter times based on the camera angle and vehicle speed (1 ms = 1/1000 s):
Camera Angle: | 30 km/h (⁓ 19 mph) | 50 km/h (⁓ 31 mph) | 80 km/h (⁓ 50 mph) | 110 km/h (⁓ 68 mph) | 130 km/h (⁓ 81 mph) |
|---|---|---|---|---|---|
5⁰ | 19.3 ms | 11.6 ms | 7.2 ms | 5.3 ms | 4.5 ms |
10⁰ | 9.7 ms | 5.8 ms | 3.6 ms | 2.6 ms | 2.2 ms |
15⁰ | 6.5 ms | 3.9 ms | 2.4 ms | 1.8 ms | 1.5 ms |
20⁰ | 4.9 ms | 2.9 ms | 1.8 ms | 1.3 ms | 1.1 ms |
25⁰ | 4.0 ms | 2.4 ms | 1.5 ms | 1.1 ms | 0.9 ms |
30⁰ | 3.4 ms | 2.0 ms | 1.3 ms | 0.9 ms | 0.8 ms |
Maximum Gain
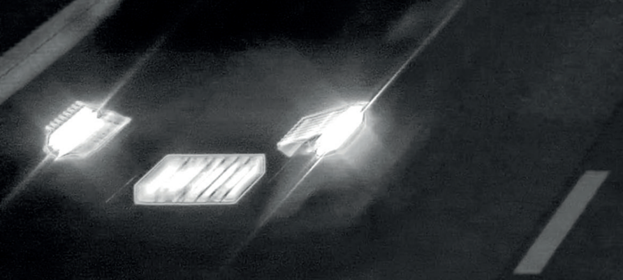
To prevent license plate overexposure, it is advisable to limit the maximum gain of the camera. This can be achieved by adjusting the available IR intensity, considering the distance to the vehicles, and taking into account the camera's sensitivity. By finding the right balance, the license plate can be captured clearly without being excessively bright, as demonstrated in the picture below:
WDR
Wide dynamic range (WDR) techniques are employed to enhance the dynamic range of an image. This technology proves particularly valuable in revealing details that may be concealed in shadows or preventing excessive glare from overwhelming the camera.
However, it is important to note that WDR can introduce motion artifacts in images of moving vehicles, depending on the implementation in a specific camera. Unless explicitly specified in the camera specifications, we advise disabling WDR when capturing license plates.
To ensure optimal recognition, it is recommended to examine a freeze-frame of the license plate, ensuring clear and well-defined borders. This guarantees that the recognition module will have no difficulty identifying the license plate accurately.
Tone Mapping or Local Contrast
The adjustment of tone mapping plays a crucial role in enhancing detail and contrast in the darker areas of an image. For cameras equipped with an ARTPEC-6 chip or earlier, this setting can be modified through the local contrast option. However, ARTPEC-7 cameras offer improved functionality and a dedicated tone-mapping feature.
Utilizing tone mapping or adjusting the local contrast can effectively enhance the visibility of license plate letters and numbers. Nevertheless, it's important to exercise caution as setting it too high may result in increased glare and reflections from headlights, ultimately producing a gray and noisy image.
Balancing the local contrast setting on an ARTPEC-6 camera involves finding the right tradeoff between good contrast in the license plate and potential drawbacks such as increased noise and glare in the overall image:
To achieve optimal results, we recommend keeping the local contrast below 50% on cameras equipped with the ARTPEC-6 chip. Additionally, disabling the color mode is advised, as a black-and-white image offers greater contrast and is more accurately interpreted by the recognition module.


