Partners Portal Manual
Introduction
This manual provides an overview of the Partners Portal and describes its main menu items.
To become a partner of IncoreSoft and receive a partner account, follow these steps:
- Navigate to the Become a Partner page: Click the Become a Partner button on the Authorization page or select the Become a Partner item in the website's main menu
- Carefully fill in the application form with the required information on the Become a Partner page
- Review and agree with the partnership terms, and then submit the completed application form
- Wait for confirmation from the vendor regarding the partnership
- Receive all the necessary registration details via email, once the partnership is confirmed
Access to the Partners Portal
To access the Partners Portal, follow these steps:
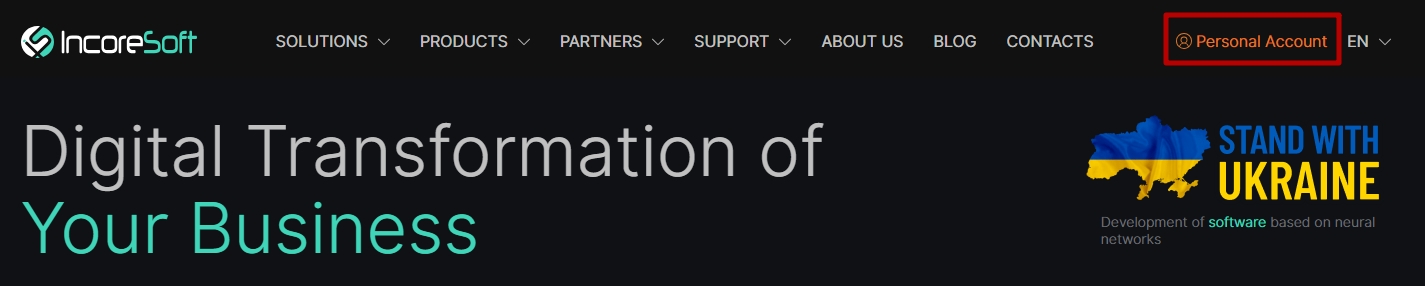
- Open the https://incoresoft.com website
- Click the Personal Account button located in the upper-right corner
- Enter the login and password provided by an IncoreSoft team member
- Click the Log In button to open the Partners Portal
If you have forgotten your password, follow these steps:
- Click the "Forgot Password?" button
- Specify your email address in the Login field
- Click the Reset Password button
- Receive an email with your new password
Usability and Functionality
The Partners Portal interface consists of the following elements:
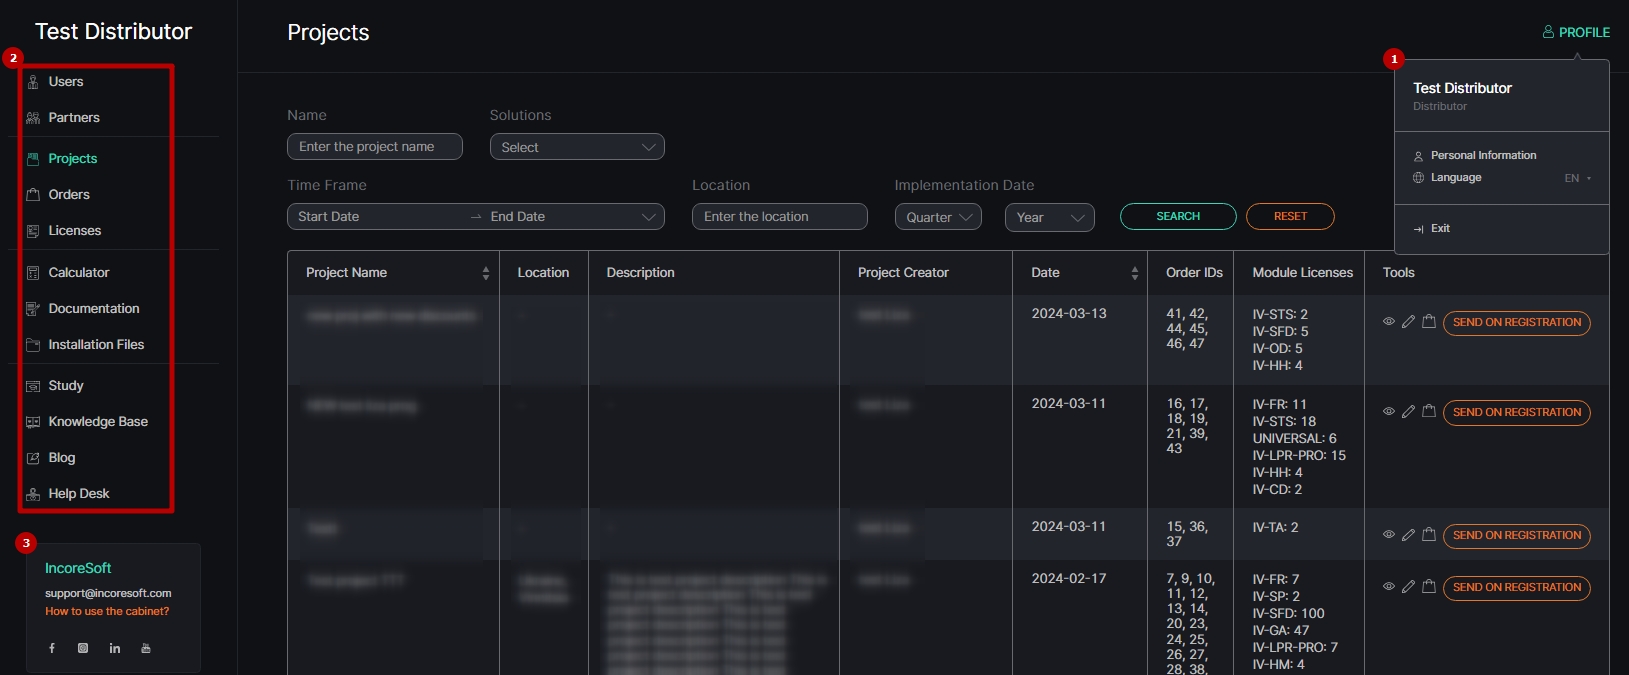
- Profile Menu, which allows to:
- View the username and partner's status
- Change account settings by clicking the Personal Information button
- Change the interface language by selecting the desired language from the drop-down list
- Log out of the Partners Portal by clicking the Exit button
- Main Menu with the following items:
- Users
- Partners
- Projects
- Orders
- Licenses
- Calculator
- Documentation
- Installation Files
- Study
- Knowledge Base
- Blog
- Help Desk
- Info Box, providing:
- IncoreSoft Company's support email address
- Link to this Manual
- IncoreSoft Company's social media links
Access to the items in the main menu varies based on the partner's status:
- Distributors have access to all menu items
- Resellers have access to all menu items, except for Partners, Orders, and Licenses
- Technology Partners have access to the following items only:
- Users
- Calculator
- Documentation
- Installation Files
- Knowledge Base
- Blog
- Help Desk
Personal Information
To change the account settings, select the Personal Information item in the profile menu:
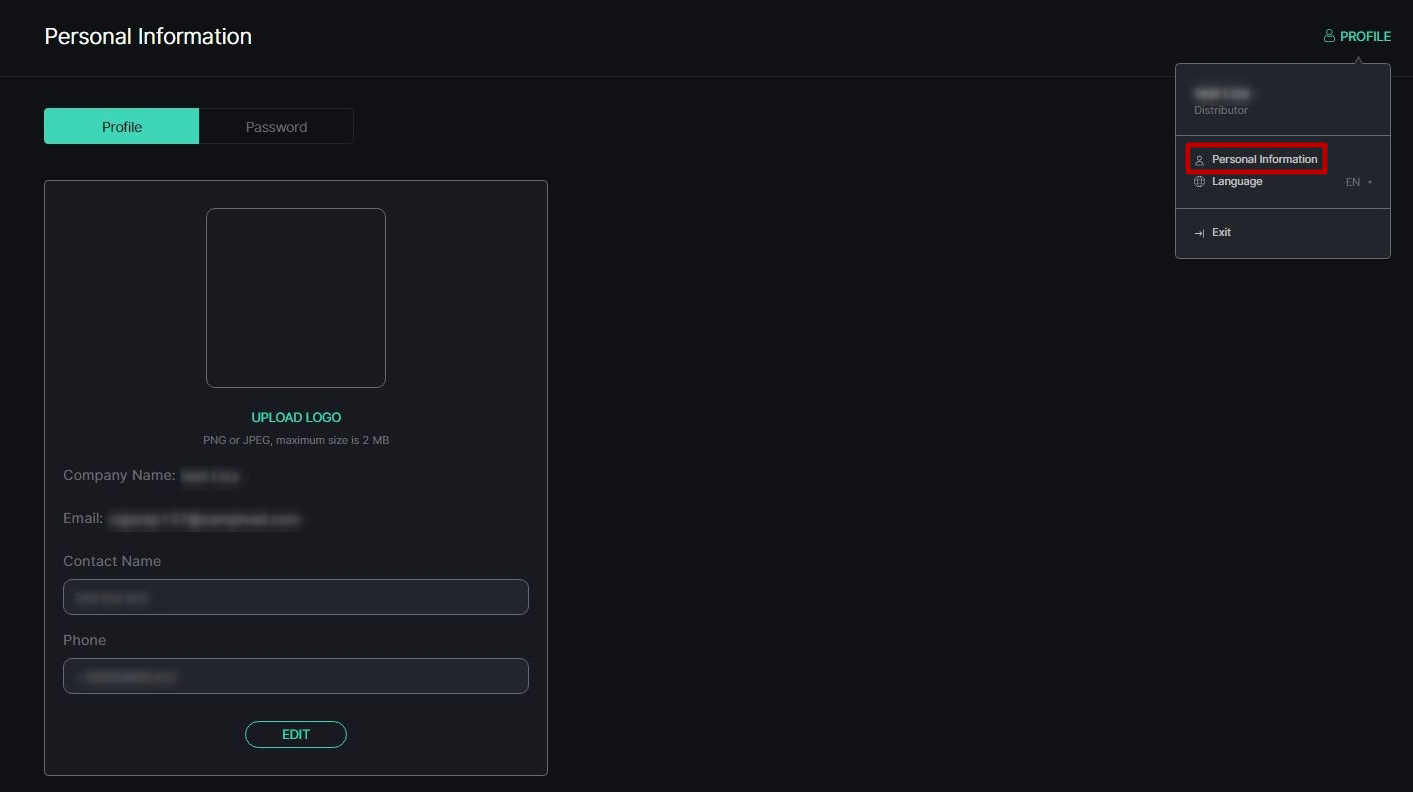
The Personal Information item consists of 2 tabs:
- Profile tab allows modifying the account information:
- Click the Upload Logo button to set the company's logo
- Change contact information in the Contact Name and Phone fields
- Click the Edit button to apply changes
- Password tab allows changing the password:
- Fill in the required fields to set the new password
- Click the Change Password button to apply changes
Users
To manage users, choose the Users item from the main menu:

To add a new user, click the Add User button:

In the Add User pop-up window, proceed with the following steps:
- In the General tab:
- Fill in the required fields
- Click the Next button
- In the Permissions tab:
- Check the boxes next to the desired categories to assign access rights
- Click the arrows next to each category to reveal additional options
- Select the Create button
- A list of created users with their ID, name, email, and status is displayed in the table.
- The Status toggle indicates whether user access is allowed (green) or denied (grey). Click the toggle to switch the status.
To edit the required user parameters, click the Edit icon on the toolbox:

In the Edit User pop-up window, proceed with the following steps:
- In the General tab:
- Make the necessary changes in the required fields
- Click the Next button
- In the Permissions tab:
- Check the boxes next to the desired categories to assign access rights
- Click the arrows next to each category to reveal additional options
- Select the Save button to apply changes
To delete the user:

- Click the Delete icon on the toolbox
- Confirm the intention in the pop-up window
Partners
To manage partners, choose the Partners item from the main menu:

The Partners functional menu offers the following capabilities:

- Enter the partner company name or specific characters to filter partner companies
- Select the partner company's registration country
- Click the Reset button to clear the applied filters
Below is a table displaying the list of partner companies, including the following details:
- Partner company ID
- Partner company name and country of registration
- Name of the distributor to which the partner company belongs
- Partner company status
- Partner company registration date in the system
- Toolbox includes:
- View icon to view detailed information about the selected partner company
- Edit icon to modify the information related to the selected partner company
- View Projects icon to view only the projects associated with the selected partner company
To create a new partner company, click the Create Partner Company button:

In the Create Partner Company pop-up window, proceed with the following steps:
- In the Company tab:
- Fill in the required fields
- Click the Next button
- In the Partner tab:
- Type a short description of the new partner company
- Click the Next button
- In the User tab:
- Enter a new login and password for the partner company's account
- Provide the full name and phone number of the partner company's contact person
- Click the Create button
In the Users tab of the Create Partner Company pop-up window:
- Click the Generate Password icon to automatically generate a password.
- Click the Display Password icon to view the entered/generated password.
Projects
To manage projects, choose the Projects item from the main menu:

The Projects functional menu provides the following capabilities:
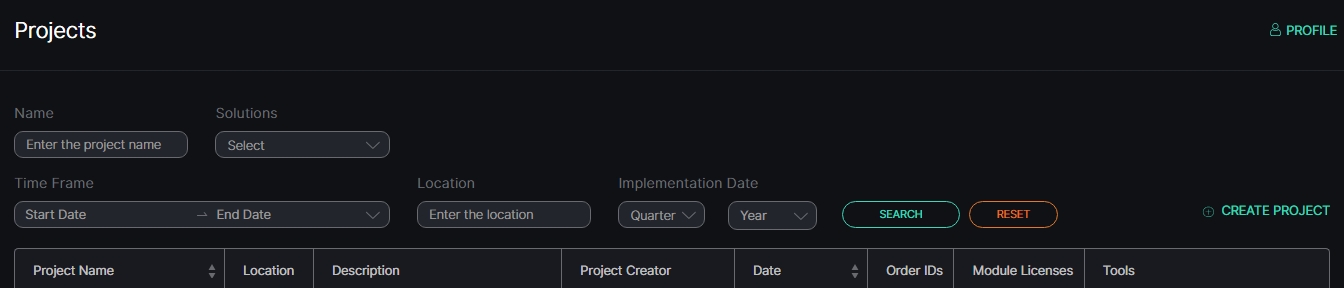
- Enter the project name or specific characters to filter projects
- Select the solution for the project from the drop-down list
- Set the time frame within which the projects were created
- Enter the project location
- Select the project implementation date (year and quarter) from the drop-down list
- Click the Search button to initiate the filtering process
- Click the Reset button to clear the applied filters
The table below displays the list of projects, including the following information:
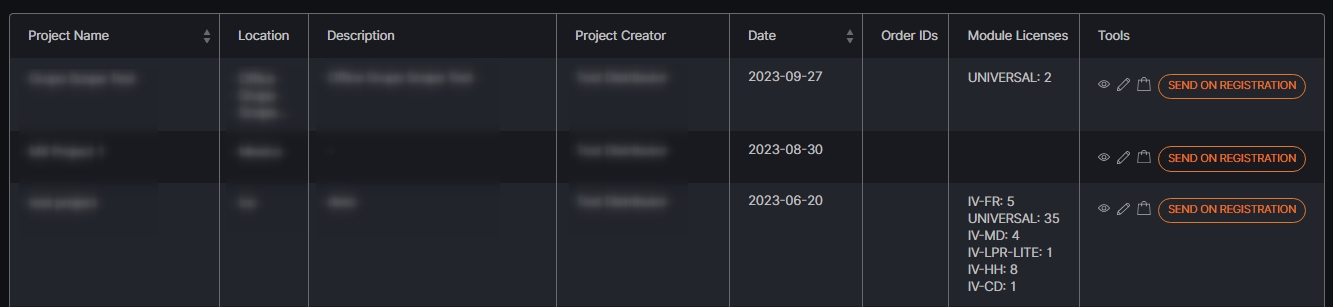
- Project name, location, and description
- Name of the project creator
- Date the project was created
- IDs of all orders related to the project
- Number of active licenses associated with the project
- Toolbox comprises:
- View icon, to view information about the selected project
- Edit icon, to change the required project parameters
- Create Order icon, to create orders for real licenses upon the selected project (available for distributors only)
- Send on the Registration button for distributors to submit the project for confirmation
- Submitted projects have different confirmation statuses, including:
- Pending Confirmation
- Confirmed
- Rejected
- Project confirmation may take some time. Kindly wait while the vendor confirms the project.
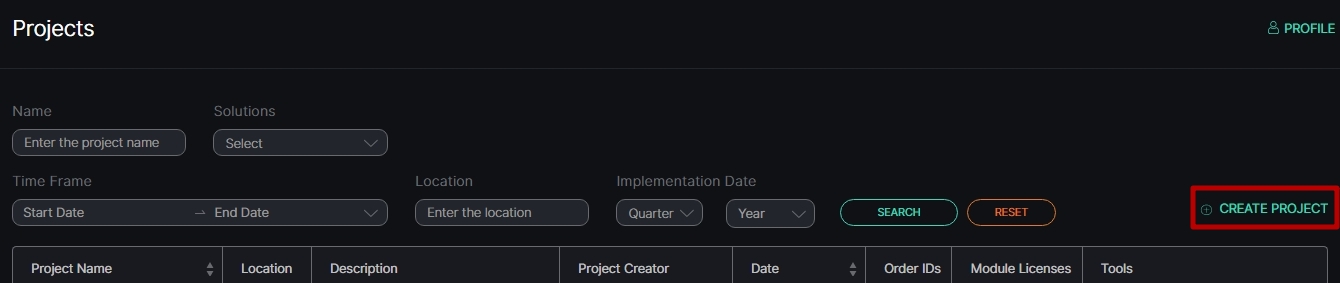
To create a new project, click the Create Project button:
In the Create Project pop-up window, proceed with the following steps:
- In the General tab:
- Fill in the required fields
- Select the solution for the project from the drop-down list
- Click the Next button
- In the Partner tab:
- Select the reseller partner company from the drop-down list
- Click the Next button
- In the Client tab:
- Fill in the required fields regarding the client's company
- Click the Next button
- In the Finances tab:
- Set the budget for the new project
- Select the project implementation date (year and quarter)
- Click the Save button
Orders
- The Orders item is exclusively accessible to distributors. The functionality within the Orders item depends on the permissions granted to distributor users.
- The vendor does not have the capability to create or edit the orders; this task is exclusively assigned to distributors.
- The distributors bear full responsibility for discount verification.
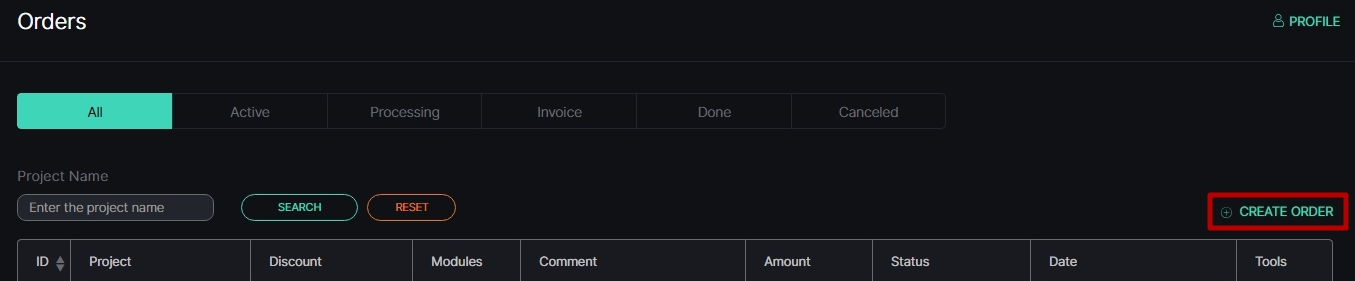
To manage orders, choose the Orders item from the main menu:

The Orders functional menu provides the following capabilities:
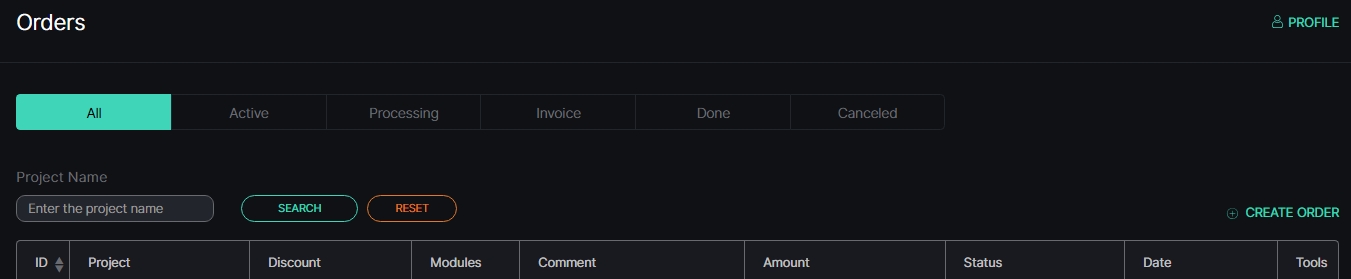
- Move among the main tabs to filter orders by status:
- All
- Active
- Processing
- Invoice
- Done
- Canceled
- Enter the project name to filter orders by a specific project
- Click the Search button to initiate the filtering process
- Click the Reset button to clear the applied filters
- The Active order status designates newly created orders that have yet to be processed.
- The Processing order status indicates orders currently being worked on by the vendor, with corresponding document preparation underway.
- The Invoice order status refers to orders for which the vendor has already prepared documents and is currently generating license keys.
- The Done order status signifies completed orders for which the vendor has generated license keys and prepared all necessary documents.
- The Canceled order status applies to orders canceled by either the distributor or the vendor.
The table below displays the list of orders, including the following information:
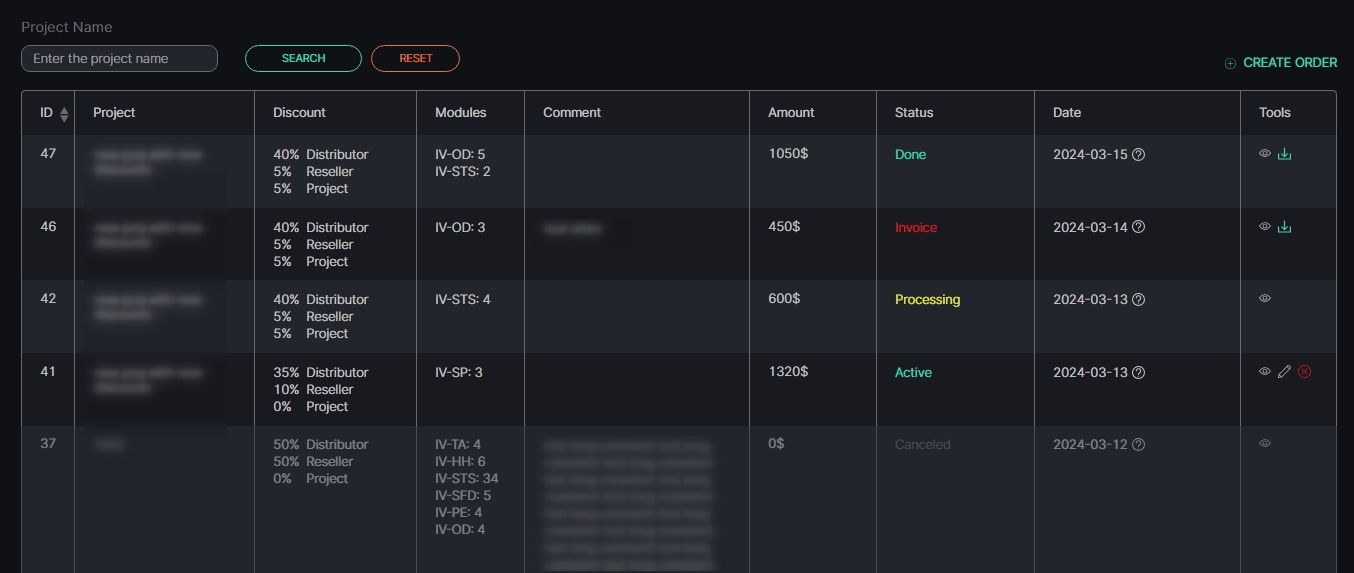
- Order ID
- Name of the project to which the order applies
- Order discount information according to a project
- List of included modules for licensing
- Comment to the order
- Total amount in $ for ordered licenses
- Order status
- Order creation date
- Toolbox comprises:
- View button, to view all information about the required order
- Edit button, to manually edit the required parameters in the order
- Decline button, to cancel the project
- Download Invoice button, to select and download the required documents
- The Edit and Decline buttons are available only for orders with the Active status.
- The Download Invoice button is available only for orders with Invoice and Done statuses.
To create a new order, click the Create Order button:
In the Create Order pop-up window, proceed with the following steps:
- In the Project tab:
- Select the required project from the drop-down list
- Verify the automatically populated reseller and client details
- Click the Next button
- In the Modules tab:
- Select the required module from the drop-down list
- Set the number of channels for the selected module
- Click the Add License button to apply the settings
- Click the Next button
- In the Details tab:
- Choose licensing preferences:
- Generate a single license key for all channels in all modules in the order
- Generate a single license key for all channels in each module type (separate keys for each module in the order)
- Generate separate license keys for each channel in the order
- Select Other if none of the above options are suitable for your needs
- Provide additional details in the Comment field below, including your licensing preferences description (if you selected "Other"), specify the order details, or list the required documents
- Choose licensing preferences:
- In the Amount tab:
- Verify the distributor, reseller, and project discounts
- Review the price, and total amount with and without discount for licenses in the order
- Click the Save button to submit the order
- The Smart Parking module operates under any desired type of IV-LPR or UNIVERSAL license.
- Once the order is submitted, it obtains the Active status. Distributors can edit or cancel the order only at this stage.
- During order editing, parameters can only be manually modified within the Modules and Details tabs; changing the project at this stage is no longer possible.
To view the detailed order information, click the View button. The Order Information pop-up window allows to:
- In the General tab:
- View the general information about the order
- Enter a custom comment about the order
- In the Amount tab:
- View the ordered licenses
- Check license price and total order amount with and without a discount
- In the Licenses tab:
- View the created license key(s) for the order based on licensing preferences
- Click the Copy License Key icon to easily copy the required license key to the clipboard
- Click the View icon to see the license information for the desired license key
- Click the Export PDF button to download a PDF file containing all generated license keys for the order and their activation status
- In the History tab: Review user actions related to the order, along with the date and time of these actions
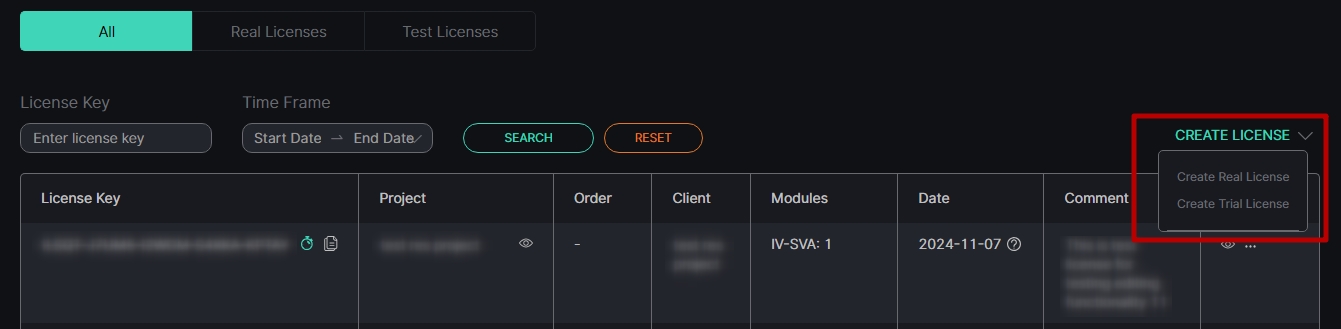
Licenses
To manage licenses, choose the Licenses item from the main menu:

The Licenses functional menu provides the following capabilities:
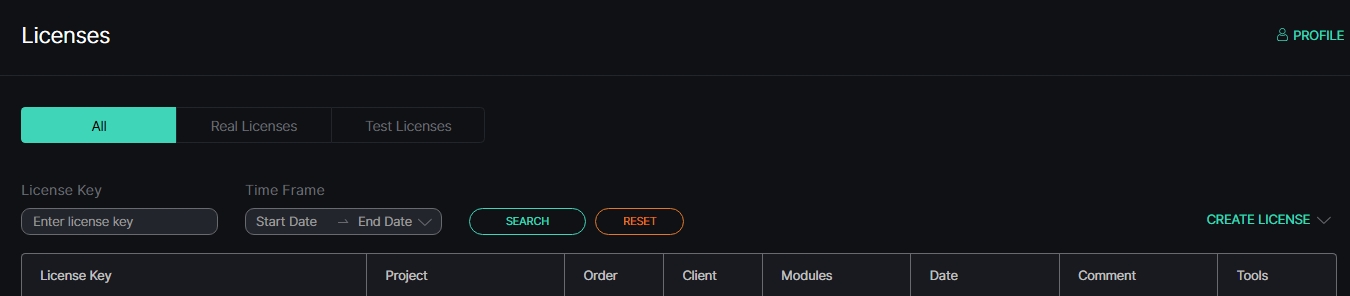
- Move among the main tabs to filter licenses by type:
- All
- Real Licenses
- Test Licenses
- Enter the license key or characters in the license key to expedite the search process
- Set the time frame within which the license was created
- Click the Search button to initiate the filtering process
- Click the Reset button to clear the applied filters
The table below displays the list of licenses, including the following information:
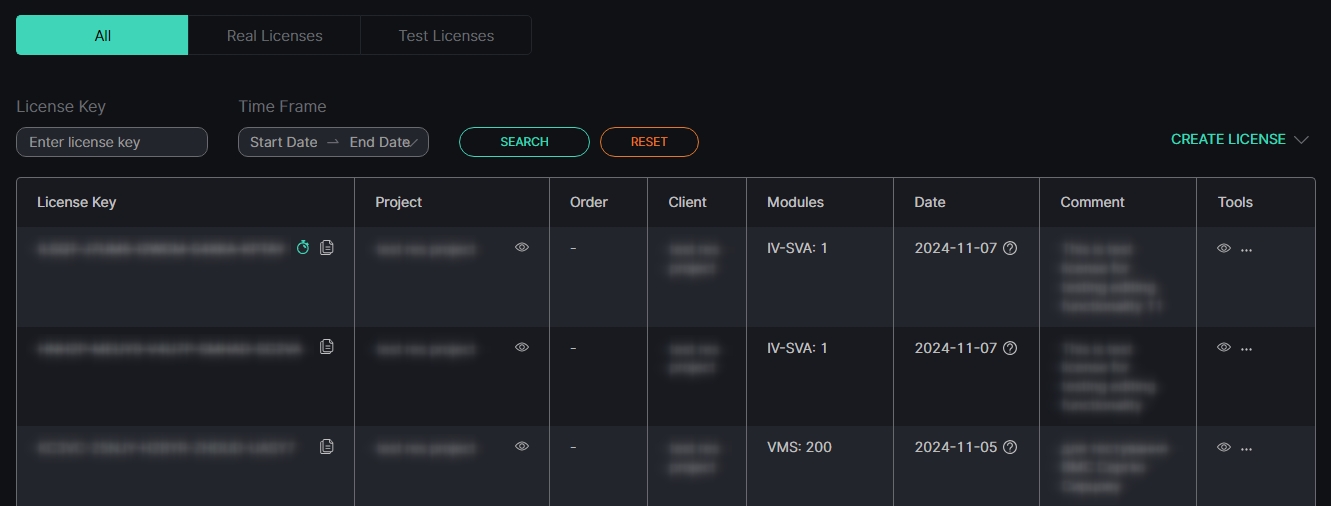
- License Key and additional options:
- Test License icon, to visually distinguish test licenses in the general list:
- Green icon for active licenses
- Orange icon for expired licenses
- Copy the License Key icon, to easily copy the required license key to the clipboard
- Test License icon, to visually distinguish test licenses in the general list:
- Name of the project to which the license applies
- ID of the order related to the license
- Name of the client partner company for which the license was created
- List of included modules
- License creation date
- Comment to the license
- Toolbox comprises:
- View icon, to view information about the selected license
- Additional Download Certificate option, to download the PDF license certificate
To create a new license, hover the mouse over the Create License button and select the desired new license type from the drop-down menu:
In the Add License pop-up window, proceed with the following steps:
- In the Project tab:
- Optionally, select the desired order (applicable only for real licenses)
- Select the required project from the drop-down list
- Verify the automatically populated reseller and client details
- Click the Next button
- In the Modules tab:
- Select the required module from the drop-down list
- Set the number of channels for the selected module
- Click the Add License button to apply the settings
- Click the Next button
- In the Validity tab:
- Set the license validity period:
- In days for the Number of Days option
- Until the selected date for the Expiration Date option
- Set the service period (applicable only for real licenses)
- Type any additional comment
- Click the Create button
- Set the license validity period:
- The License Validity Period for trial licenses is limited to 60 days from the date of creation.
- Only one trial license per project is permitted.
- The trial license is limited to a maximum of 10 channels in total.
- To obtain access rights for creating test licenses, contact the vendor beforehand.
- The Smart Parking module operates under any desired type of IV-LPR or UNIVERSAL license.
Calculator
To calculate the necessary hardware parameters, choose the Calculator item from the main menu:

To perform the calculation:
- Select the desired hardware type:
- Server
- Desktop
- Click the Hardware block and check the boxes next to the required CPU and GPU hardware options
- Select the analytics modules from the drop-down list and adjust other parameters as needed:
- Number of cameras
- CPU/GPU hardware acceleration
- Analytics FPS
- Codec
- Resolution
- Camera FPS
- Keyframe
- Click the Add Module button to select additional analytics modules
- Click the Delete icon to delete the selected module
- Click the Calculate button to start the calculation
- Click the Reset button to clear the applied parameters
- Select the Export PDF button to download the calculation report
Leveraging keyframes in analytical processes reduces the decoding chip workload, enabling efficient operation focused on individual keyframes (the decoding chip processes one keyframe per second instead of all 25 frames). The following analytics can operate on a keyframe:
- Heat Map
- Motion Detection
- Smart Tracking System
- Smoke & Fire Detection
- If you didn't find the CPU/GPU you need in the Hardware block, skip all options in the Hardware block and proceed with the calculation by other required parameters. In the calculation results:
- For CPU: Pay attention to the specified required number of CPU points and compare the CPU you need based on this criterion. If the desired CPU has an equal or greater number of CPU points, it meets this criterion.
- For GPU:
- Pay attention to the specified required number of CUDA cores and compare the GPU you need based on this criterion. If the desired GPU has at least 20% more CUDA cores than the specified quantity, it meets this criterion.
- Consider the number of decoding chips in the required GPU. A GPU must have at least one decoding chip. The more decoding chips present in a single GPU, the greater the number of streams it can process independently, without the need for additional GPUs.
- Refer to the GPU Selection Recommendations for Video Analytics documentation to select a GPU that is fully compatible with video analytics.
Documentation
To access the IncoreSoft VEZHA documentation and related materials, choose the Documentation item from the main menu:
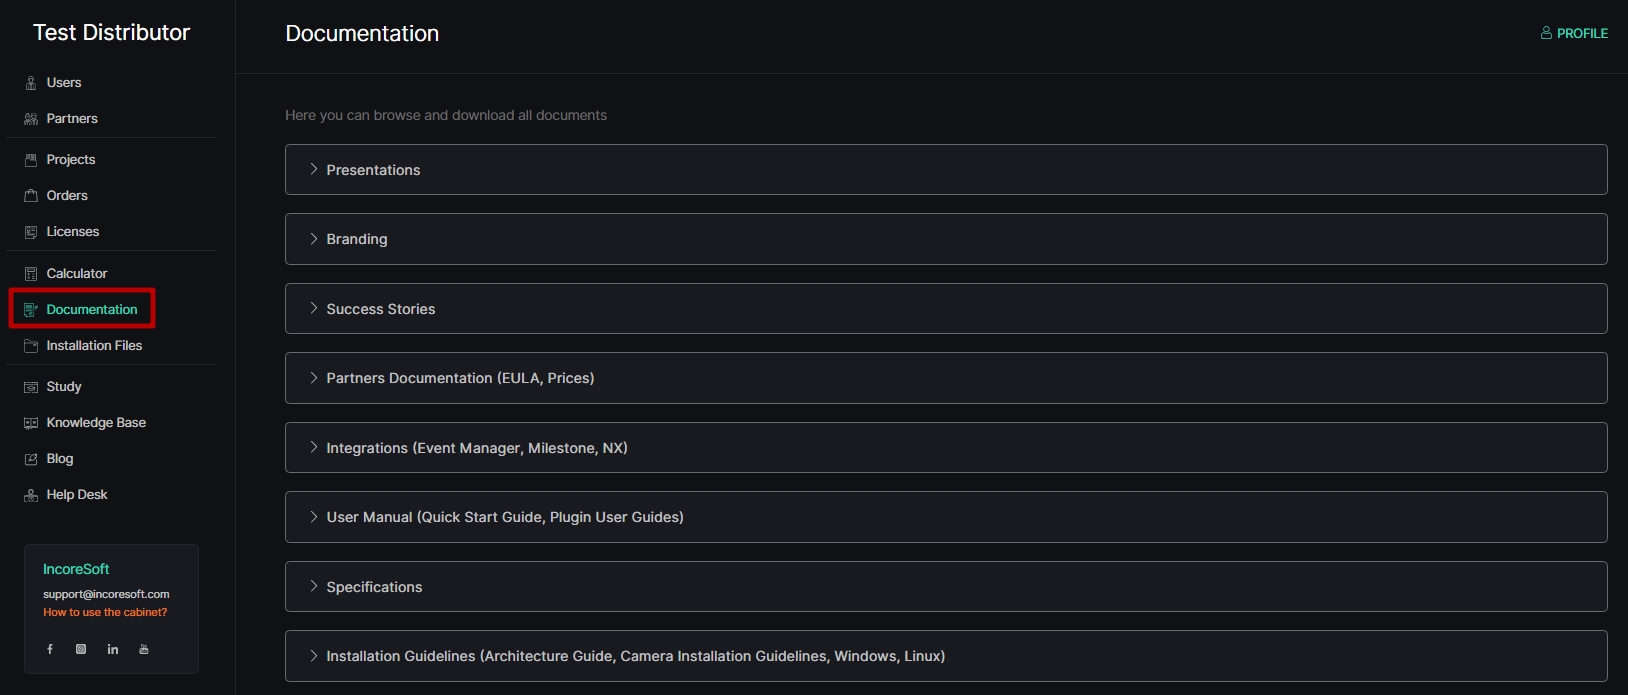
The documentation offers a comprehensive range of resources, including:
- Product Presentations
- Branding Materials
- Success Stories
- Partners Documentation:
- EULA
- Prices (only available for distributors)
- Integration Guides:
- Event Manager
- Milestone
- NX
- Analytics System User Manual:
- Quick Start Guide
- Plugin User Guides
- Specifications
- Installation Guidelines:
- Architecture Guide
- Camera Installation Guidelines
- Analytics System Installation Manual for Windows
- Analytics System Installation Manual for Linux
Installation Files
To obtain the IncoreSoft VEZHA software installation files, choose the Installation Files item from the main menu:
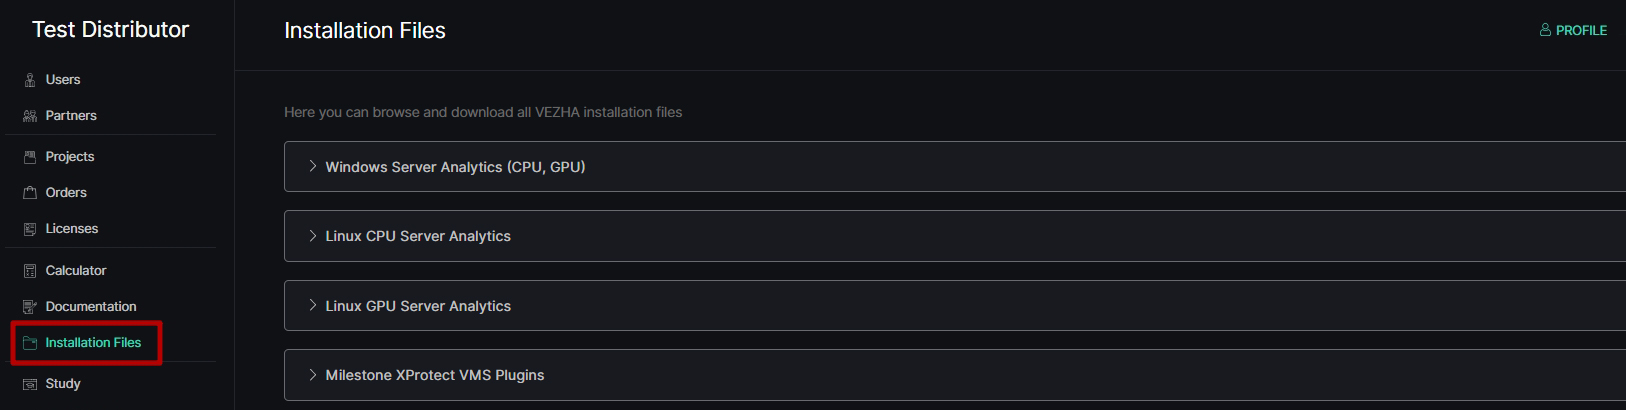
The installation files available for download include:
- Windows Server Analytics (CPU, GPU)
- Linux CPU Server Analytics
- Linux GPU Server Analytics
- Milestone XProtect VMS Plugins
Study
To access the VEZHA courses and enhance your knowledge, choose the Study item from the main menu:
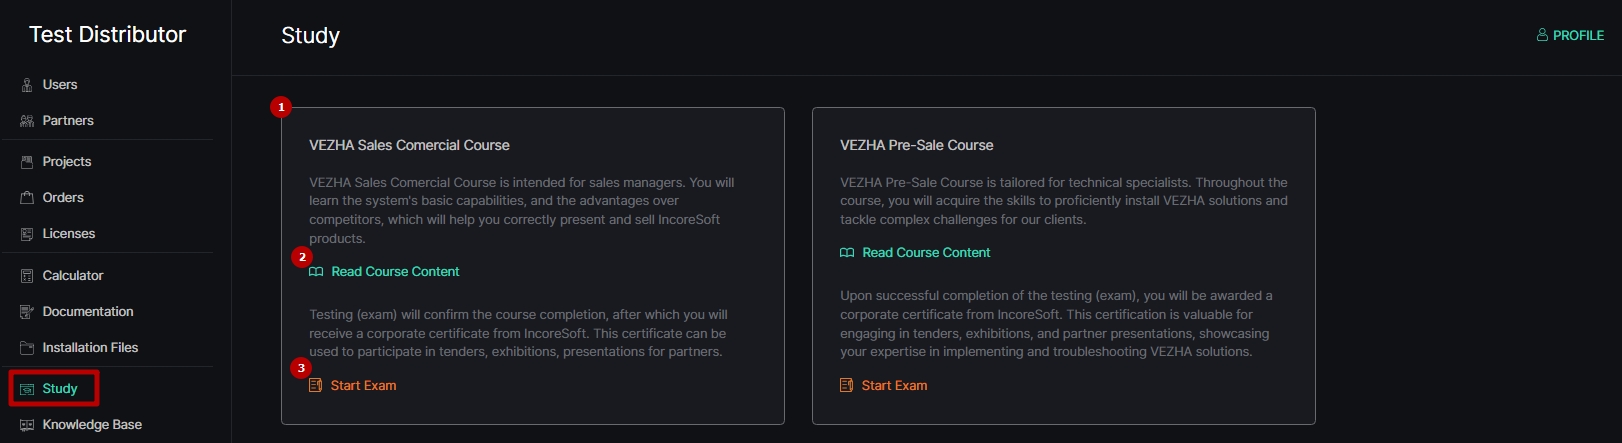
- Select the desired course:
- VEZHA Sales Commercial Course
- VEZHA Pre-Sale Course
- Click the Read Course Content button to start learning
- Click the Start Exam button to demonstrate your knowledge and obtain the VEZHA sales specialist certificate
Exam Conditions:
- Allocate Time: Set aside a guaranteed 30 minutes for the examination.
- Achieve Passing Grade: Aim to answer at least 75% of the questions correctly for successful certification.
- Use Multiple Attempts: Take advantage of up to three attempts to pass the exam.
Knowledge Base
To access the IncoreSoft VEZHA system guides and documentation, choose the Knowledge Base item from the main menu.
The Knowledge Base menu includes the following options:
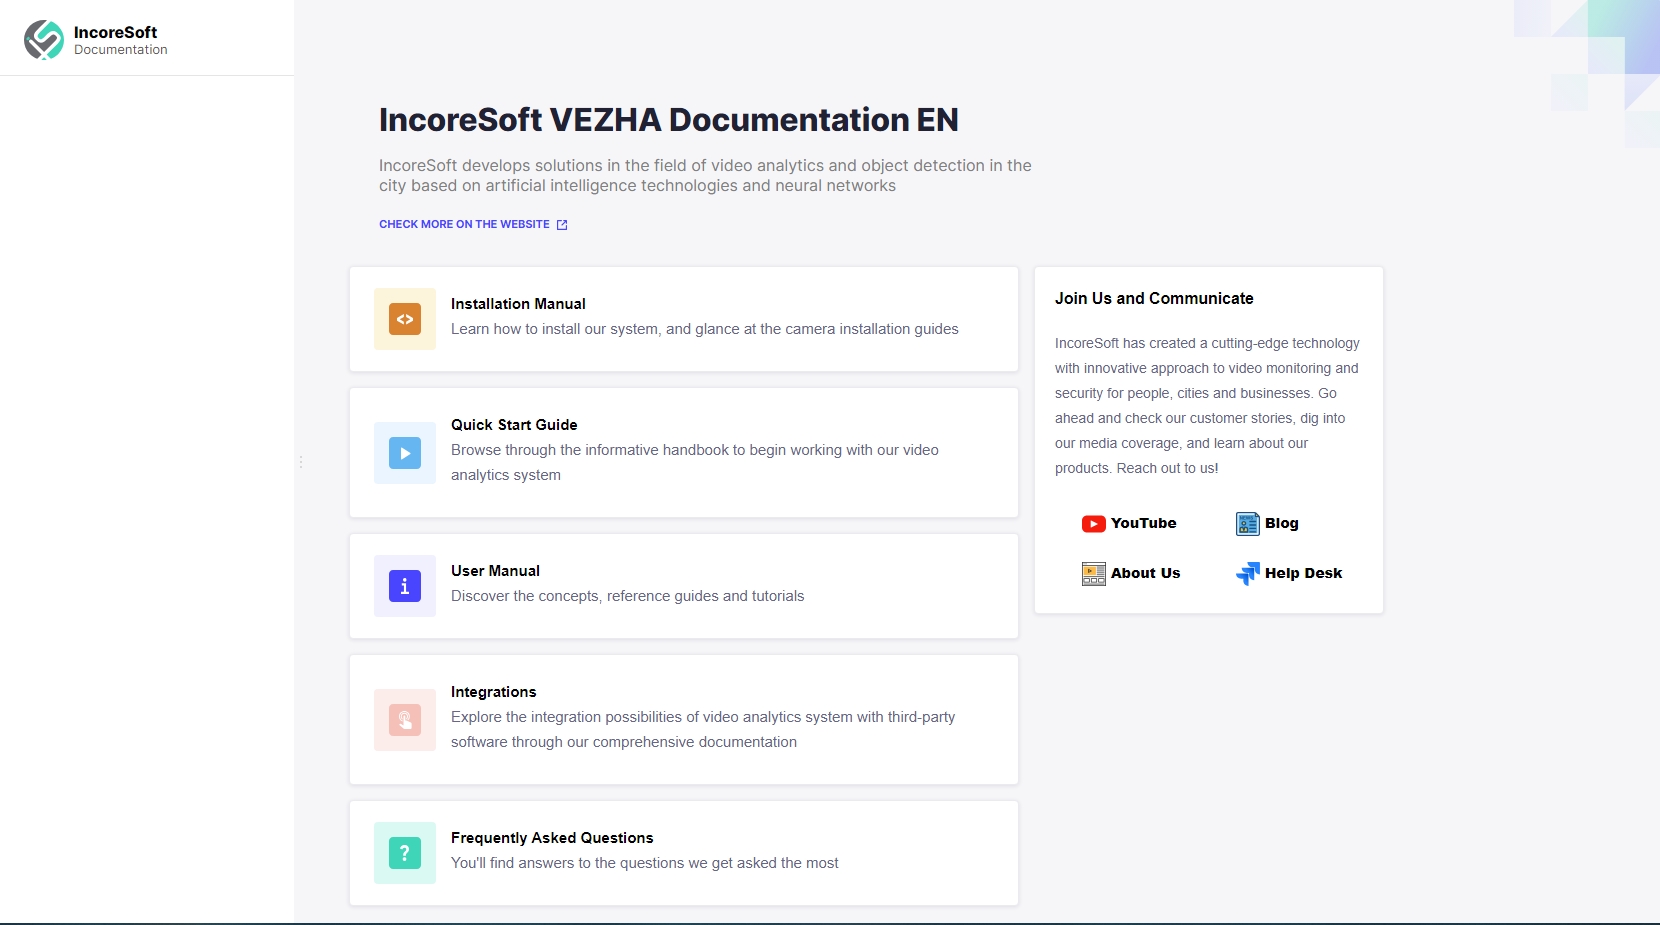
- Installation Manual
- Quick Start Guide
- User Manual
- Integrations
- Frequently Asked Questions (FAQs)
Blog
To access the IncoreSoft blog posts, choose the Blog item from the main menu.
The Blog features articles covering various topics, including:
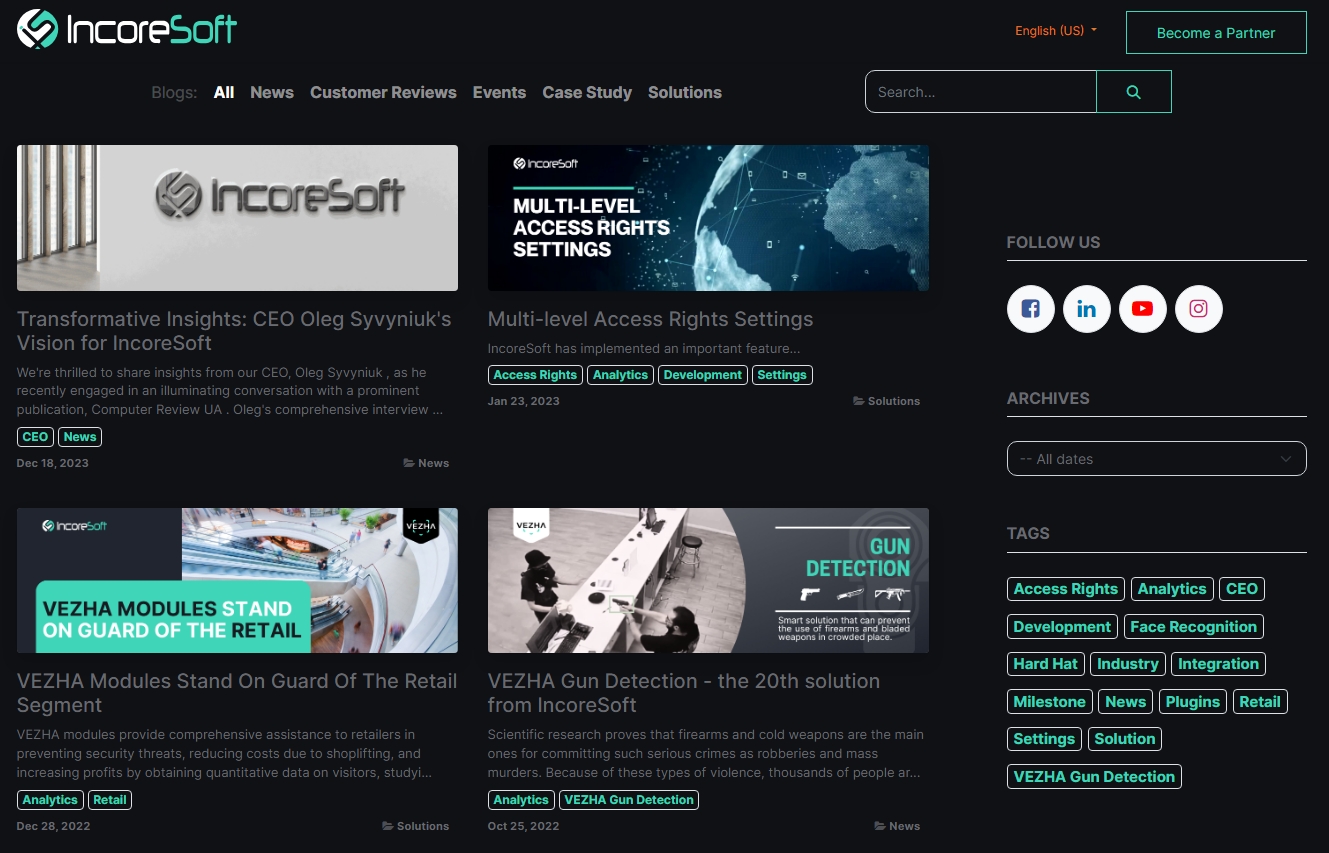
- News
- Customer Reviews
- Events
- Case Study
- Solutions
Help Desk
To get in touch with IncoreSoft support regarding a specific request, choose the Help Desk item from the main menu.
The Help Desk request menu includes the following options:
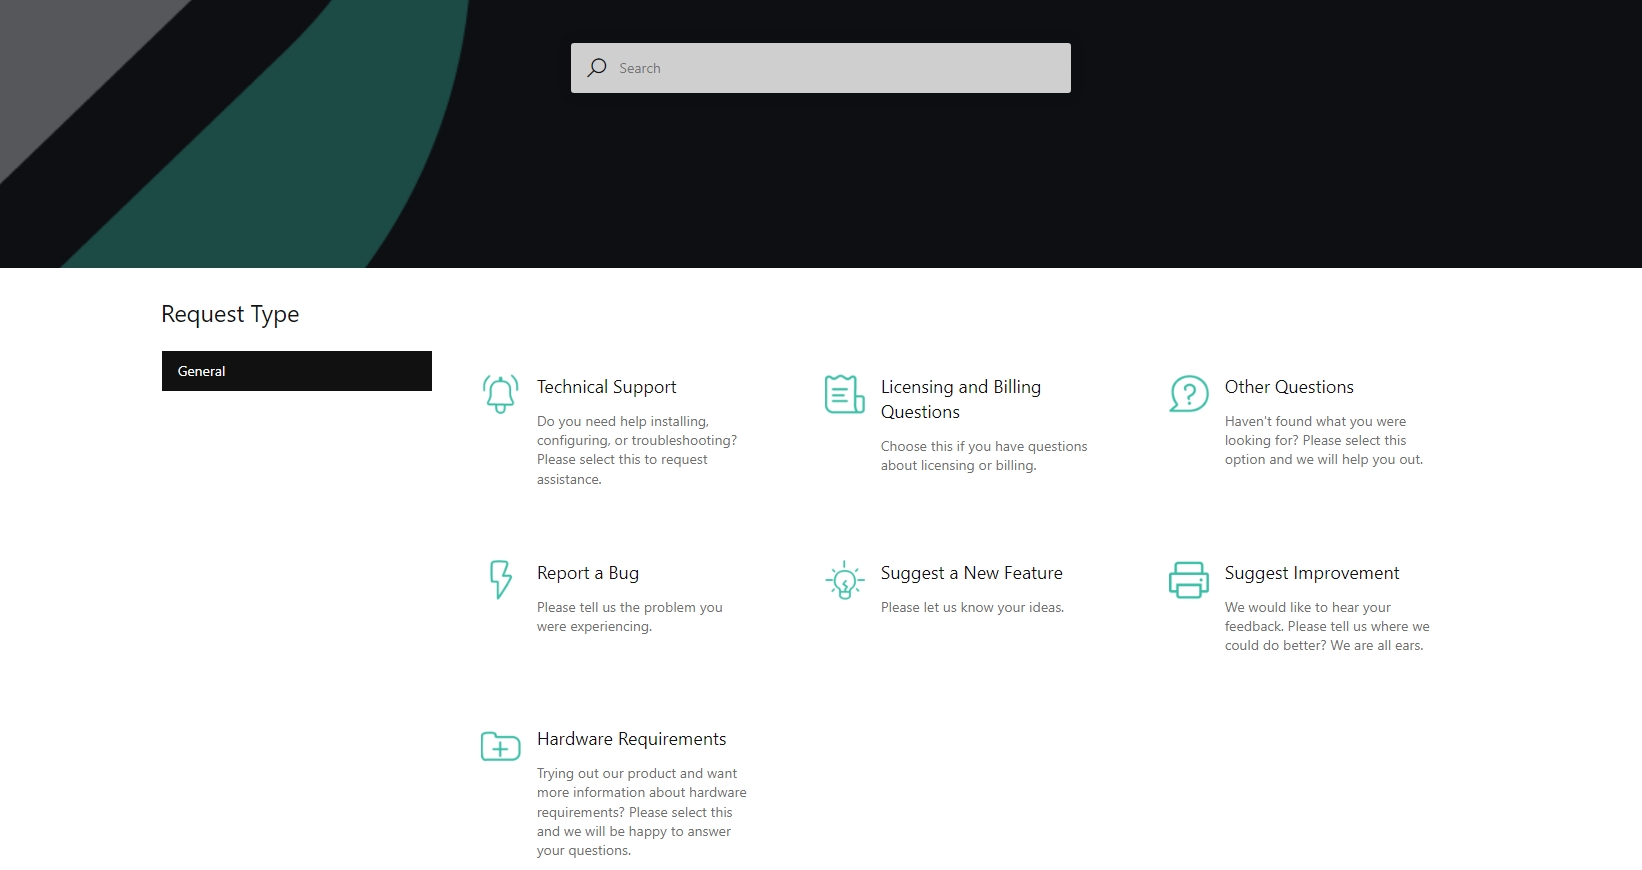
- Technical Support
- Licensing and Billing Questions
- Other Questions
- Report a Bug
- Suggest a New Feature
- Suggest Improvement
- Hardware Requirements
To submit a request, select the desired category from the Help Desk request menu and proceed with the following steps:
- Fill in the required fields
- Attach any necessary files
- Click the Create button