Settings: Manage Vehicles
This page comprises the Manage Vehicles tab overview and options to manage vehicle cards. This tab allows linking the vehicle to the company structure, to let each vehicle be assigned a parking space in a predetermined zone.
Overview
Select the Manage Vehicles tab in the tabs menu:

Use and Functionality
The Manage Vehicles functional menu allows to:

- Enter the license plate number to filter vehicles
- Select multiple tags from the drop-down list
- Click the Find button to start filtering
- Click the Reset button to clear the filters
- Click the Export button to download the list of added vehicles in the CSV format
- Click the Import button to upload the CSV file with multiple vehicle numbers
The exported CSV file's content comprises a list of license plate numbers with tags as shown in the example:
number;tags
JV1544;white_list,supplier
KV5794;white_list,staff
KH7652;white_list,staff
- The CSV file for import should have data structured the same way: string 1 contains the "number;tags" capture, while string 2, 3, etc., contains content data (license plate number with tags separated by commas). Ensure that the number and tags are separated by a semicolon within each string.
- If the CSV file for import contains tags that have not been added to the system yet, they will be added automatically after importing.
See the filtered vehicle cards in the table below. It contains:
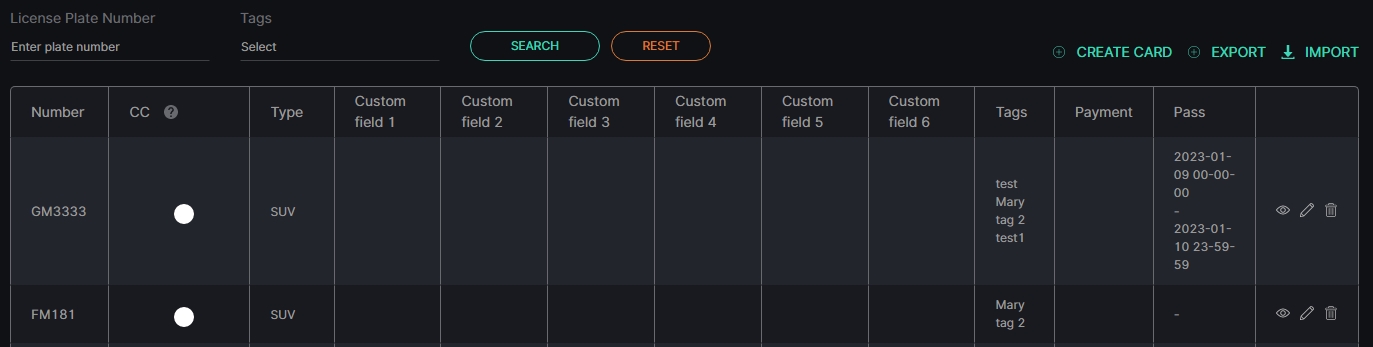
- License plate number
- Country of registration, color, and type of the vehicle
- Custom vehicle fields
- Vehicle tags
- Payment for the vehicle
- Time frame for which the vehicle has a pass to the territory
- Toolbox comprises:
- View Card
- Edit Card
- Delete Card
Create Vehicle Card
To create a new vehicle card, select the Create Card button. In the Create Vehicle Card pop-up window:
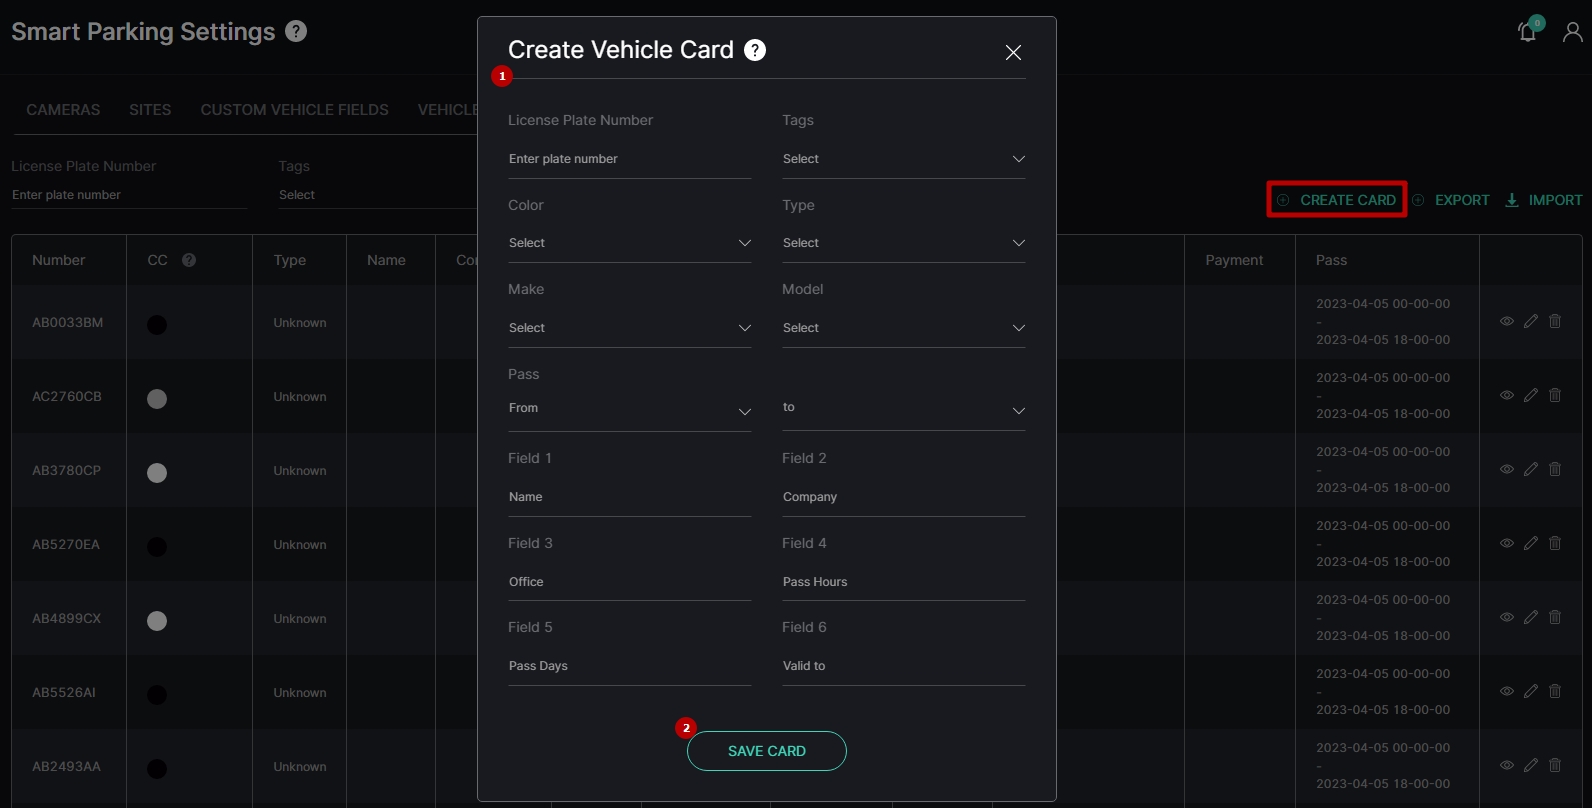
- Fill in the fields:
- Enter the license plate number
- Select from the drop-down lists:
- Multiple vehicle tags
- Color
- Type
- Make and Model
- Select pass time frames
- Enter required vehicle information in the custom vehicle fields
- Click the Save Card button
Edit Vehicle Card
To edit the vehicle card, click the Edit icon on the toolbox:
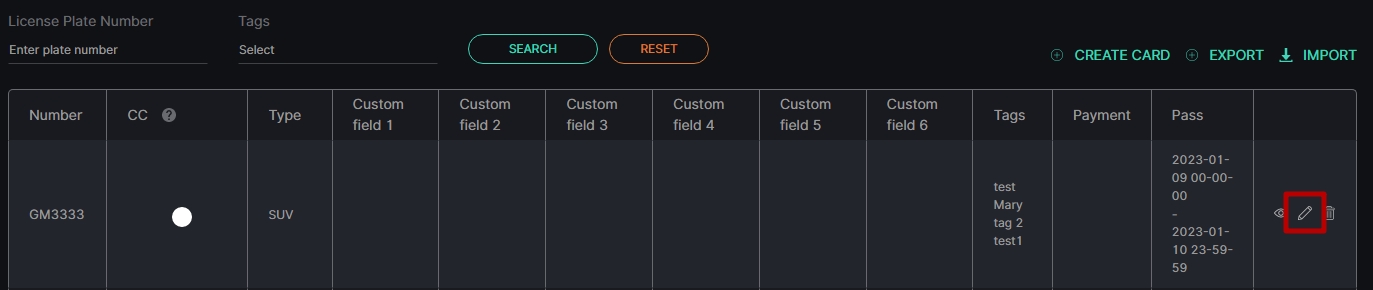
All parameters configured during the creation of a vehicle card are editable.
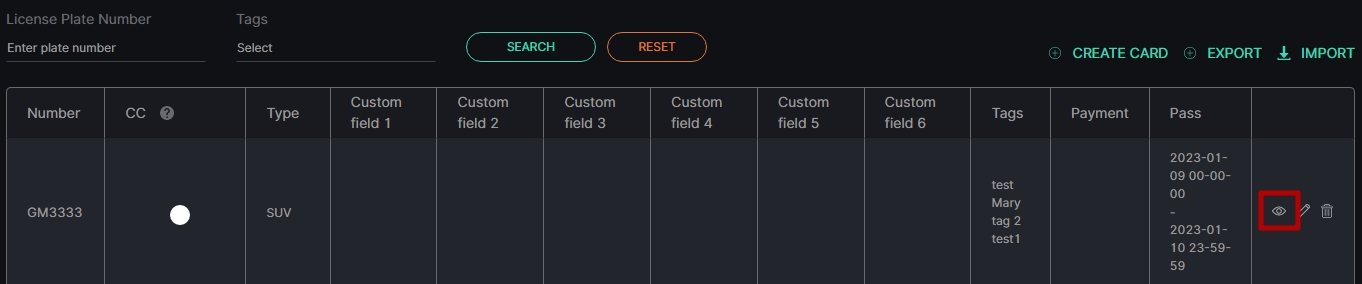
View Vehicle Card
To view the required vehicle card, select the View icon on the toolbox:
The Vehicle Information view mode comprises:
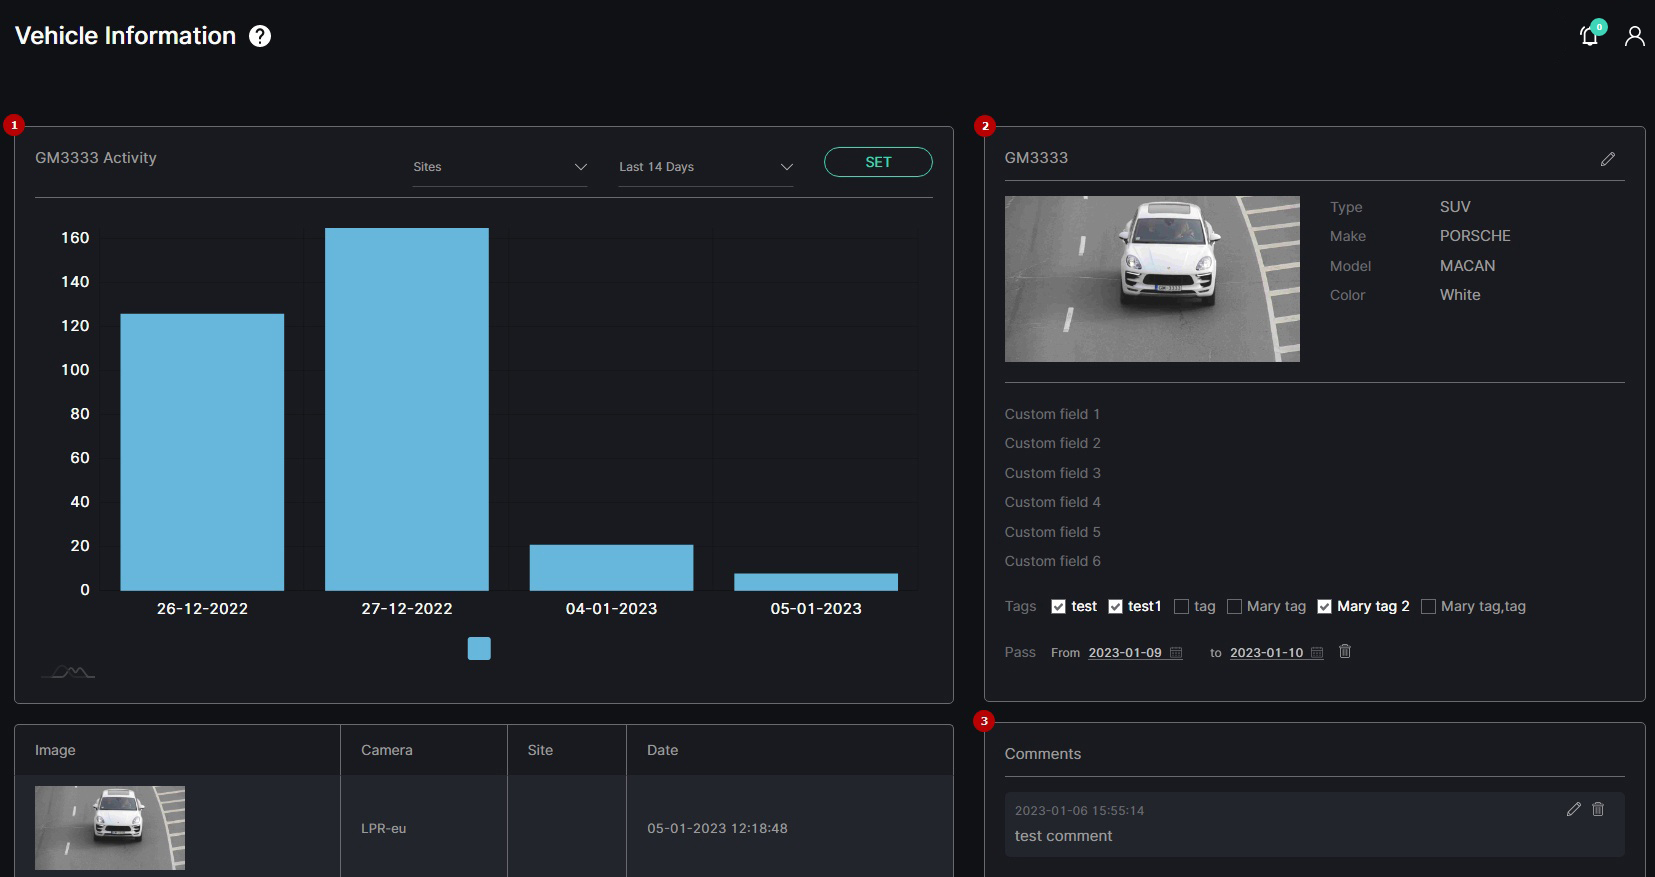
- Activity block
- Vehicle Data block
- Comments block
Activity Block
The Activity block allows to:
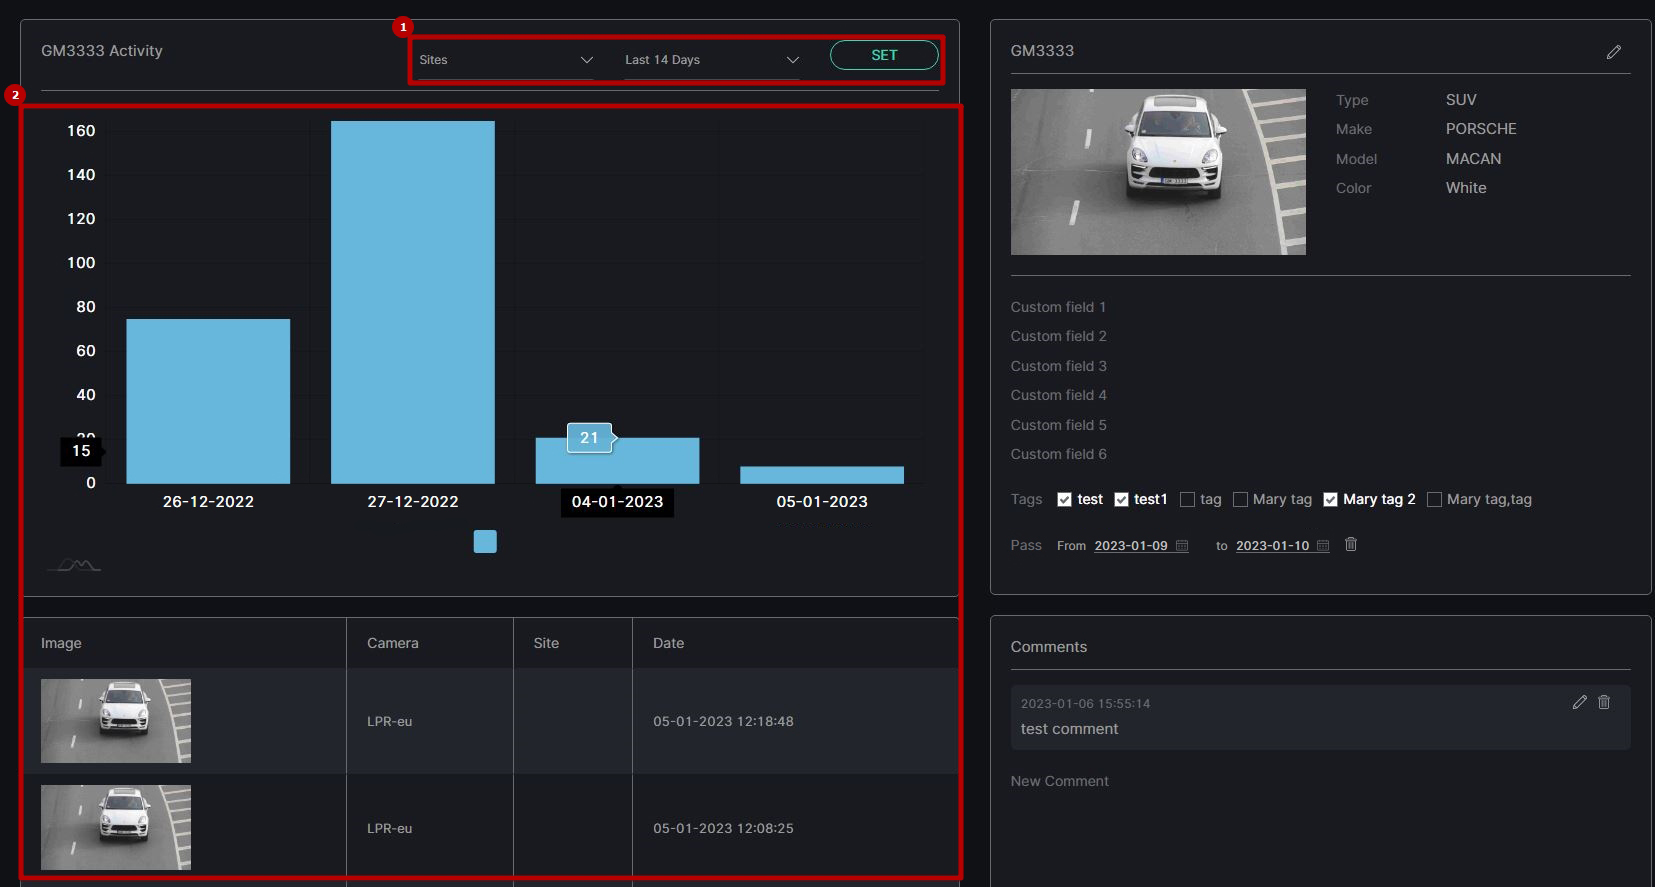
- Set filters:
- Select multiple sites from the drop-down list
- Select the required time frame from the drop-down list (up to the last 14 days)
- Click the Set button to start filtering
- View vehicle activity statistics:
- View the column chart with the date and vehicle detection quantity upon selected sites
- Hover the mouse over the desired column to view the exact vehicle detection quantity for the required date
- Take a closer look at each vehicle detection in the table below
Vehicle Data Block
The Vehicle Data block allows to:
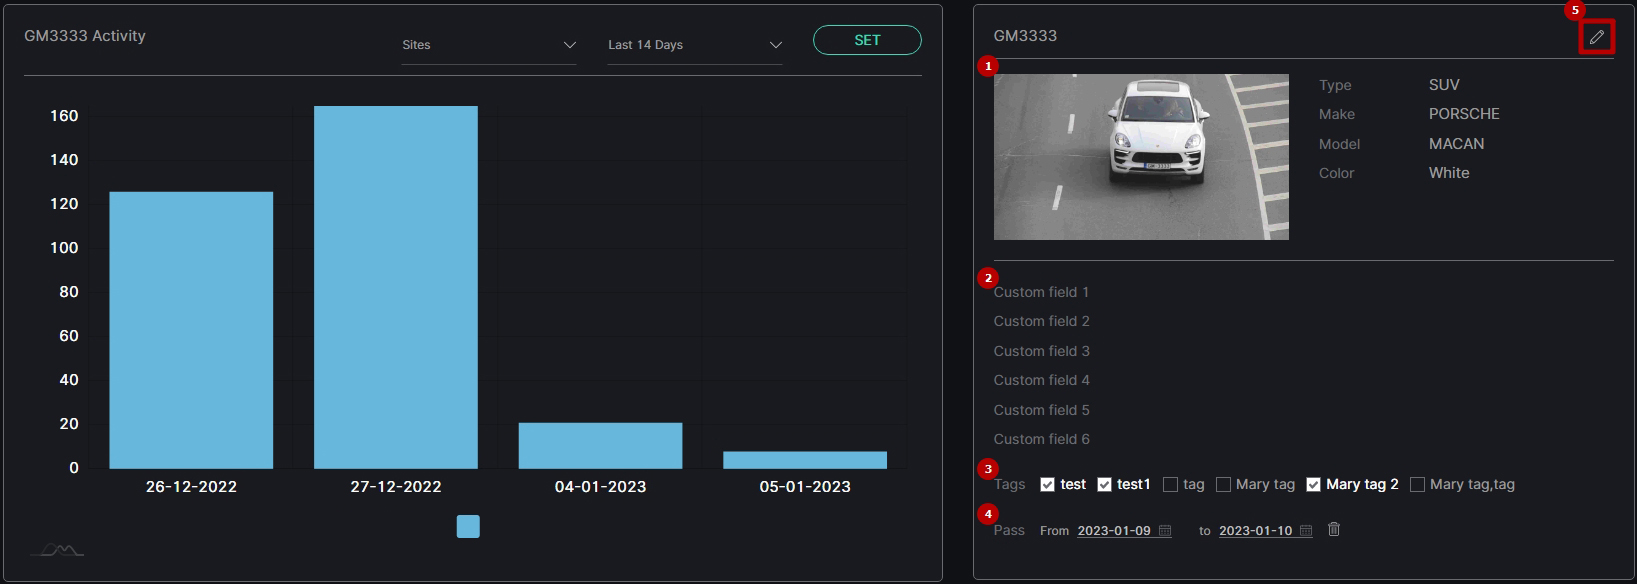
- View the vehicle data including:
- Frame with the vehicle
- Color
- Make and model
- Type
- View custom vehicle fields
- View vehicle tags and manage them manually by checking the boxes
- Manage vehicle pass:
- To create a pass:
- Click the Create Pass button
- Select the required time frame in the pop-up window
- Click the Save Pass button
- To delete the pass:
- Click the delete icon next to the pass time frame
- Confirm the intention in the pop-up window
- To create a pass:
- Edit the Vehicle Card data by clicking the Edit icon in the upper-right corner of the block
Comments Block
The Comments block allows to:
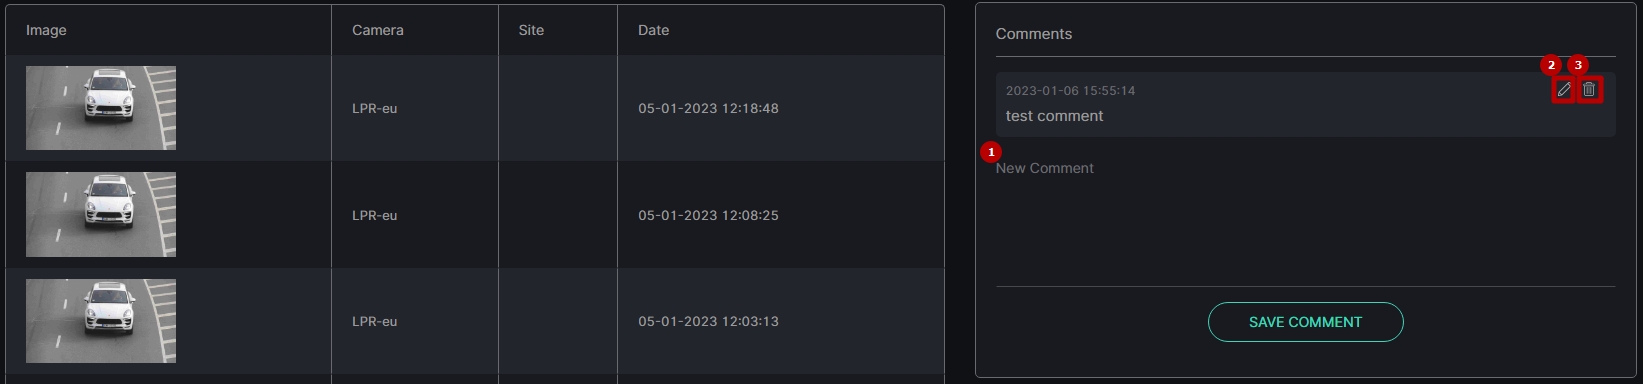
- Add a new comment to the vehicle:
- Type a comment in the text field
- Click the Save Comment button
- Edit the existing comment:
- Select the Edit icon next to the required comment
- Type another comment
- Click the Edit button to save changes
- Delete the comment:
- Select the Delete icon next to the required comment
- Confirm the intention in the pop-up window
Delete Vehicle Card
To delete the vehicle card:
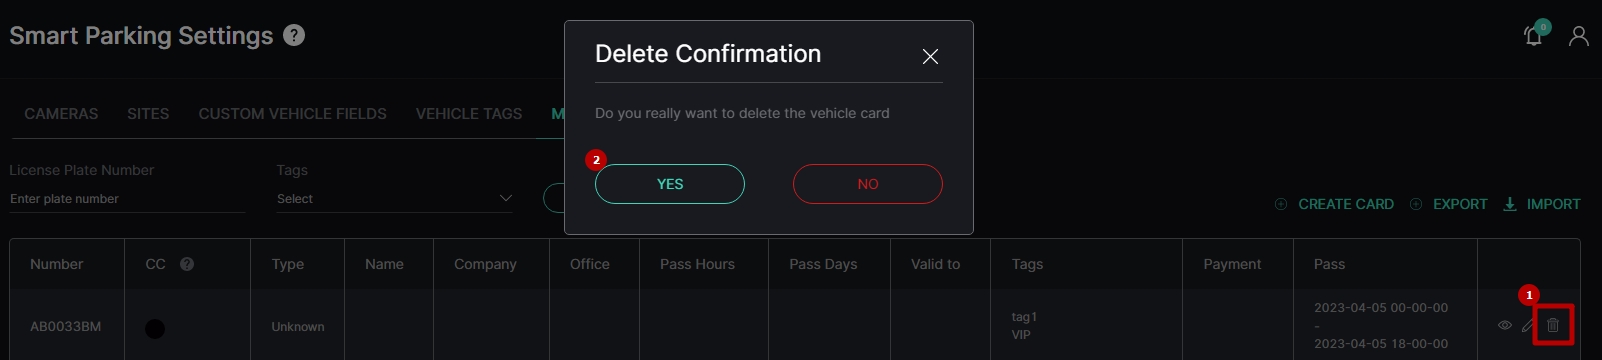
- Select the Delete icon on the toolbox
- Confirm the intention