Lists: Lists
Overview
Select the Lists tab in the tabs menu:

Use and Functionality
The Lists tab functional menu allows to:

- Enter the list name or characters in the name to filter lists
- Select the Reset button to clear the filters
See the filtered lists in the table below. It contains:

- List name
- Number of vehicles included in the list
- Total number of video streams involved in the list
- List color
- List creation date and time
- Enabled/Disabled list toggle
- Toolbox comprises:
- Edit List
- Delete List
- View List
Off List Notification Settings
To set up notifications about recognized license plates out of lists select the Off the List button:

In the Off List Notification Settings pop-up window:
- Click the Camera parameter to choose the desired video analytics. In the pop-up window:
- Check the boxes next to the required video analytics and folders
- Click the Select Video Analytics button
- Check the Internal Notification box to allow the system to send all notifications to the Events tab of the Lists item
- Check the Send Events to Event Manager box to allow the system to send all notifications about license plates out of lists to the Event Manager and then to external resources
- Click the Save button
Create List
To create a new list, click the Create List button:

The Create List pop-up window allows to:
- Configure the General Settings tab's parameters:
- Enter the list name
- Click the Camera parameter to select the desired video analytics. In the pop-up window:
- Check the boxes next to the required video analytics and folders
- Click the Select Video Analytics button
- Type a comment to the list in the Notes field
- Click on the Color block to pick a color for the list
- Configure the Notifications tab's parameters:
- Check the Internal Notification box to allow the system to send all notifications related to the list to the Events tab of the Lists item
- Check the Send Events to Event Manager box to allow the system to send all notifications about license plates in the list to the Event Manager and then to external resources
- Configure the Permissions tab's parameters:
- Assign list access rights for Roles:
- Select the required role from the drop-down list
- Click the Add Role button
- Select the checkboxes for the required access rights
- Click the Delete icon to remove the unnecessary role
- Assign list access rights for Users:
- Select the required user from the drop-down list
- Click the Add User button
- Select the checkboxes for the required access rights
- Click the Delete icon to remove the unnecessary user
- Select the checkboxes for the required list access rights by default
- Assign list access rights for Roles:
- Click the Save button to save parameters and create a new list
- The Permissions tab's default parameters are active only if no Roles or Users are added.
- The quantity of added Roles and Users in the Permissions tab is not limited.
- Checking the Internal Notification box allows getting event notifications only in case the Enabled/Disabled list toggle is turned on.
Once the list is created with the checked Internal Notification box, the Enabled/Disabled list toggle is turned on, and at least one of the selected analytics is enabled, the Notification icon signals about each new event notification. Click the Notification icon to open the Notification Panel. It comprises:
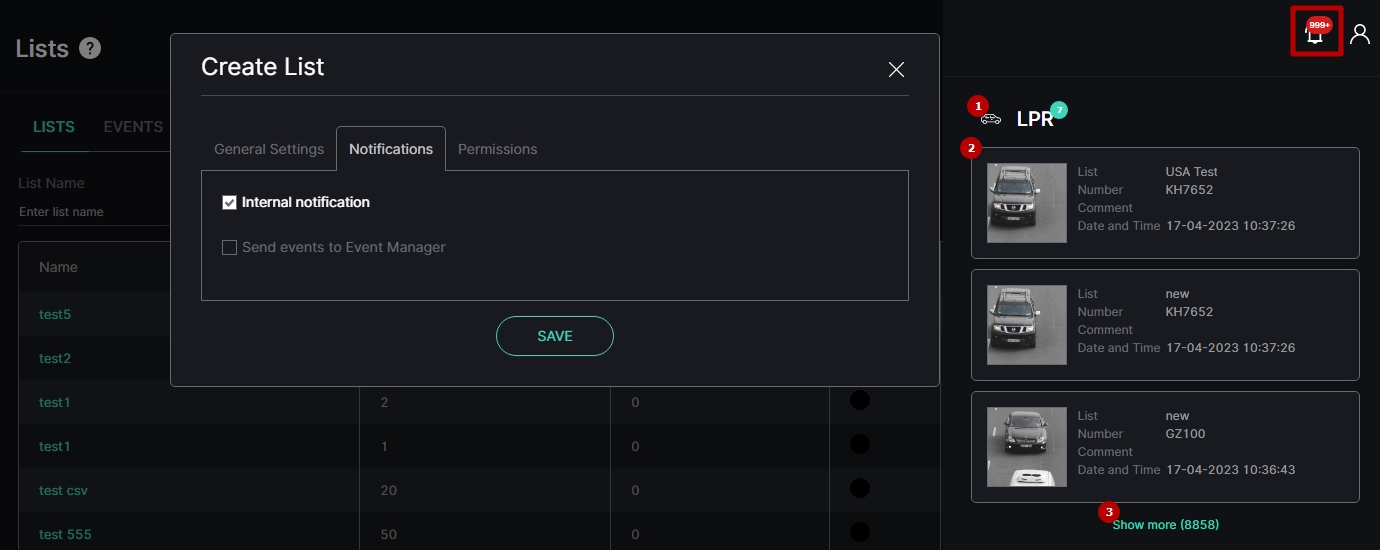
- Plugin name box to:
- Collapse/expand the list of event notifications by clicking the plugin name
- Clear all plugin event notifications at once from the Notification Panel by clicking the Close button (this action doesn't affect events in the Events tab of the Lists item)
- Event notification box to:
- View short event information and frame preview for up to 3 last notifications
- Open the event pop-up window by clicking the required notification
- Clear the desired event notification from the notification list by clicking the Close button inside the box (this action doesn't affect the event in the Events tab of the Lists item)
- Show More button with the total events number to open the Events tab of the Lists item and view all events
List Permissions Configuration
For example, it is necessary to give full access to a new list to all users related only to a specific role, and at the same time, to restrict the vehicle card managing access rights in the list for one of the users related to this role. For this purpose:
- In the Roles item of the Settings section assign all required LPR permissions to the role, including:
- View Vehicle Lists
- Add New Vehicle to List
- Edit Vehicle List Elements
- Delete Vehicle List Elements
- In the Users item of the Settings section assign the selected role to all required users
- In the Create List pop-up of the Lists item open the Permissions tab
Configure the parameters in the Permissions tab:
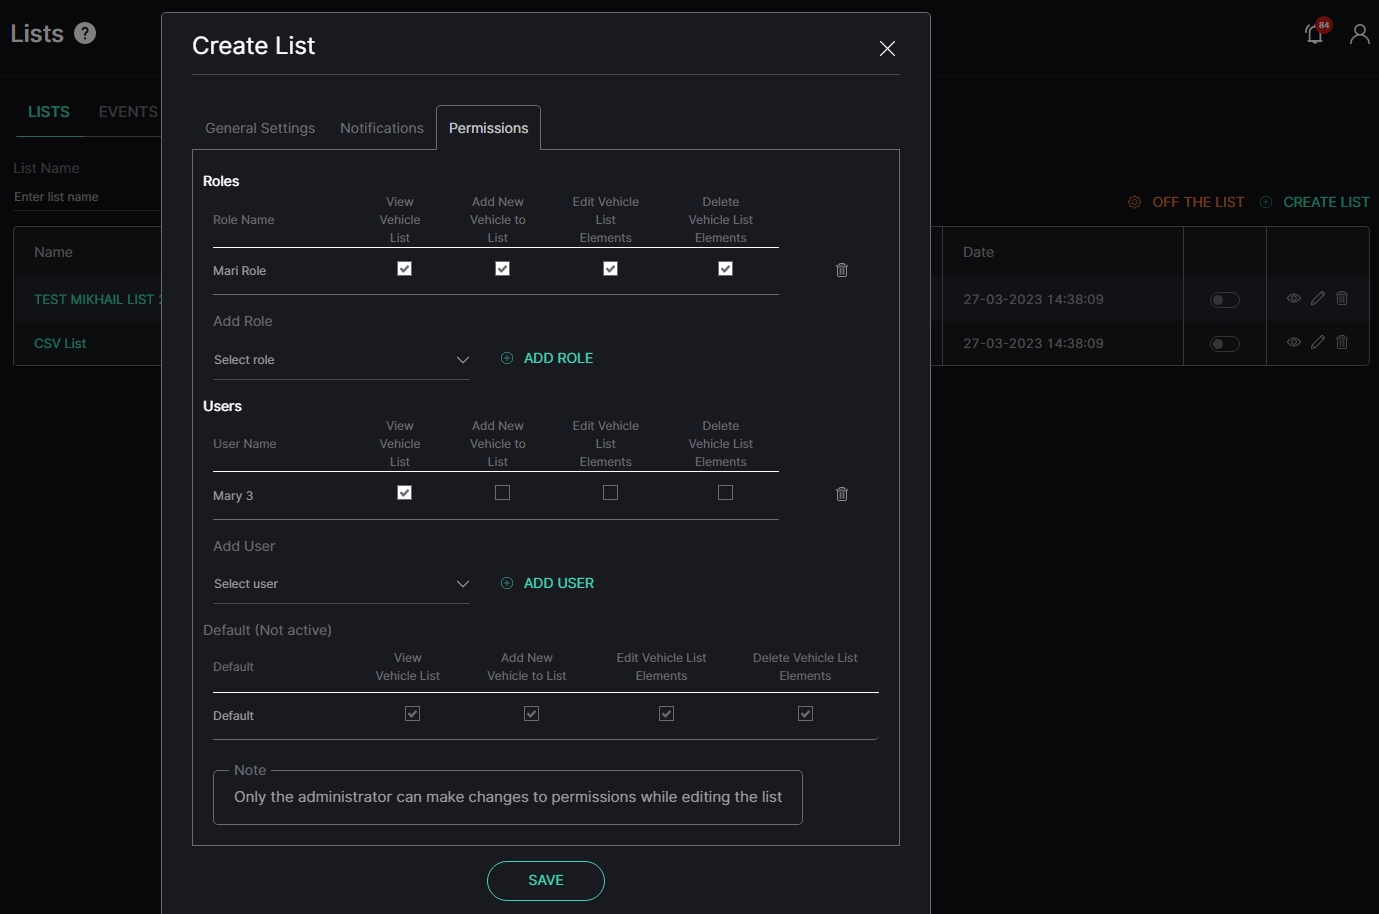
- In the Roles block, add the required role and check all access rights boxes
- In the Users block, add the required user and check only the View Vehicle Lists access right box
- Finish the list configuration and save it
Once the list is created, all users with the selected role can view the new list and manage vehicle cards in it. At the same time, the additionally selected user can only view the new list but cannot manage vehicle cards in this list.
- User permissions are with higher priority than Role permissions.
- The sequence of access rights validation in the list by the system:
- Global permissions
- User permissions
- Role permissions
- Default permissions
Edit List
To edit the list, select the Edit icon on the toolbox:

To view editing list parameters, read Create List.
Delete List
To delete the list:
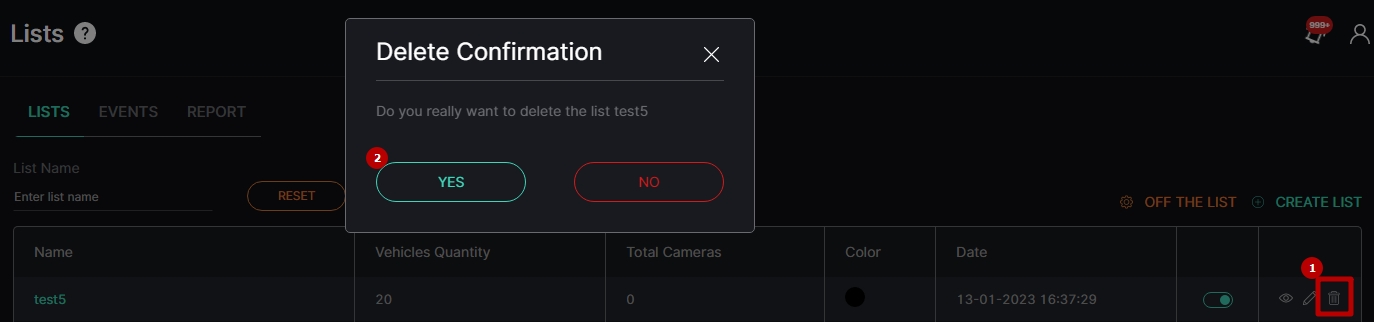
- Select the Delete icon on the toolbox
- Confirm the intention
View List
To view the list, select the View icon on the toolbox:

The List View functional menu comprises:

- List Info Box contains:
- List parameters
- Edit List tool
- Delete List tool
- Filters to:
- Enter the license plate number to filter vehicles
- Click the Reset button to clear the filters
- Add License Plate button to add a license plate number to the list. In the pop-up window:
- Enter the desired license plate number
- Type a comment to the vehicle in the Message field
- Click the Save button
- Options to import and export the list of vehicle information cards in CSV
See the list of license plate numbers in the table below. It contains:

- License plate number
- Author's username and comment
- Date and time the number was added to the list
- Toolbox comprises:
- Edit Card
- Delete Card
- View Card
Edit Card
To edit the vehicle information card, select the Edit icon on the toolbox:

In the pop-up window:
- Change the license plate number
- Type a comment to the vehicle in the Message field
- Choose another list to move the vehicle card
- Click the Save button
Delete Card
To delete the vehicle card:
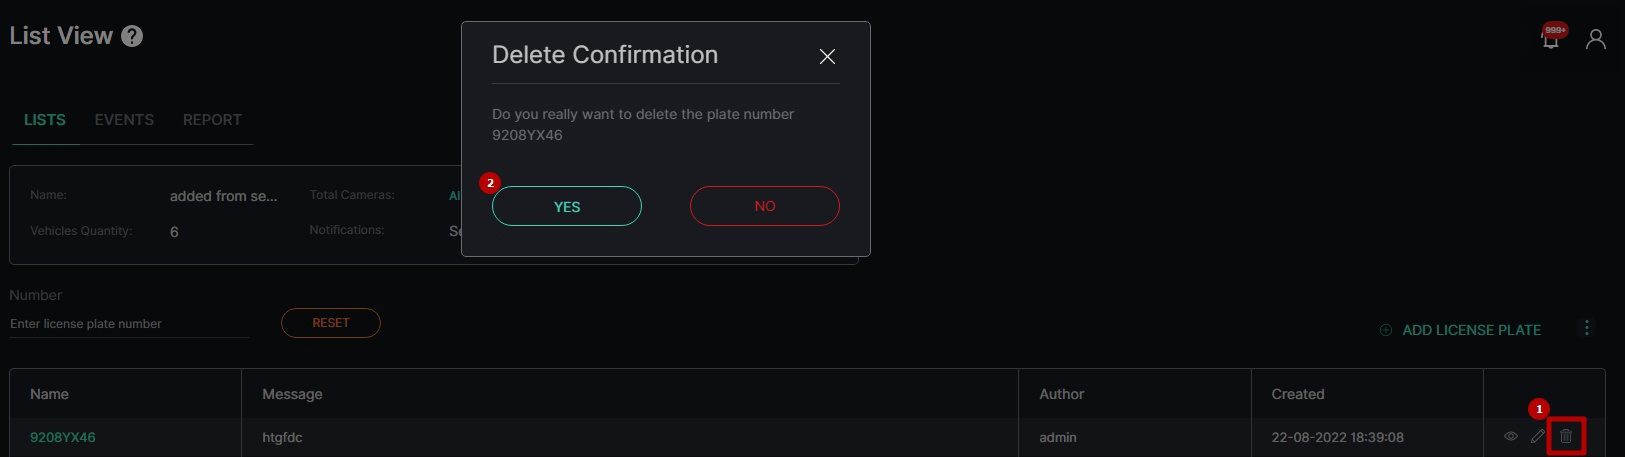
- Select the Delete icon on the toolbox
- Confirm the intention
View Card
To view the required vehicle card, select the View icon on the toolbox:

The Card Info Box contains:

- Vehicle info
- Frame with a vehicle
- Enlargement icon over the frame preview to view the image in the full-size
- Edit Card tool
- Delete Card tool
The vehicle's Events Log in the table below allows users to:
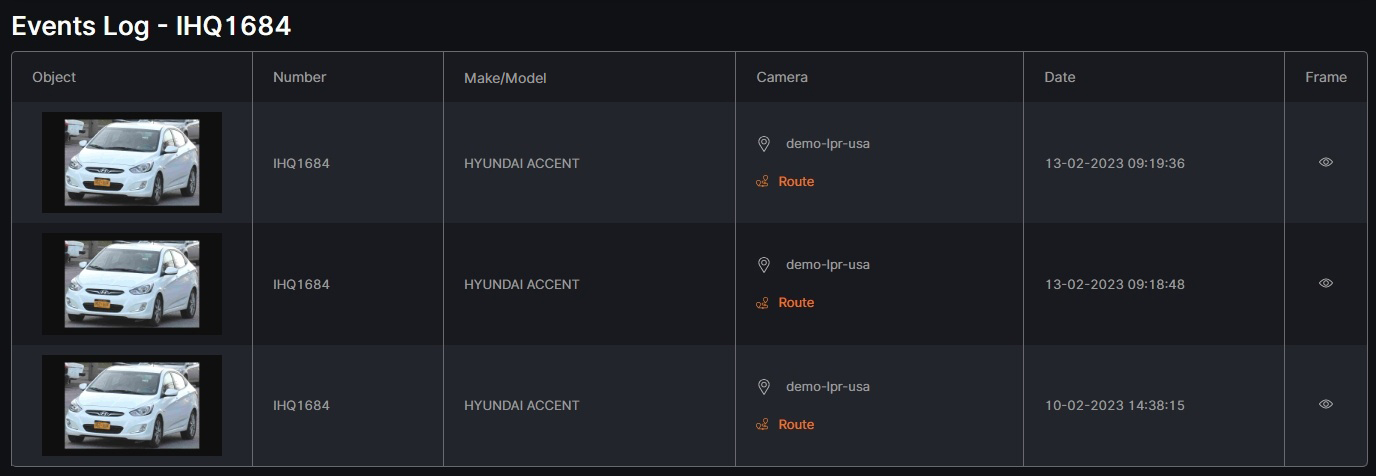
- View recognized vehicle data, date and time the license plate number has been recognized
- View the vehicle route and camera location on the map by clicking the corresponding icons in the Camera column
- Select the View icon to open the frame with the vehicle. In the pop-up window:
- See the extended vehicle data
- Use frame view tools:
- Zoom Out icon (-) to zoom out from a specific area of the frame
- Zoom In icon (+) to zoom in on a specific area of the frame
- Reset View icon (~) to reset the frame to its original size and position
- Target icon to zoom in on the detected object in the frame
- Enlargement icon to open the frame in full-screen (in the full-screen press the Esc button to return to default view)
- Hover the mouse over the Extra Options icon and click the Save Image button to download the event frame in full size
Search by Number
To quickly find a vehicle card, on the main Lists tab click the Search by Number button:

The Search by Number functional menu allows to:

- Enter the license plate number to filter vehicle cards
- Click the Search button to start filtering
- Click the Reset button to clear the filters
View the search results in the table below:
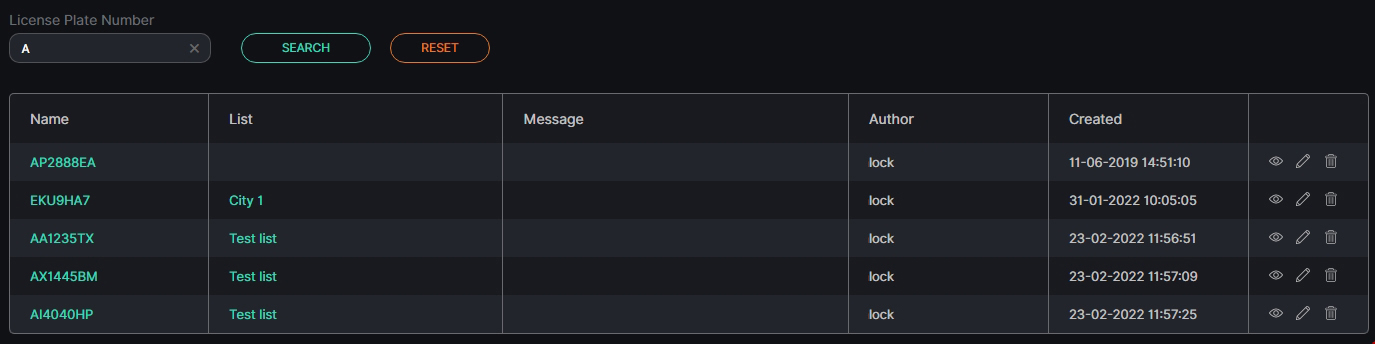
- License plate number
- The name of the list which contains the required number
- Author's username and comment
- Date and time the number was added to the list
- Toolbox comprises:
- Edit Card
- Delete Card
- View Card