General Settings
This page describes the General Settings item that allows setting general system parameters.
Overview
To open the General Settings item, in the left menu:
- Select the Settings section
- Choose the General item
- See general settings
Use and Functionality
The General Settings navigation menu consists of 5 tabs:
- API Token
- Google Maps API Key
- Branding
- Storage
- Network Storage
The selected tab is always highlighted.
API Token Tab
The API token is unique for each user within the system. To use the API token, select and copy the token from the corresponding field:
Click the View API Documentation button to open the API documentation (Swagger) for installed plugins in the system.
Google Maps API Key Tab
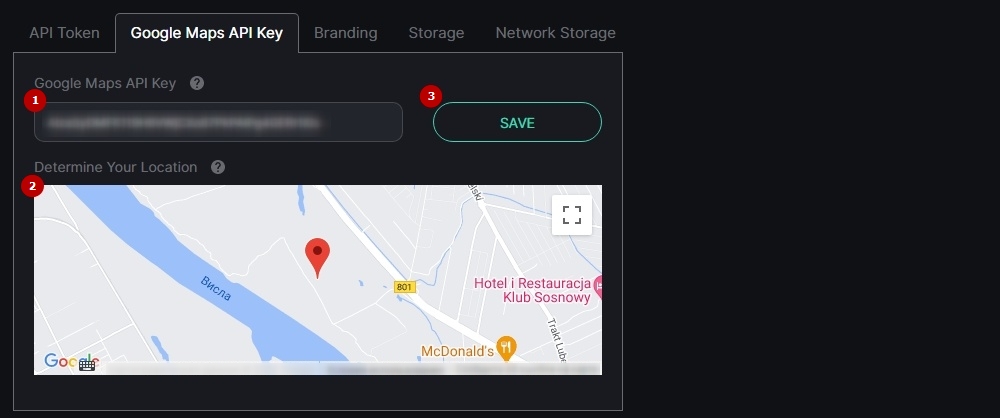
To use the Google Maps service:
- Insert the Google Maps API key into the corresponding field
- Set a default camera location marker by clicking on the desired spot on the map to approximate the location of the streaming cameras
- Click the Save button to establish the connection to Google Maps
To learn more about getting the Google Maps API key, read How to Get Google Maps API Key.
Branding Tab
The Branding tab allows to:
- Upload a logo image from the device
- View the uploaded logo inserted into the system interface
- Reset the logo image to the default settings
Storage Tab
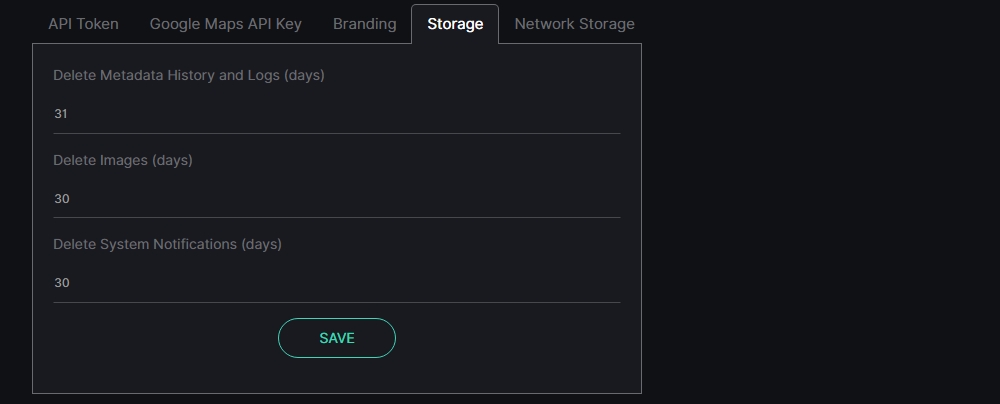
The Storage tab allows customizing the data archive settings. Set the parameters as required:
- Specify the time period in days during which the system stores:
- History of search results and logs (Delete Metadata History and Logs field)
- Images (Delete Images field)
- History of events (Delete System Notifications field)
- Click the Save button to apply changes
Network Storage
The Network Storage tab is only compatible with Forensic Analytics and works only via SMB protocol upon Linux OS.
The Network Storage tab contains the information about storage:
- ID
- Host
- Shared folder name
- Domain
To add new storage:
- Click the Add Storage button
- Fill in the required fields:
- Host name
- Shared folder name
- Shared folder access login and password (optionally)
- Domain
- Click the Save Storage button to confirm the intention
To edit the required storage:
- Select the Edit icon
- Fill in the required fields:
- Host name
- Shared folder name
- Shared folder access login and password (optionally)
- Domain
- Click the Save Storage button to apply changes
To delete the storage:
- Select the Delete icon
- Confirm the intention


