Milestone: Watermark Plugin Configuration
This page provides instructions for configuring the main settings of the VEZHA Watermark Plugin in the XProtect Management Client.
Introduction
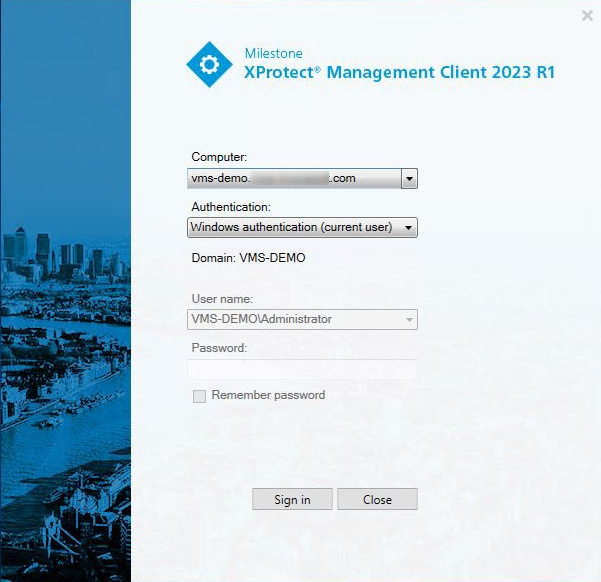
Open the XProtect Management Client application and sign in by performing the following steps in the login dialog:
- Specify the hostname or the IP address of the Management Server in the Computer field
- Select the desired authentication method
- Enter the username and password
- Click the Sign In button
Watermark Enablement
To enable watermarking over a video, follow these steps:
- Open the Security section and select the Roles item
- Select the desired role to apply the Watermark plugin
- Switch to the MIP tab at the bottom of the Role Settings window
- Click the Milestone Watermark Plugin item in the MIP Configurations block
- Check the Display Watermark on Video checkbox
All users associated with the selected role will see the watermark displayed over the video.
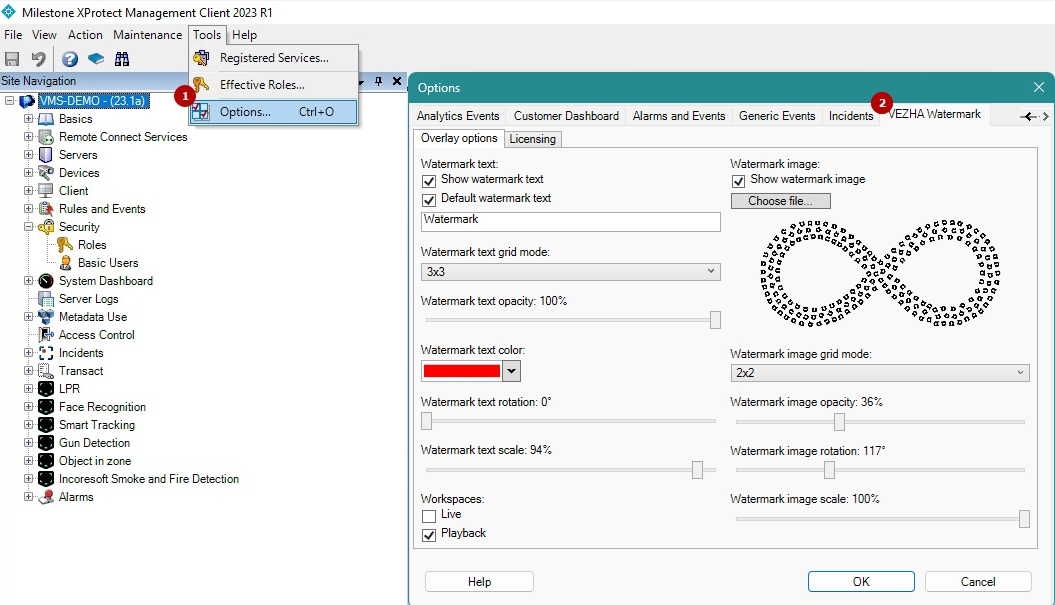
For further Watermark parameters configuration:
- Open the Tools tab in the menu bar and select Options from the drop-down menu (or press Ctrl + O)
- Navigate to the VEZHA Watermark tab
License Activation
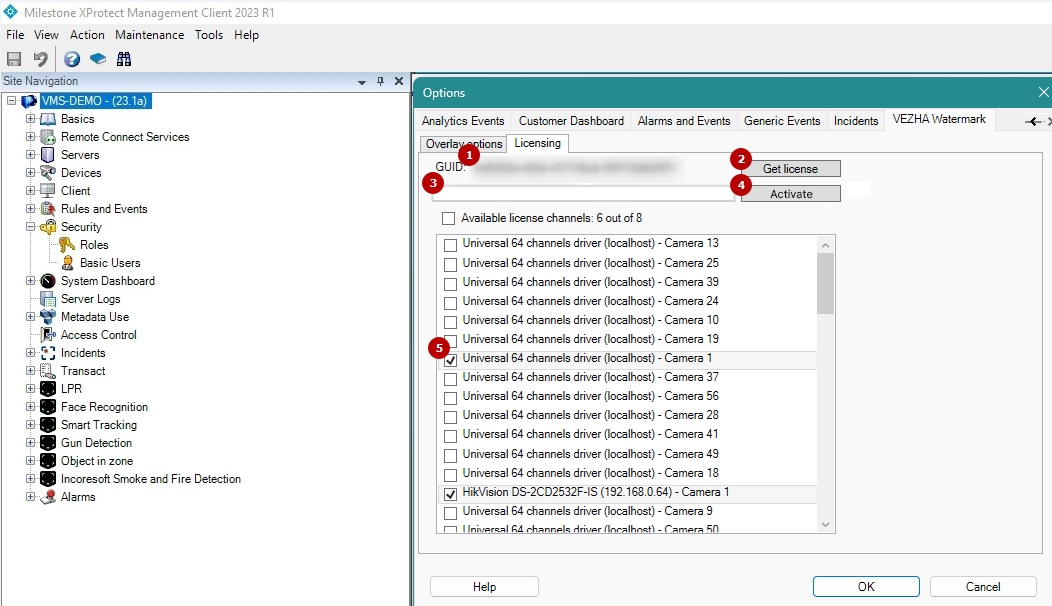
To activate the license for the Watermark plugin, open the Licensing tab and follow these steps:
- Copy the GUID, send it to the distributor, and wait for the distributor to provide a license key
- Click the Get License button
- Paste the received license key in the new field
- Click the Activate button
- Select the checkboxes next to the desired channels to connect them
- The number of available channels is dependent on the received license.
- The Select All checkbox allows selecting all available channels at once.
Overlay Options
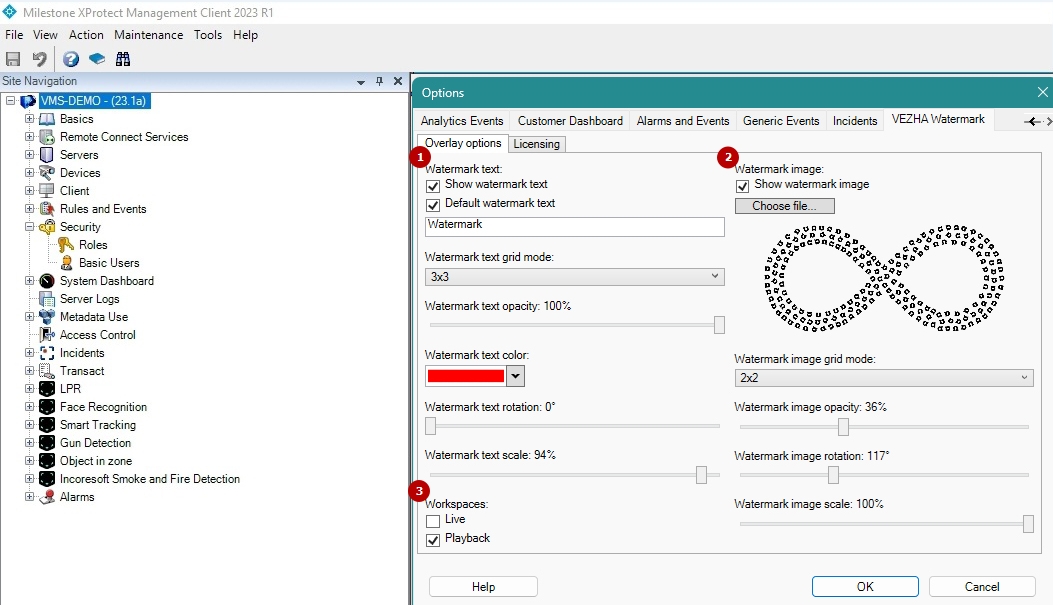
To customize the watermark overlay, open the Overlay Options tab and configure the following parameters:
- Watermark Text Configuration:
- Select the Show Watermark Text checkbox to enable the watermark text overlay
- Select the Default Watermark Text checkbox to use the server name and Milestone XProtect user name as the watermark text
- Fill in the field with the desired text to use it as the custom watermark text
- Choose the quantity of watermark text items displaying over the frame (up to 10x10) from the Watermark Text Grid Mode drop-down list
- Select the watermark text color from the drop-down color palette
- Adjust watermark text opacity, rotation, and scale by moving the respective sliders
- Watermark Image Configuration:
- Select the Show Watermark Image checkbox to enable the watermark image overlay
- Click the Choose File button to browse the required image for the watermark from the computer
- Choose the quantity of watermark image items displaying over the frame (up to 10x10) from the Watermark Image Grid Mode drop-down list
- Adjust watermark image opacity, rotation, and scale by moving the respective sliders
- Workspace Selection:
- Check the Live checkbox to apply a watermark overlay in the Live mode
- Check the Playback checkbox to apply a watermark overlay in the Playback mode
- Watermark text and image can be used simultaneously.
- The custom watermark text will be ignored if the Default Watermark Text option is enabled.
- The supported file formats for watermark images are .jpg, .jpeg, and .png.
- The watermark image file size must not exceed 5 MB.
Once all parameters are configured, click the Ok button and reopen the cameras with the watermark in XProtect Smart Client to apply the changes.


