Windows: MySQL Installation Guide
Introduction
MySQL is a widely popular Database Management System (DBMS) known for its simplicity of installation, high functionality, and versatility. It is commonly used for storing data on websites of various complexities. MySQL is available for different operating systems, including Linux distributions, FreeBSD, and Windows.
There are two editions of MySQL: a paid version known as the Enterprise edition and a free version called the Community edition. The Enterprise edition offers additional features and comes in different pricing options, while the Community edition is freely available for download from the official MySQL website. The website also provides additional utilities and connectors (drivers) for MySQL.
To proceed with the installation, download the latest version of the MySQL database server from the official MySQL website.
The MySQL server installation is available in two versions of the installation files:
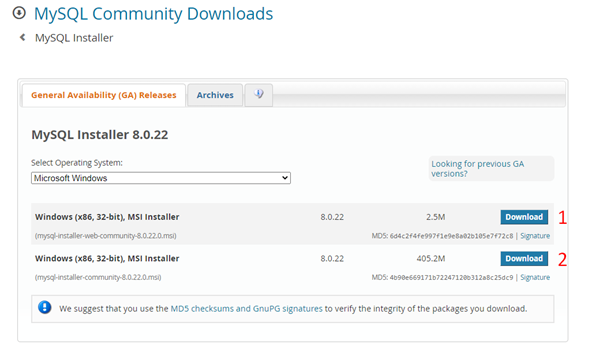
Online Version includes a small file that initiates the installation process and retrieves all the required files from the Internet. It is recommended in the presence of a stable internet access channel
Offline Version consists of a large archive containing all the files required for installation. It is recommended in cases where there is no internet access or the internet connection is unstable
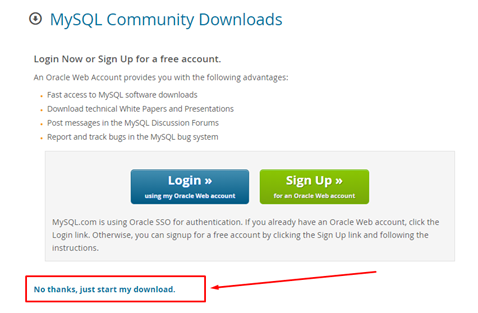
Click the Download button to proceed to the download page. Then, select the No Thanks, Just Start My Download button to initiate the file download:
MySQL Installation
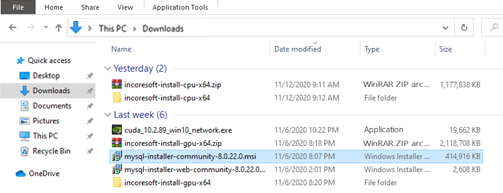
After downloading the installation file, locate it in the designated folder and execute it by double-clicking:
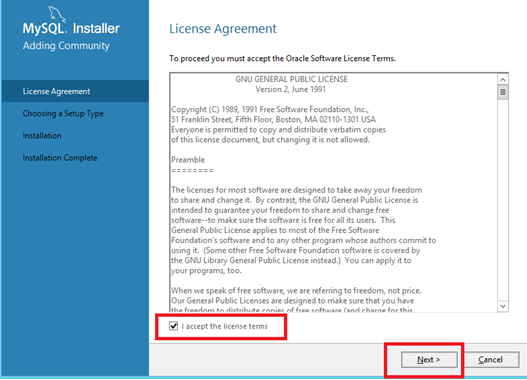
Select the I Accept the License Terms checkbox and click the Next button to proceed:
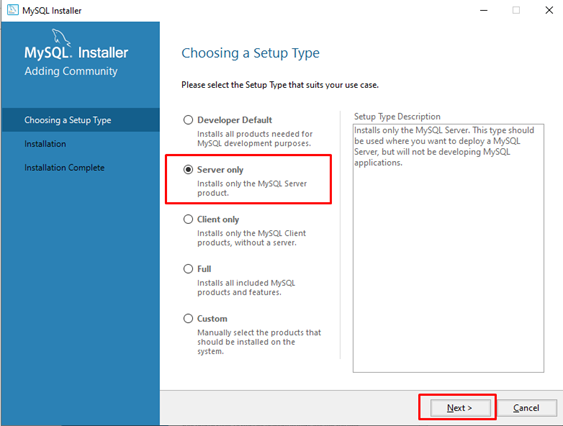
Select the Server Only setup type and proceed by clicking the Next button:
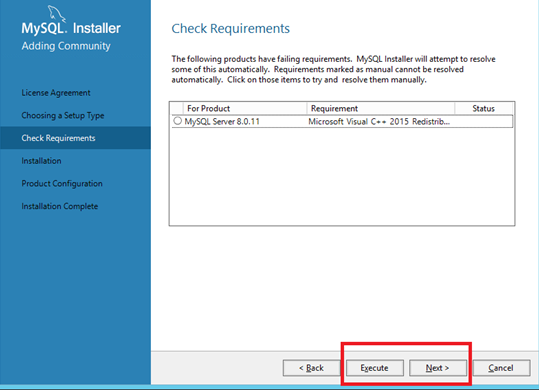
The Installer will now verify the presence of necessary software and offer to download and install it by clicking the Execute button. Once the installation is complete, click the Next button to proceed with the installation process:
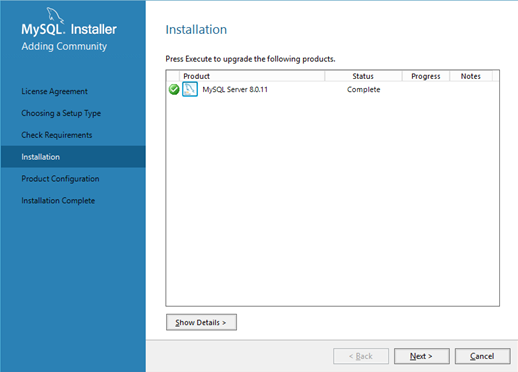
Initiate the installation process by clicking the Execute button:

The system has been installed successfully and is now ready for initial setup. Click the Next button to proceed:
MySQL Configuration
To begin the configuration process, click the Next button:

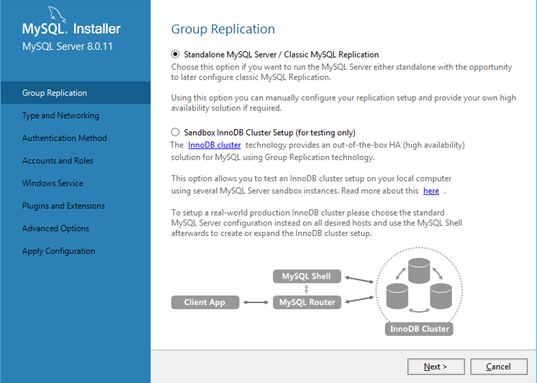
Choose the Standalone MySQL Server / Classic MySQL Replication option and proceed by clicking the Next button:
From the Config Type drop-down menu select the Server Computer option:
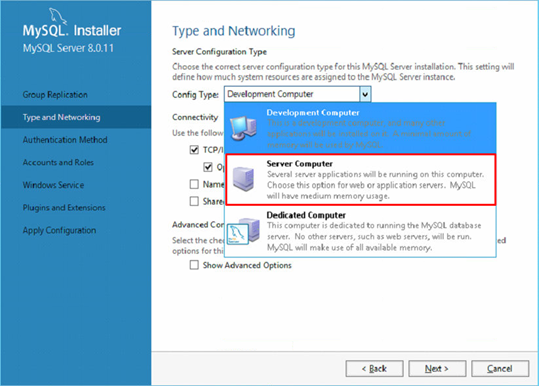
Keep the remaining settings unchanged and click the Next button to proceed:

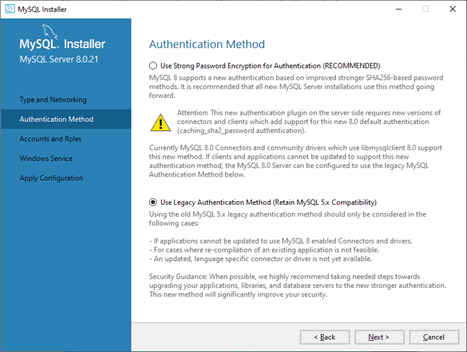
Select the Use Legacy Authentication Method option and proceed by clicking the Next button:
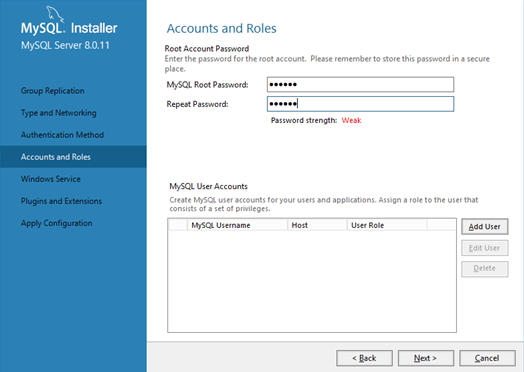
Enter a desired password for the MySQL root account (Login: root) and confirm it. Once the password is set, click the Next button to proceed:
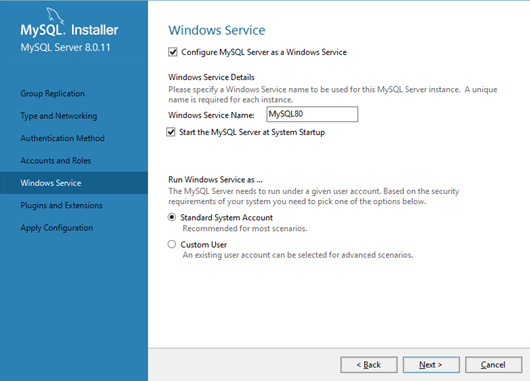
The default settings may be left unchanged, or a Custom User can be selected to run the MySQL Server under a specific user account. Proceed by clicking the Next button:
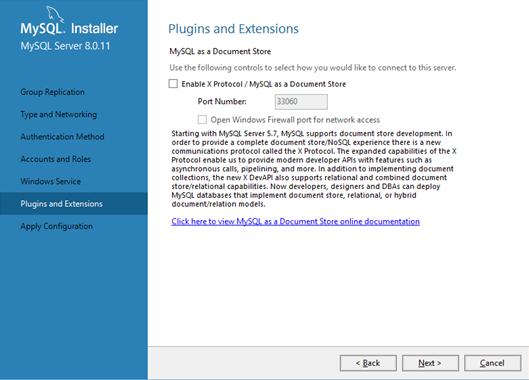
Further, it is possible to connect the storage of documents. To utilize MySQL in a traditional (SQL) manner, retain the default settings and proceed by clicking the Next button:
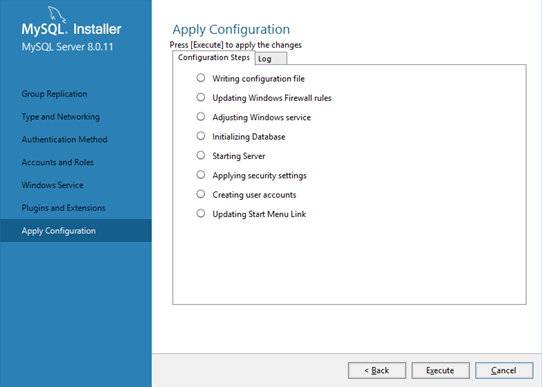
Initiate the initial system configuration by clicking the Execute button:
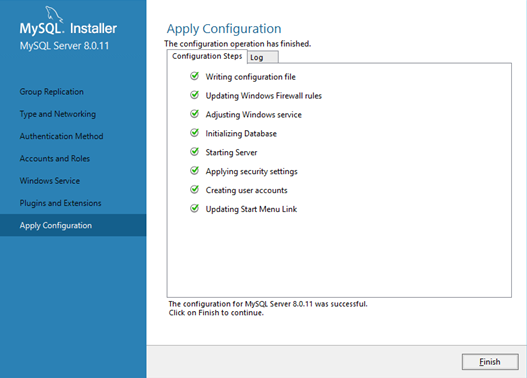
Upon completing all configuration steps (indicated by green checkmarks), proceed by clicking the Finish button:
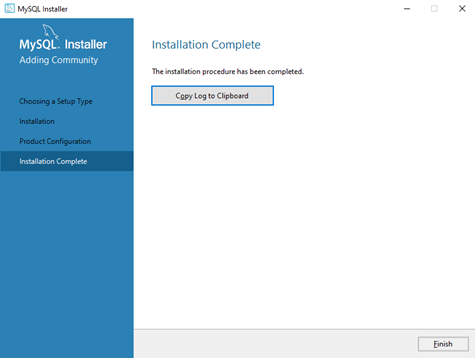
The installation and configuration process has been successfully completed. Click the Finish button to close the MySQL Installer:
Checkup
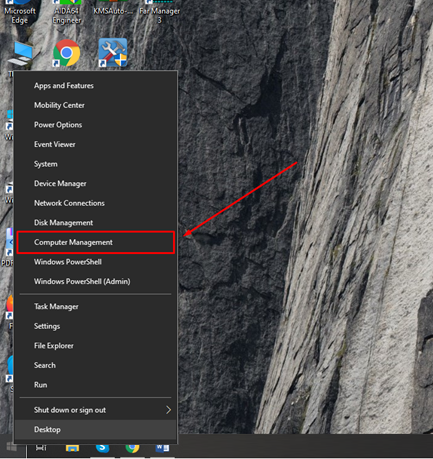
To verify the installation and ensure that the relevant service is running, access the Start menu and initiate the service. Press Win + X and select Computer Management from the menu options:
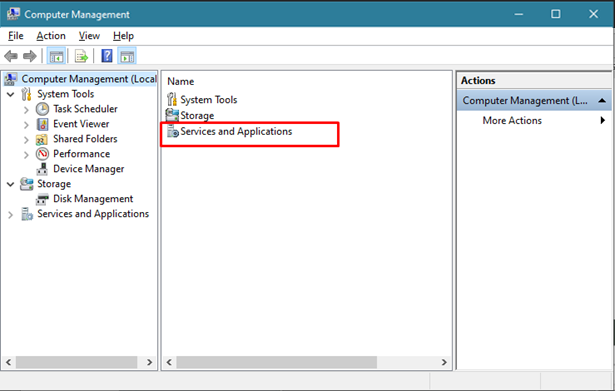
Navigate to the Services and Applications tab:
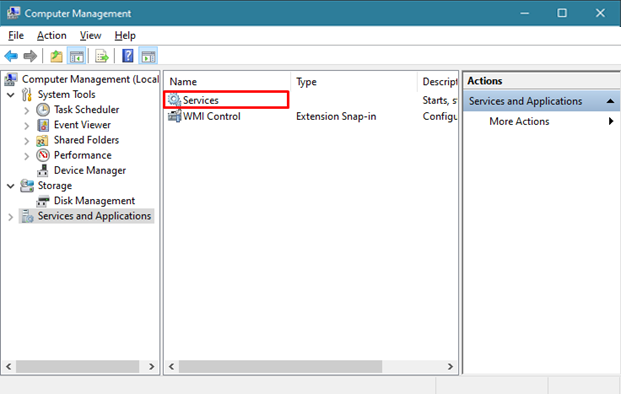
Select the Services option to access the services management interface:
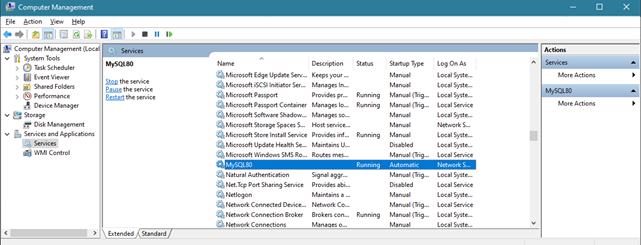
Locate the MySQL8.0 service and verify that its status is displayed as Running:
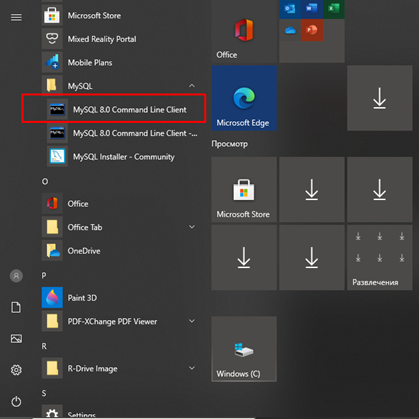
An alternative method to verify the successful installation of MySQL is by using the MySQL 8.0 Command Line Client. Locate and open the MySQL 8.0 Command Line Client from the Start menu:
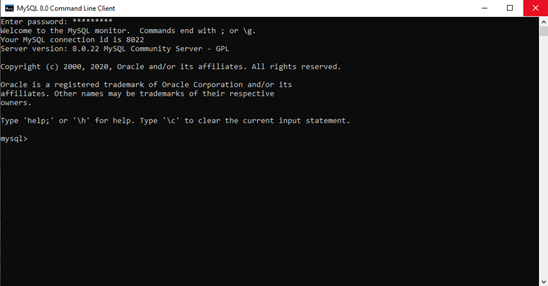
Enter the password for the root user that was set during the MySQL configuration process.
If the connection is successful, the MySQL command line interface will open, resembling the image shown below:
The installation and configuration check of MySQL on Windows OS is now complete. The window can be closed.
Time Zone Configuration
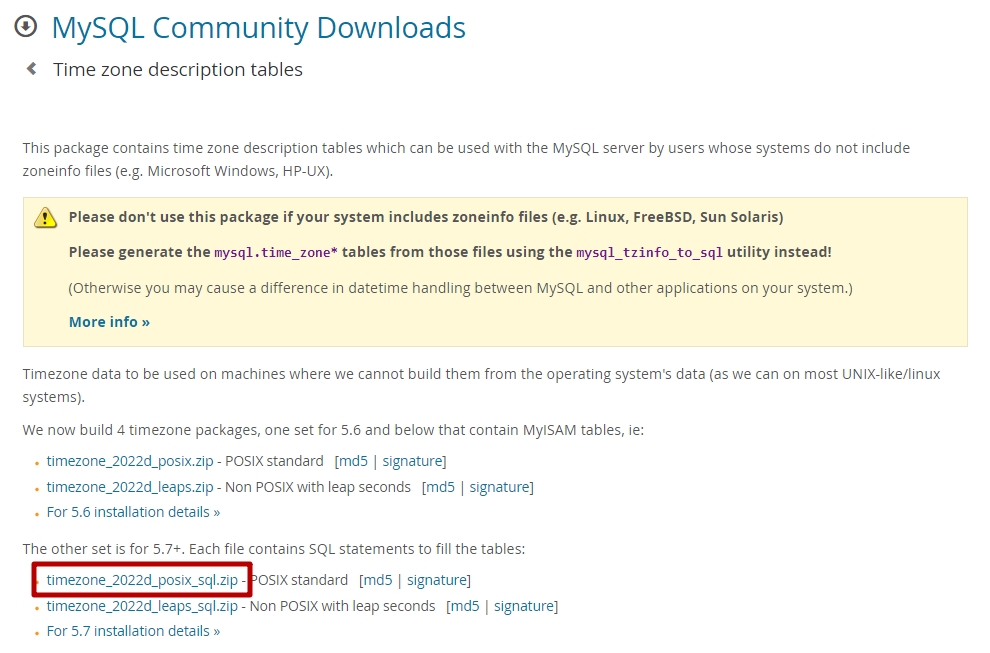
To configure the time zone, download the archive from the following link https://dev.mysql.com/downloads/timezones.html:
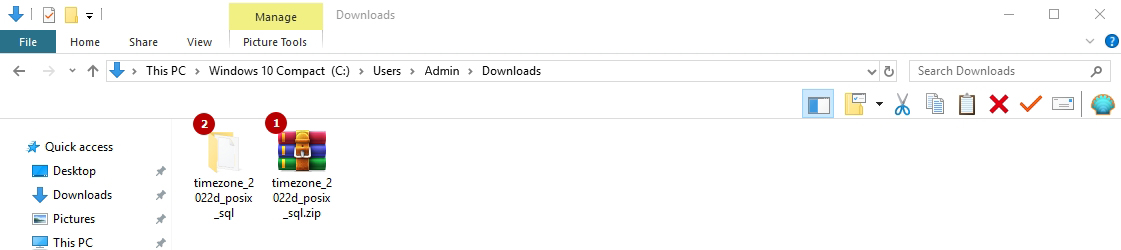
Locate the archive in the designated folder and execute it by double-clicking:
Locate and open the MySQL 8.0 Command Line Client from the Start menu:
Enter the password for the root user that was set during the MySQL configuration process. Upon successful authentication, the MySQL command line interface will open, displaying the command prompt for executing MySQL commands:
Use the following command to set the MySQL DB as the default database:
use mysql;
To specify the path to the file contained in the previously extracted folder, use the following command as shown in the example:
source C:/Users/Admin/Downloads/timezone_2022d_posix_sql/timezone_posix.sql ;
Wait for the time zone configuration process to finish and then close the window.
Encoding Configuration
To configure the encoding, open the file my.ini located in the MySQL root folder. The default directory for the file is:
C:\ProgramData\MySQL\MySQL Server 8.0\my.ini
At the end of the file, within the [mysqld] section, add the following lines:
character-set-server=utf8mb4
collation-server=utf8mb4_unicode_ci
Save the changes that have been made to the file.
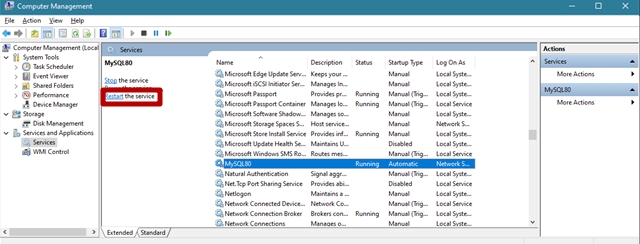
To restart the MySQL service, access the Computer Management menu by pressing the Win + X keys:
Navigate to the Services and Applications tab:
Select the Services option to access the services management interface:
Select the MySQL8.0 service from the list and click the Restart button to restart the service:
Middleware Core Reconfiguration
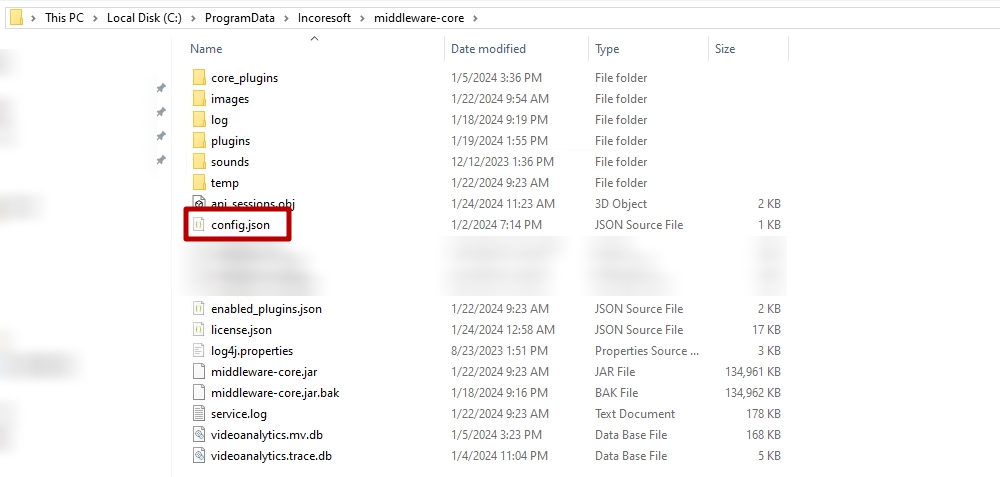
Open the middleware-core root folder on the server with the installed Middleware Core and remove the config.json file. The default directory for the file is:
C:\ProgramData\Incoresoft\middleware-core\config.json
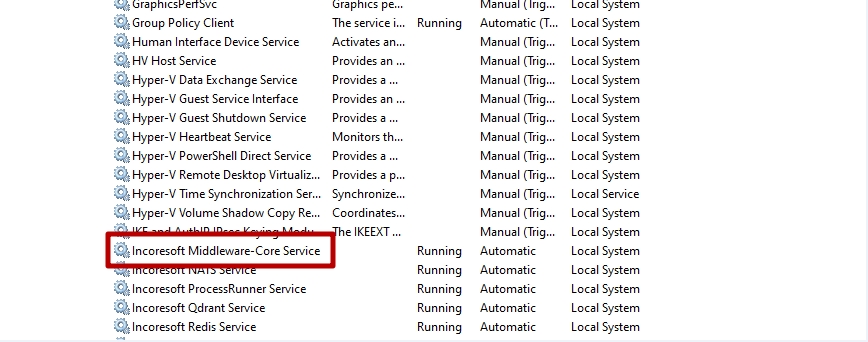
To restart the Middleware-Core service, access the Computer Management menu by pressing the Win + X keys:
Navigate to the Services and Applications tab:
Select the Services option to access the services management interface:
Select the Incoresoft Middleware-Core Service from the list and click the Restart button to restart the service:
After restarting the Incoresoft Middleware-Core Service, reboot the webpage by accessing the following URL:
- If the Middleware Core was installed on the current PC, use http://localhost:2001/
- If the Middleware Core was installed on a remote server, use http://ip:2001/ where IP is the IP address of the server where the Middleware Core was remotely installed
Within the Database block, perform the following steps:
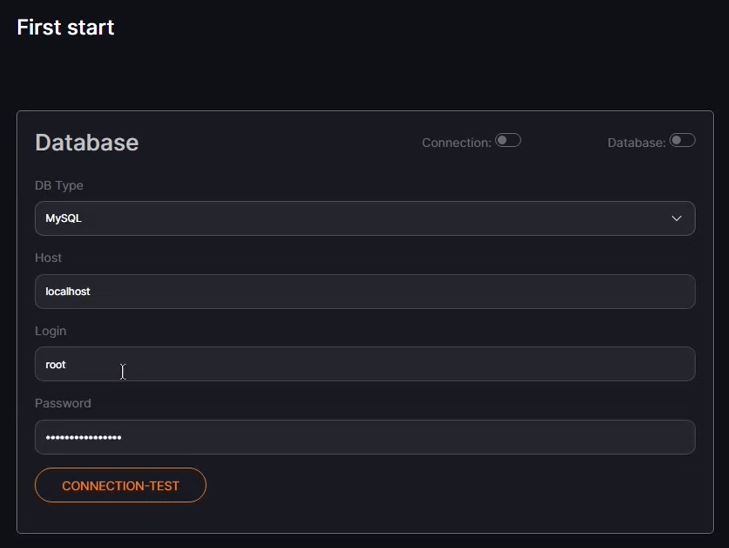
- Select the MySQL DB type from the drop-down list
- Fill in the necessary fields for the MySQL connection:
- In the Host field, specify the IP address of the server with the preinstalled and configured MySQL
- Enter the login credentials for the MySQL database (usually "root")
- Provide the password associated with the MySQL login
- Click the Connection Test button to verify the DB connection. A successful connection is indicated by a green Connection toggle
Proceed to the next step without configuring the NATS block. Click the Save and Reload button to save the current settings and restart the service:

Reboot the webpage and log in to the system. The Middleware Core reconfiguration process is now complete, and the MySQL database has been successfully connected.